


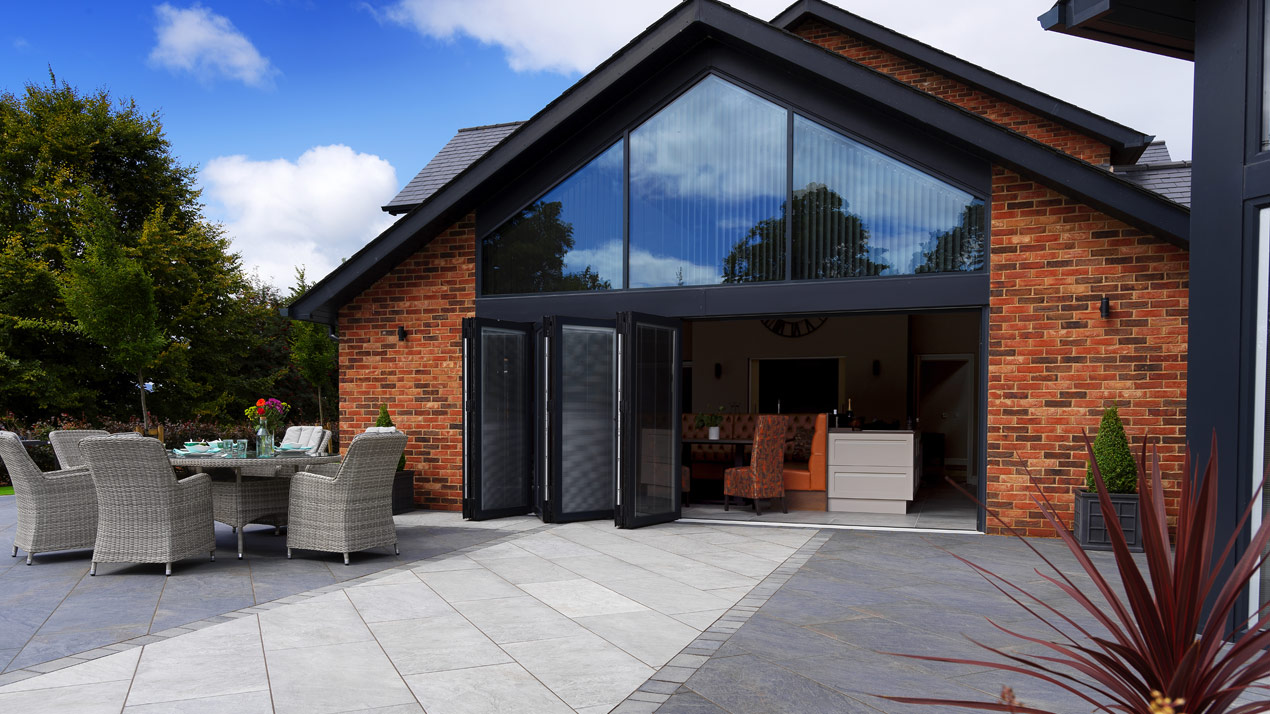
In this guide, we will discuss and explain with diagrams and images the different laying patterns that can be used for driveways, garden paths and patio paving.
We will break this down into four main sections based on the format of the paving unit:
- Patio Paving Slab Laying Patterns
- Driveway Paving Block Laying Patterns
- Setts & Cobblestone Laying Patterns
- Borders & Edging Laying Patterns
Paying Laying Pattern Downloads
Below are links to our PDF paving laying patterns for mixed sized paving and contractor packs. You can download these for your installation reference.
- Classic Sandstone 600 Series (20.7m2)
- Burford Blend 560 Series (18.92m2)
- Sawn Limestone 600 Series (15m2)
- Honed & Sawn 500 Series (Regal/Piazza)
- Rio Slate 600 Series (14.44m2)
- Tudor Flagstones (600 Series)
- Tudor Cobbles (200 Series)
- Opus Porcelain
- Fairford 3 Size Concrete (9m2)
- Tanners Mill / Rectory 4 Size Concrete (9m2)
Patio Paving Slab Laying Patterns
Patio paving slabs are supplied in two main paving pack types:
- Mixed Size Packs
- Single Size Packs
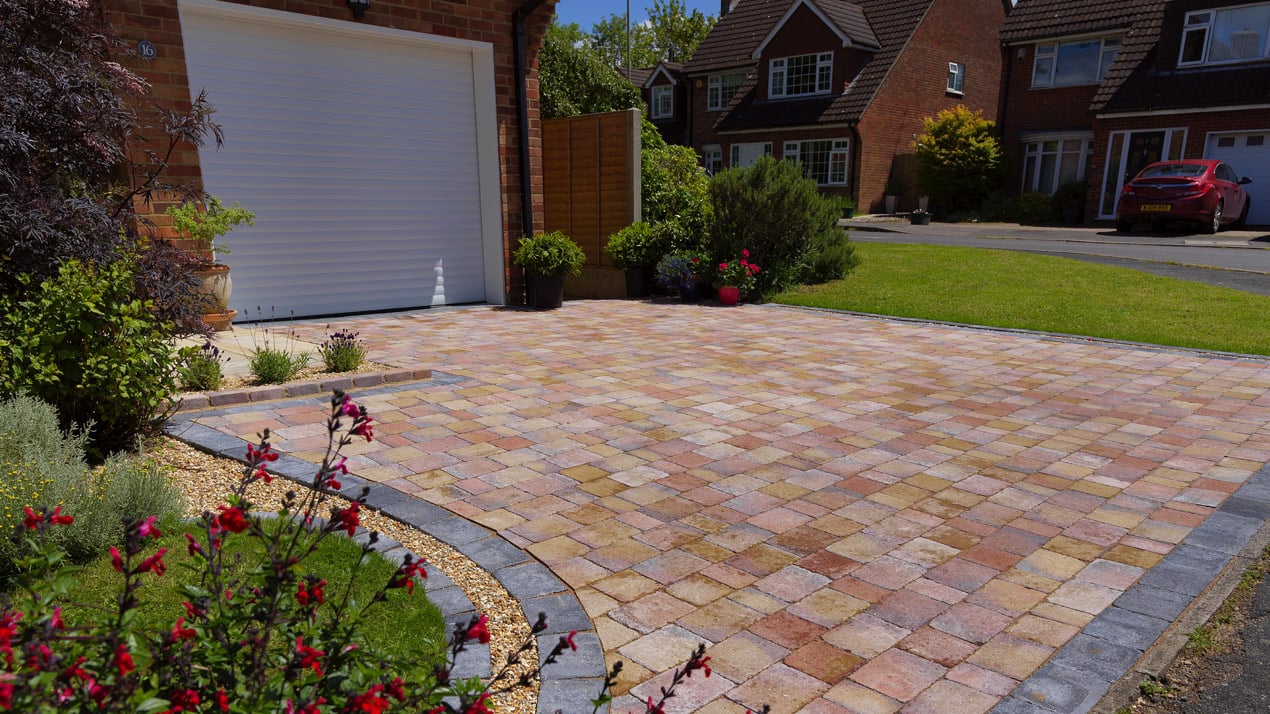
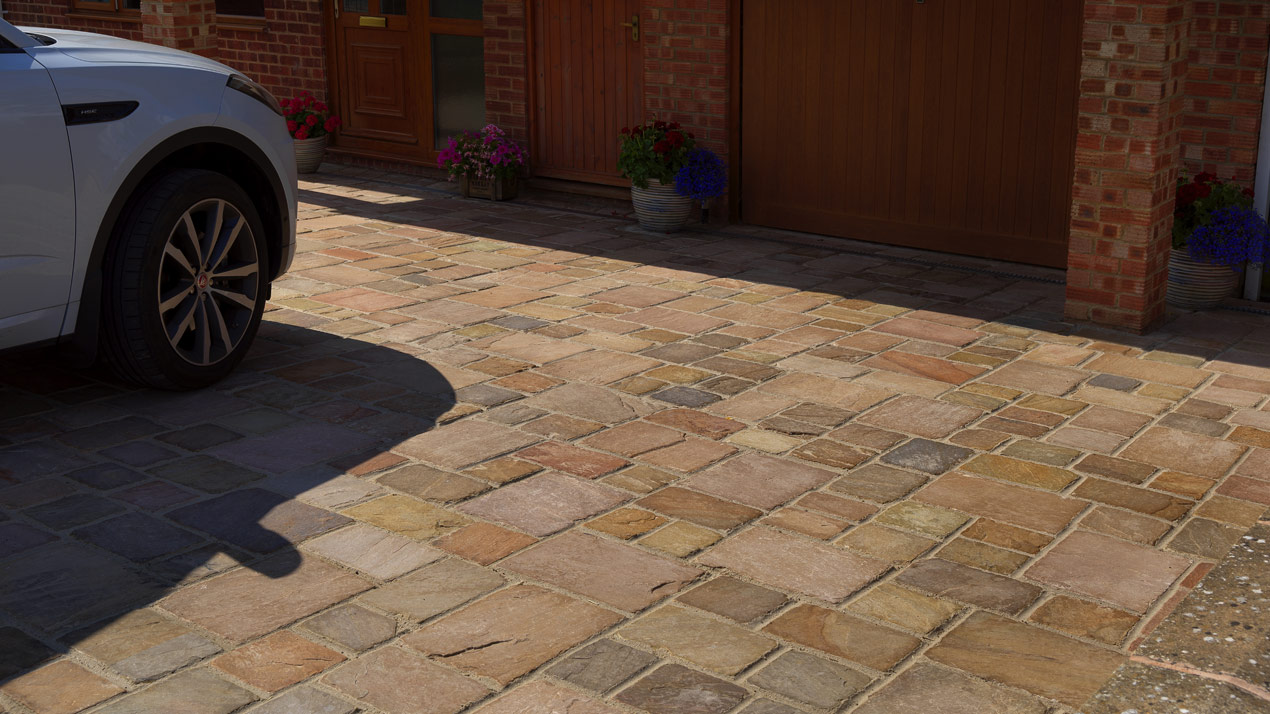
Mixed Size Paving Formats
Mixed size paving packs (often referred to as contractor packs or project packs) usually have between 3-5 different size slab formats in the pack. The packs will be designed around common dimensions that allow them to be laid together.
Within the hard landscaping industry, we refer to these packs by their common dimension as part of their naming, with the dimension coming as the prefix, followed by “series” as part of the nomenclature. For example, a pack containing 900×600, 600×600, 600×300 and 300×300 mm slabs will be called a 600-series paving pack.
Popular mixed size paving pack format include:
600-series Paving Slab Sizes
- 290 x 290 mm
- 600 x 290 mm
- 600 x 600 mm
- 900 x 600 mm
570-series Paving Slab Sizes
- 285 x 285 mm
- 285 x 570 mm
- 570 x 570 mm
- 855 x 570 mm
560-series Paving Slab Sizes
- 275 x 275 mm
- 560 x 275 mm
- 560 x 417 mm
- 560 x 560 mm
- 845 x 560 mm
500-series Paving Slab Sizes
- 500 x 250 mm
- 750 x 250 mm
- 500 x 500 mm
- 750 x 500 mm
Authority/Council Concrete Flag Sizes
- 900 x 600 x 50 mm (D50)
- 750 x 600 x 50 mm (C50)
- 600 x 600 x 50 mm (B50)
- 450 x 600 x 50 mm (A50)
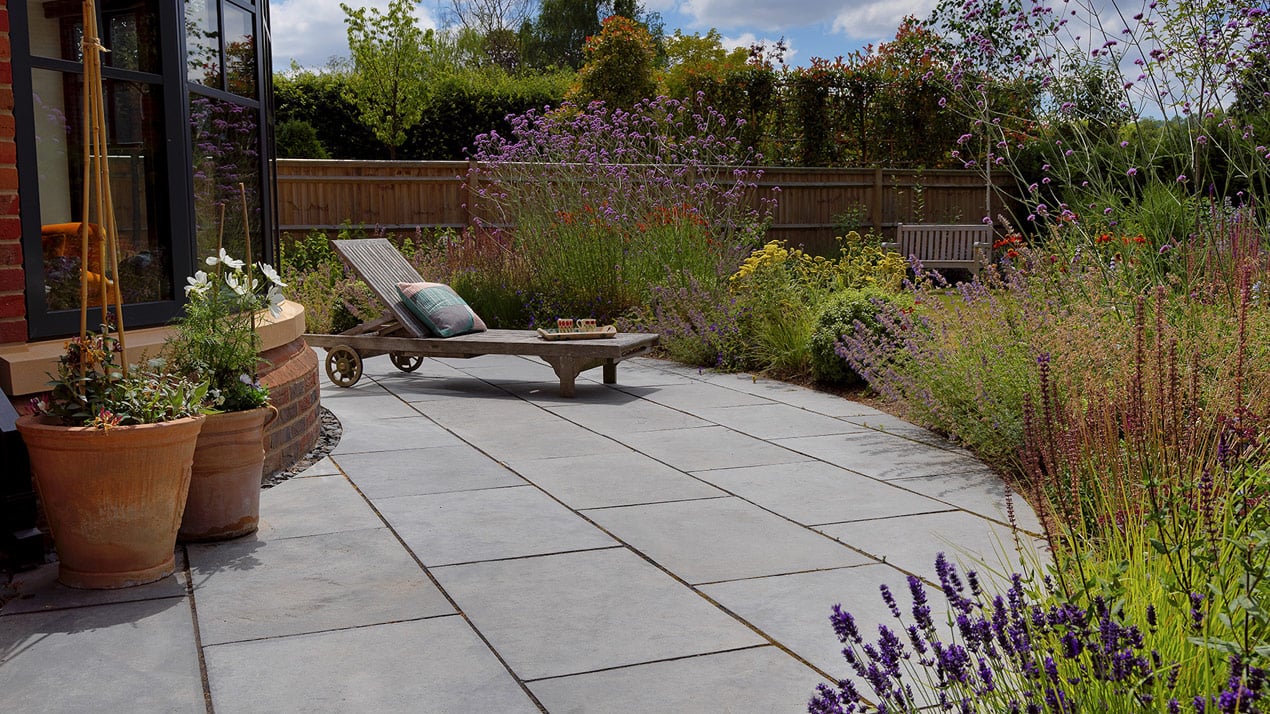
Mixed Size Paving – Laying Pattern Examples
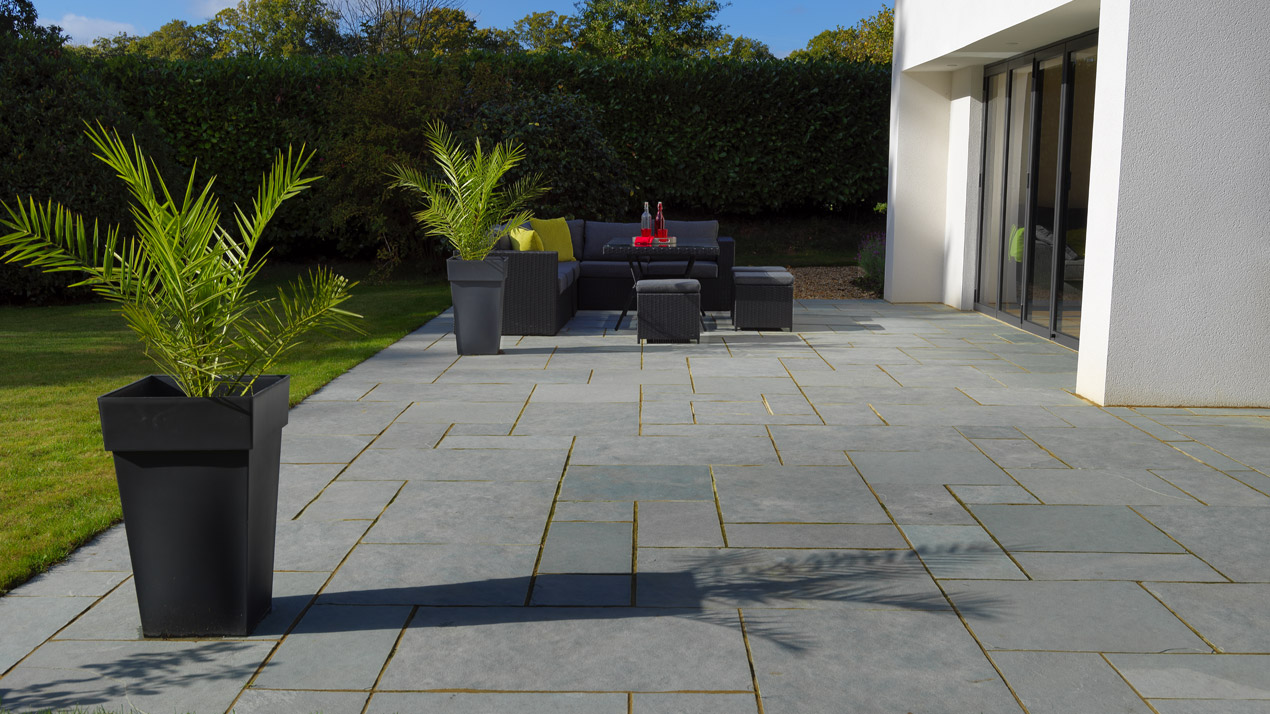
Mixed Sized Paving (600-Series Natural Stone) – Paving Slab Laying Pattern
This common mixed size laying pattern is designed for 600-series natural stone paving. This laying pattern is often seen where a more traditional aesthetic is sought. The format of 600-series natural stone paving consists of four different sized slabs that can be laid in interlocking patterns:
- 900 x 600 mm
- 600 x 600 mm
- 600 x 290 mm
- 290 x 290 mm

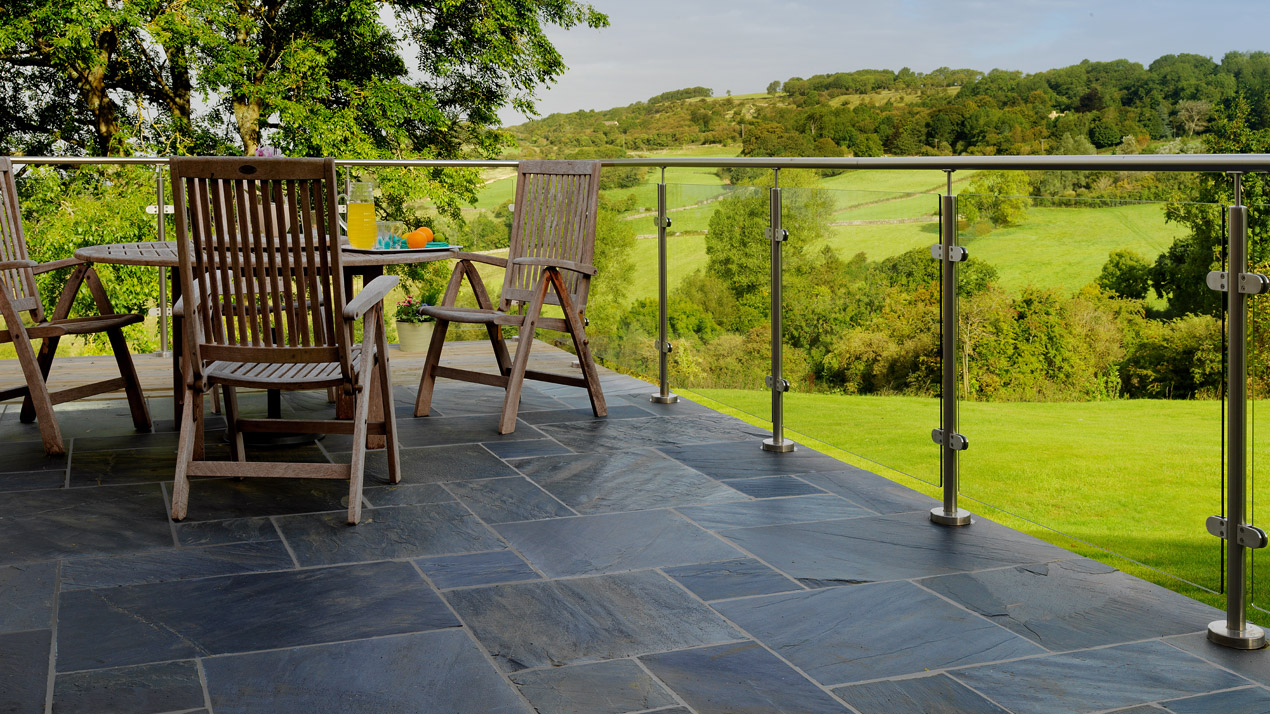
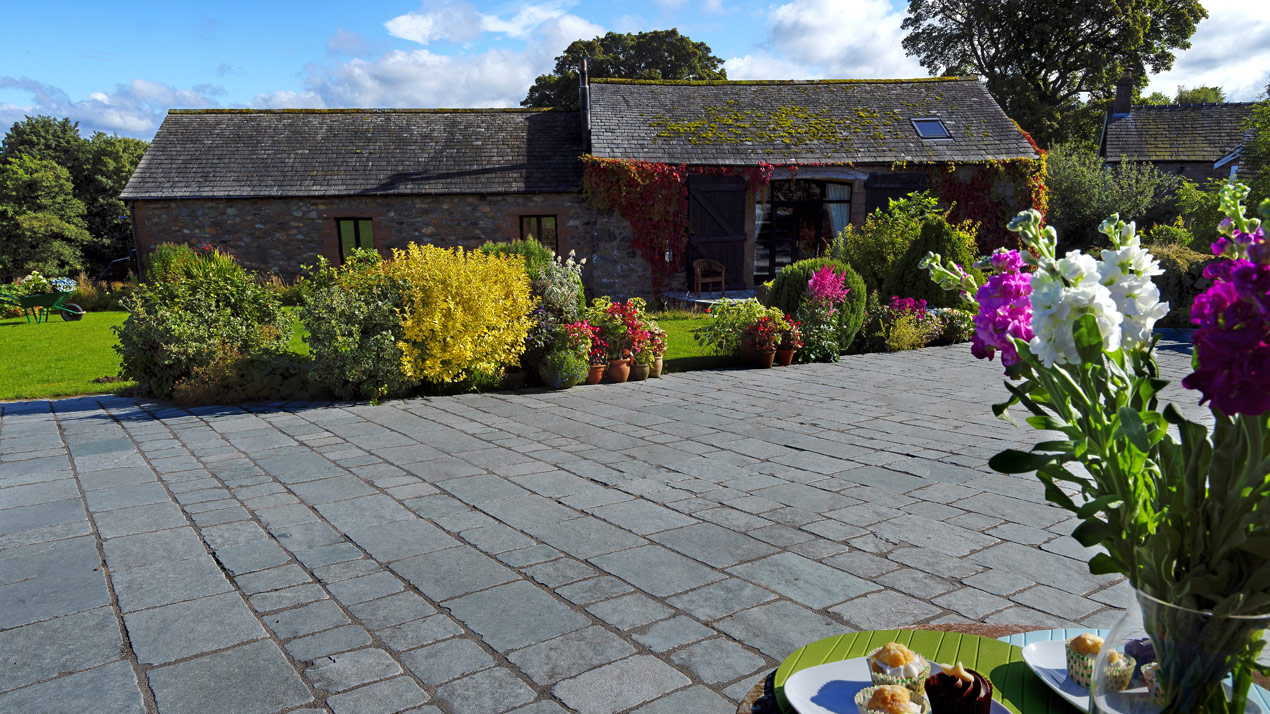
Mixed Size (600-Series) Black Slate Paving
Rio Brazilian Slate contractor pack laid on a terrace overlooking a scenic valley view. Rio Brazilian Slate is a 600-series format contractor pack. As can be seen on this patio, the variation in slab colour is intrinsic to natural stone. Consideration of slab colour selection and where they will be laid to ensure the mix of tones and colours is well blended should always be part of your installation plan. We recommend “dry laying” and numbering stones prior to installation to ensure the right aesthetic.
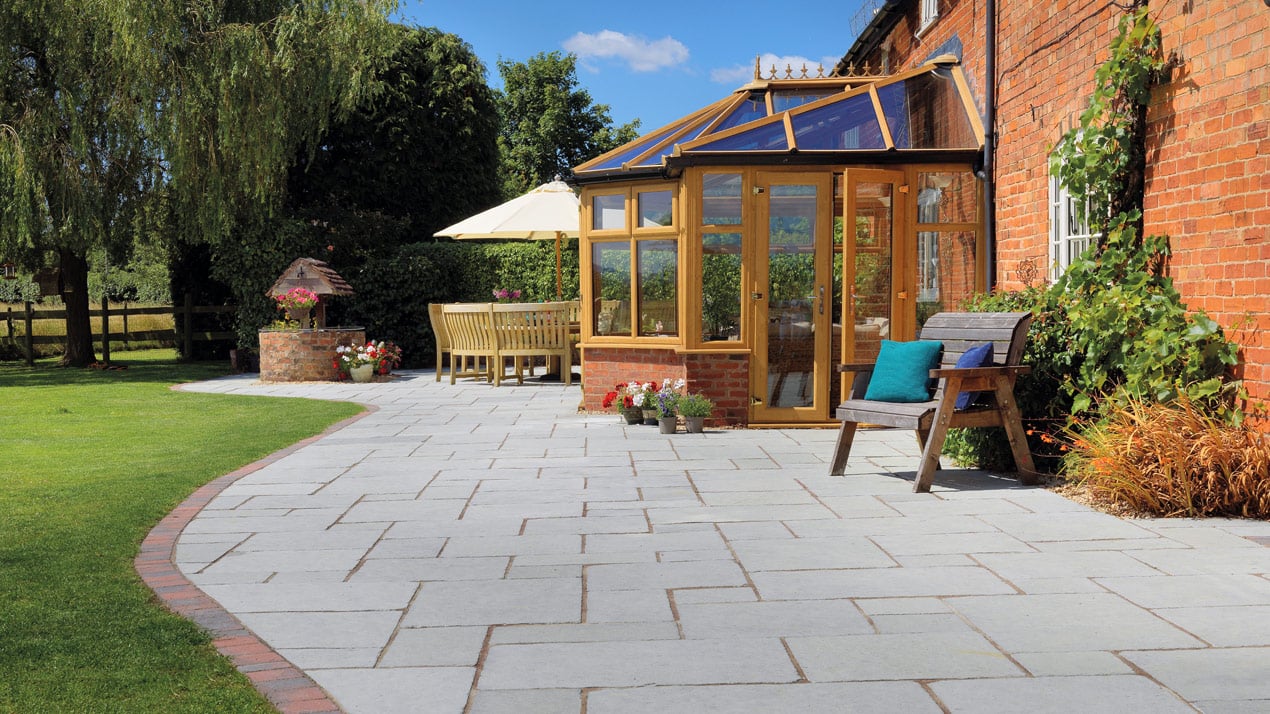
Mixed Size (600-Series) Light Grey Indian Sandstone
Pavestone Classic Light Grey Indian Sandstone patio paving shown here used in a traditional cottage garden terrace interspersed with planted beds. The paving is a mixed size 600-series format, which allows for flexible laying patterns that allow it to be laid in a manner to accommodate the flower beds and terrain.
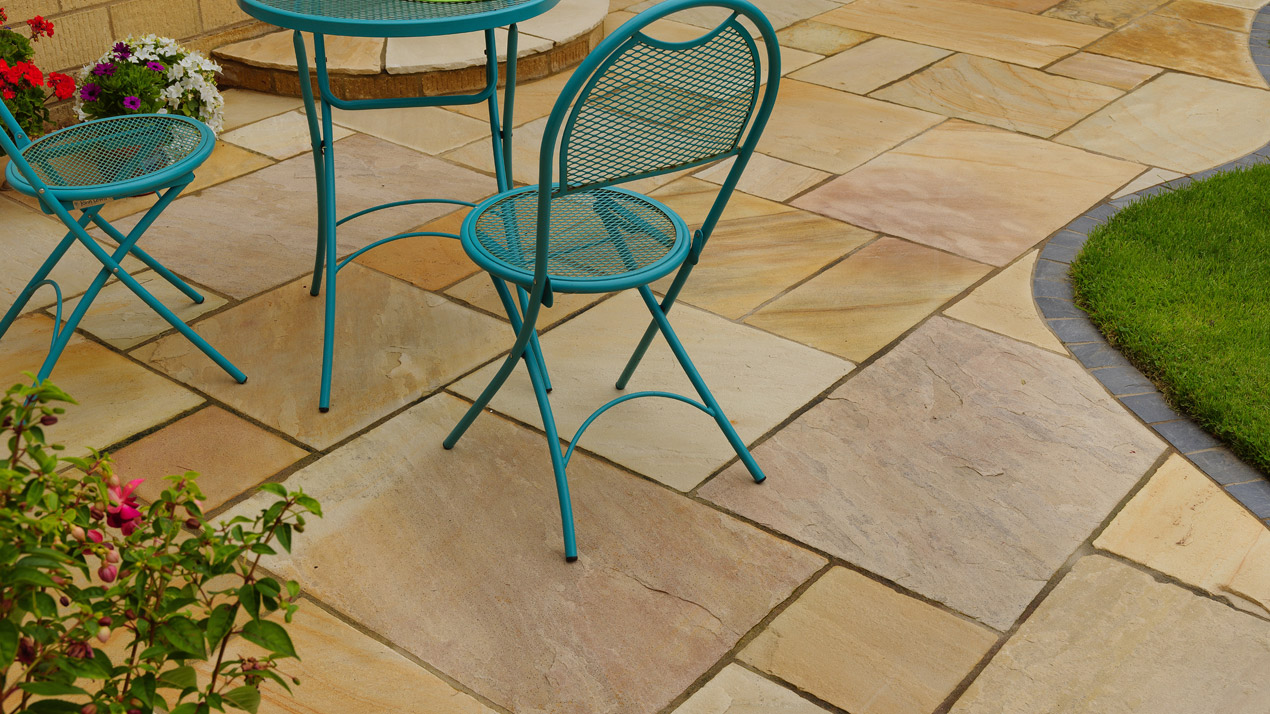
Mixed Size (600-Series) Golden Fossil Indian Sandstone Paving
The aesthetic of natural stone is the uniqueness and variation of the colouring and patterns of the stone. Golden Fossil Classic Indian Sandstone is seen here, showing off the colour and tonal range (from light creams through to dark golden honey colours). In addition to the colour and pattern variation, Fossil sandstone is also known for the appearance of fossilised ferns and ammonites (cephalopods) that date back to at least the Cretaceous period (66 million years ago).
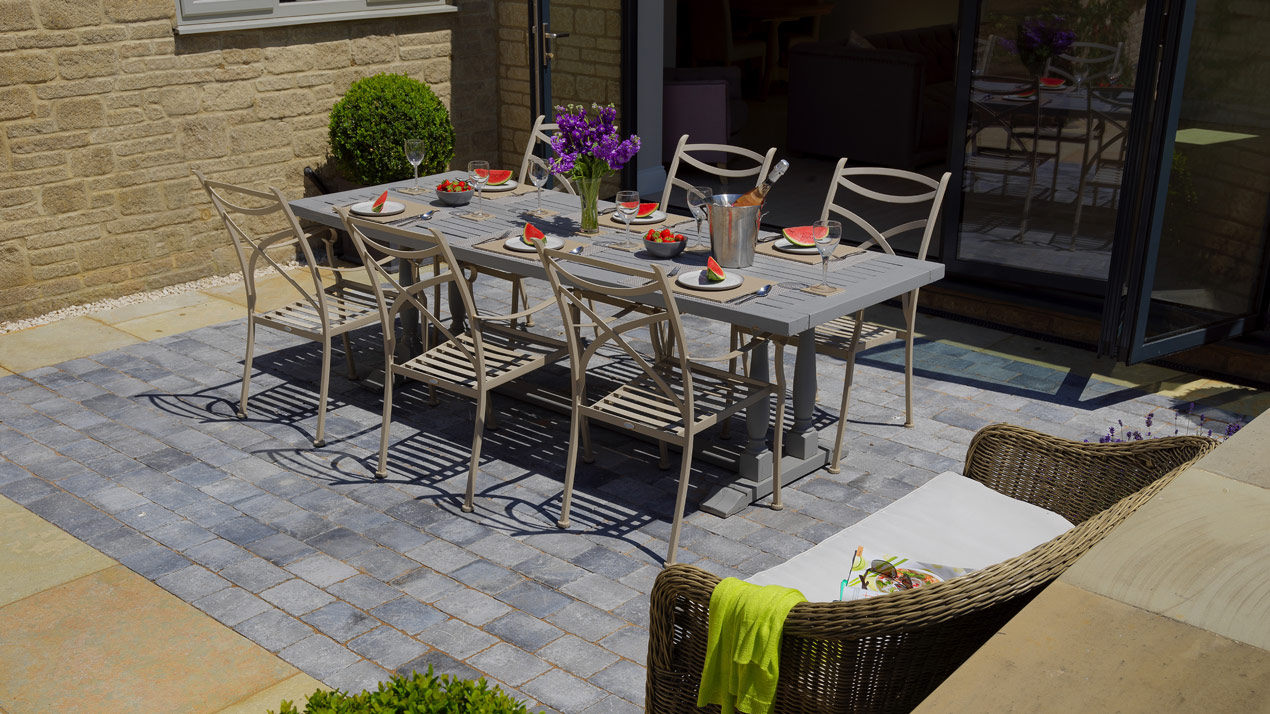
Mixed Size (600-Series) Kota Blue Limestone Paving
Kota Blue Limestone comes in a mixed size contractor pack format (600-series), seen here installed on a large garden terrace with dining area. Kota Blue has sawn straight edges, so can be laid with narrow joints to enhance a more contemporary appearance, or use standard joints if a more traditional aesthetic is desired.
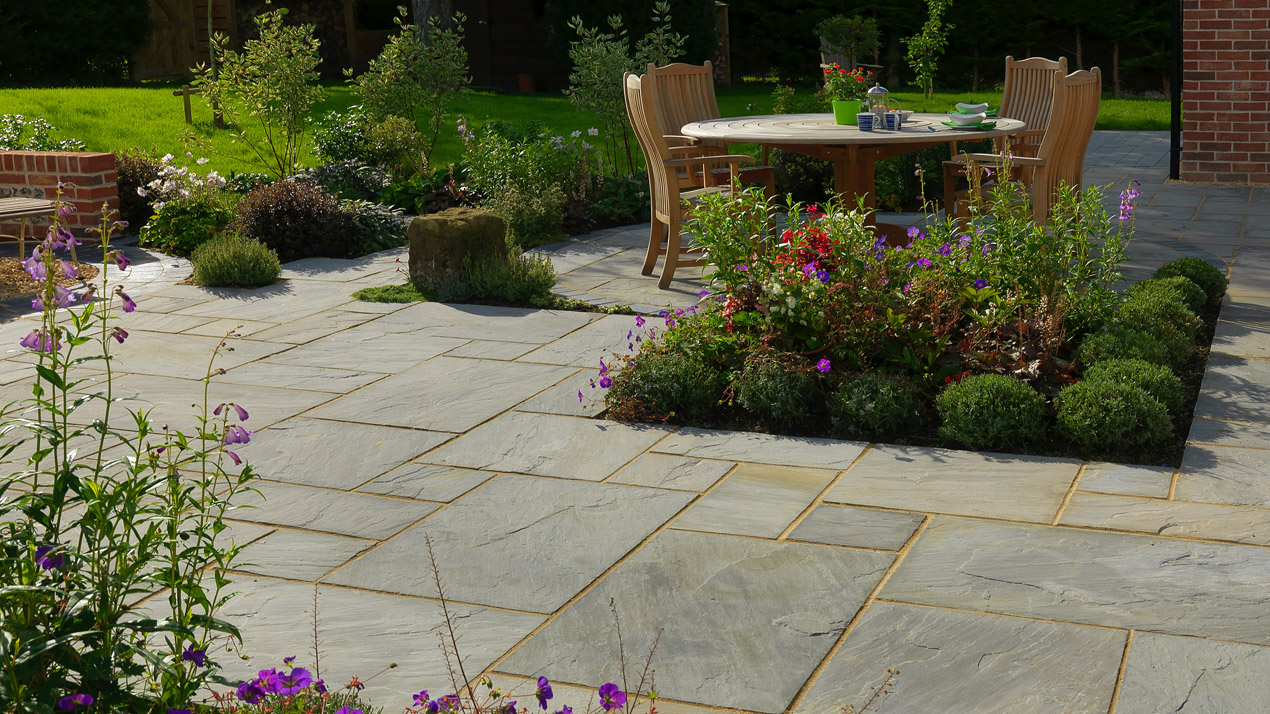
Mixed Size (600-Series) Raj Blend Indian Sandstone Paving
Here we can see a great example of a large patio of mixed size Indian sandstone paving in 600-series format. Notice how the installer has placed and mixed the colours, hues and tones of the differing stones to ensure the desired blend appearance of the stone.
Mixed Sized Paving (600-Series Concrete) – Paving Slab Laying Pattern
This popular mixed size laying pattern is designed for 600-series concrete paving. The concrete version of 600-series has smaller slab formats than natural stone, eschewing the 900 x 600 flag. This is because the 900 x 600 flag is not practical in a 30-40 mm depth format. Its length to depth ratio would likely cause strength/cracking issues. 600-series concrete paving are designed to be laid in an interlocking pattern. 600-series concrete paving consists of the following slab formats:
- 600 x 600 mm
- 600 x 450 mm
- 600 x 300 mm
- 300 x 300 mm

Mixed Size (600-Series) Antique Stone Effect Tanners Mill
This 600-series mixed size concrete stone-effect paving is designed to have the appearance of older, time-worn stone. Tanners Mill has a 600 x 450 mm format in the mix of sizes, meaning that it has a different laying pattern from standard 600-series packs, and is a variation on the existing 600-series patterns to accommodate this additional flag format.

Single Size Paving – Stretcher Bond Pattern Examples
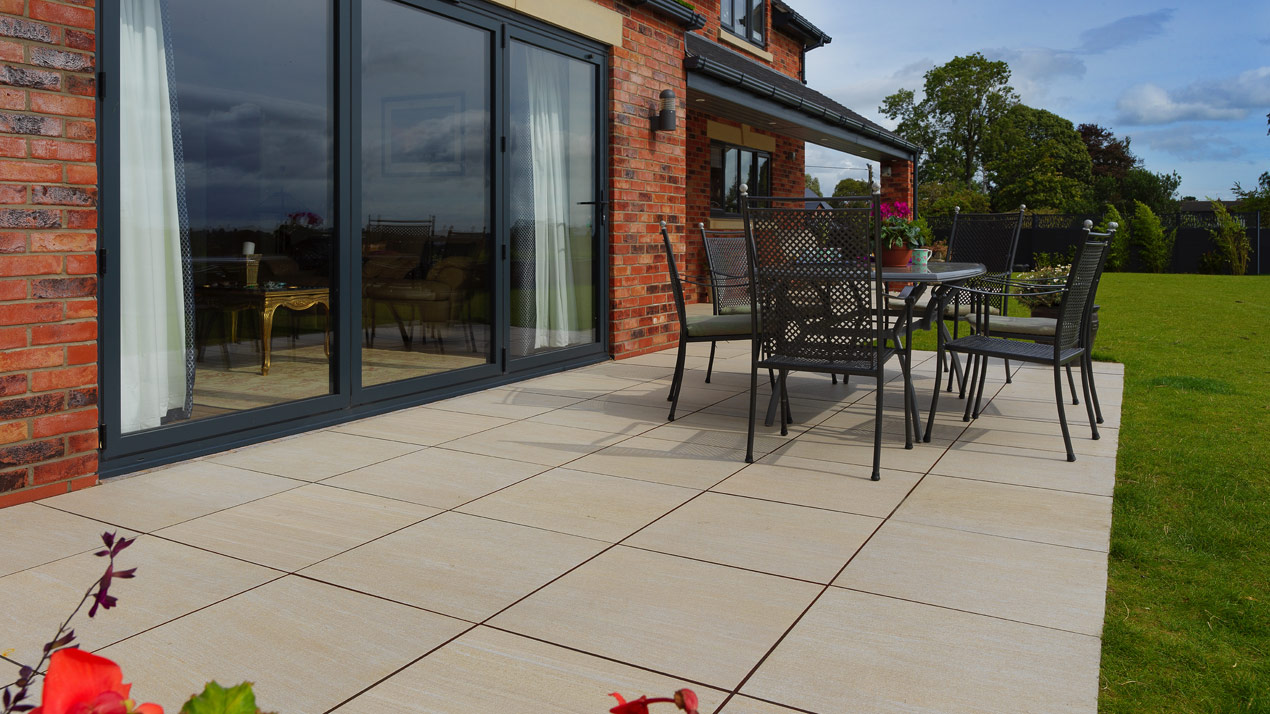
Stretcher Bond – Paving Slab Laying Pattern
The stretcher bond laying pattern is commonly used for single size rectangular paving slabs. The patterns see alternating rows laid half-way along from the adjacent rows. This ensures the joints are lined up with the middle of the slabs in the rows next to it (creating the “stretcher”). This is a popular paving pattern and favoured by UK pavers when installing single sized slabs.

Single Size Stretcher Bond – Dolomite Dust Porcelain Paving
Dolomite Dust (1000 x 500 mm) Porcelain Paving seen here laid in a classic stretcher bond. This pattern is the most common used with 2:1 ratio slabs for UK patio installations.
Single Size Stretcher Bond – Regal Summit Sandstone Paving
Regal Summit (750 x 500 mm) Honed Sandstone Paving laid in a stretcher bond pattern on this stylish patio dining area.
Single Size Stretcher Bond – Kadapha Black Limestone
Kadapha Black Limestone (900 x 600 mm) Sawn Paving shown here in a beautiful country garden. The patio has been laid in a traditional stretcher bond laying pattern. Note that these black limestone slabs have not been sealed against UV light. The unseals slabs have been allowed to naturally weathered and mellowed in the sun, where their dark pigments have been bleached by the UV sunlight, to create this soft grey tone.
Single Size Stretcher Bond – Dolomite Dark Porcelain Paving
An elegant vista in this garden of Dolomite Dark (1000 x 500 mm) Porcelain Paving. The slabs have been laid lengthways along the main axis of the patio in a standard stretcher bond laying pattern where each row (columns from this angle) is offset at 50% to the adjacent rows (columns from this angle).
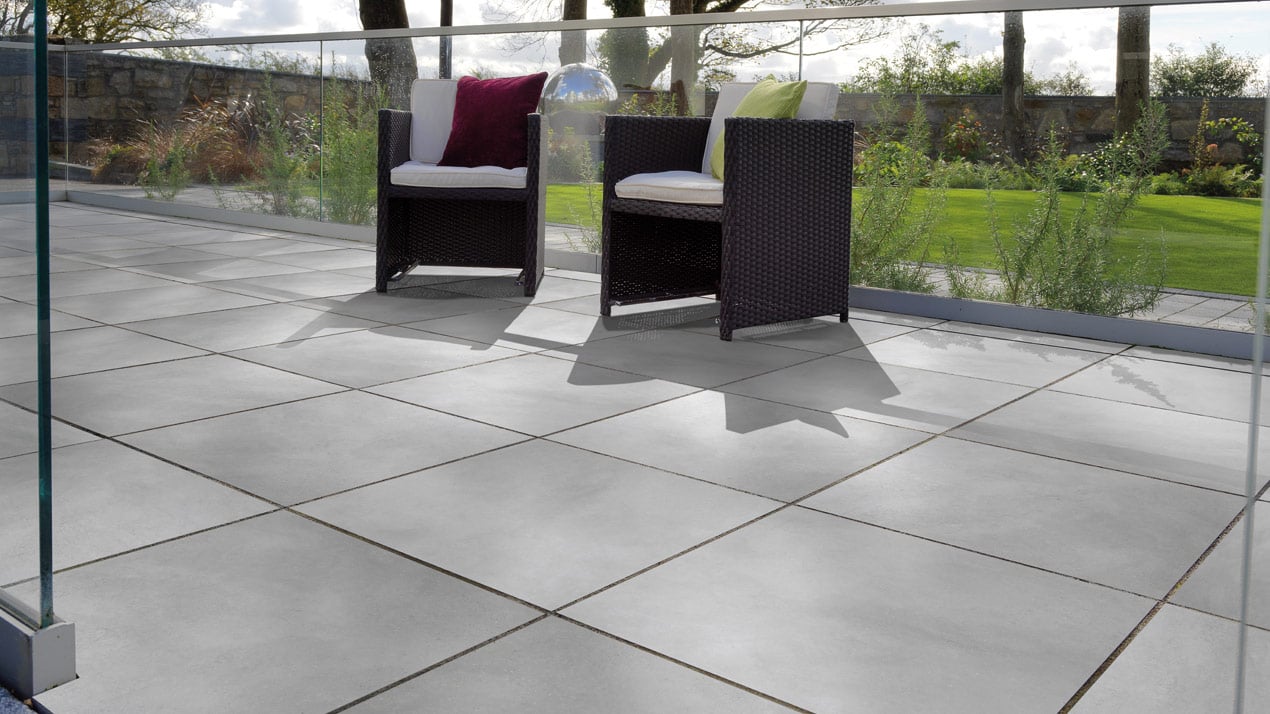
Single Size Paving – Stack Bond Pattern Examples
Stack Bond – Paving Slab Laying Pattern
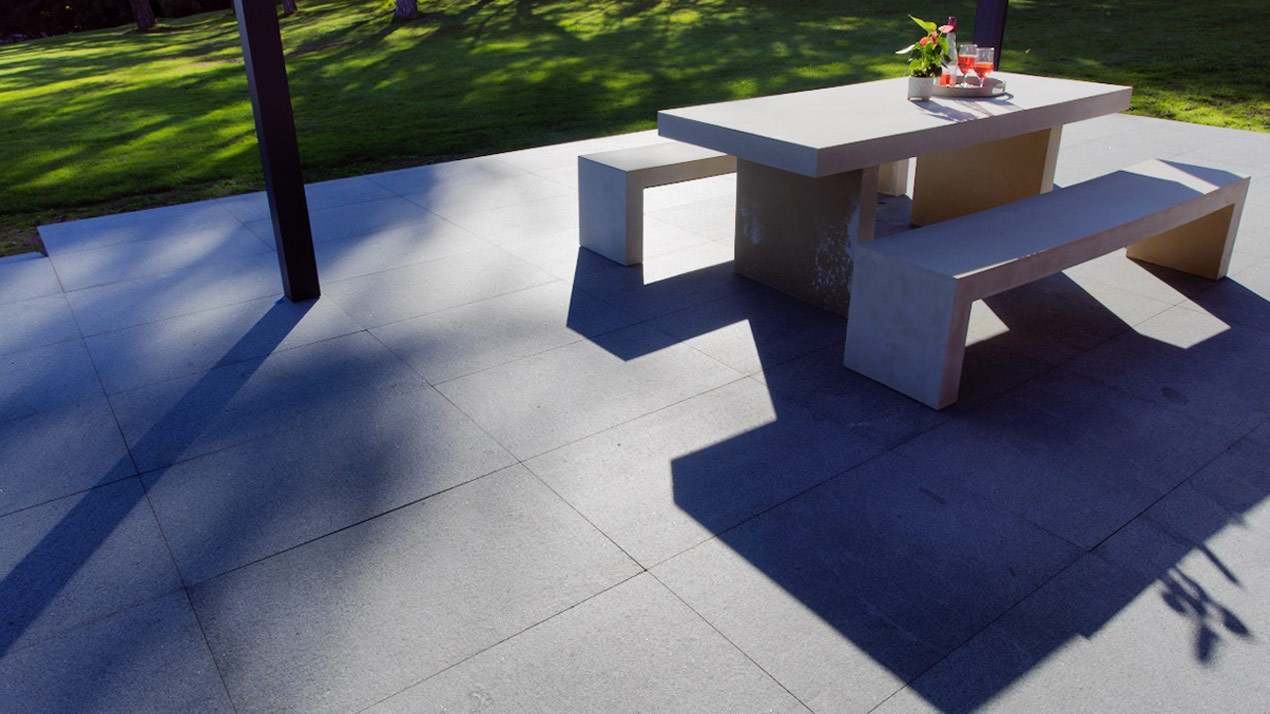
This pattern is used with single size paving slabs and sees joint alignment on all rows and columns to create a matrix or grid. This is a popular laying pattern in Europe, but less favoured in the UK, where many pavers have an aversion to “cross-joints”. When used in the UK, it will tend to be used with square rather than rectangular slabs.
A stack bond pattern is suited when trying to create a contemporary look and feel, offering straight, orderly lines. It is most commonly used when laying porcelain paving, underscoring the modernist/contemporary nature of this laying pattern.

Single Size Stack Bond – Tegel Black Porcelain Paving
A stack bond laying pattern is suited to contemporary aesthetics, where clean lines and an ordered appearance, play into the sense of modernity. In this example we can see Tegel Black (900 x 900 mm), a large format porcelain paving slab, that gives this patio grandeur and scale combined with minimalist sentiments.
Single Size Stack Bond – Calibra Silver Grey Porcelain Paving
In this example of the stack bond laying pattern has been used with Calibra Silver Grey (600 x 600 mm) porcelain paving. As you can see, the stack bond pattern gives this patio a modern, contemporary feel. The matrix/grid like appearance provides an organised and regimented aesthetic.
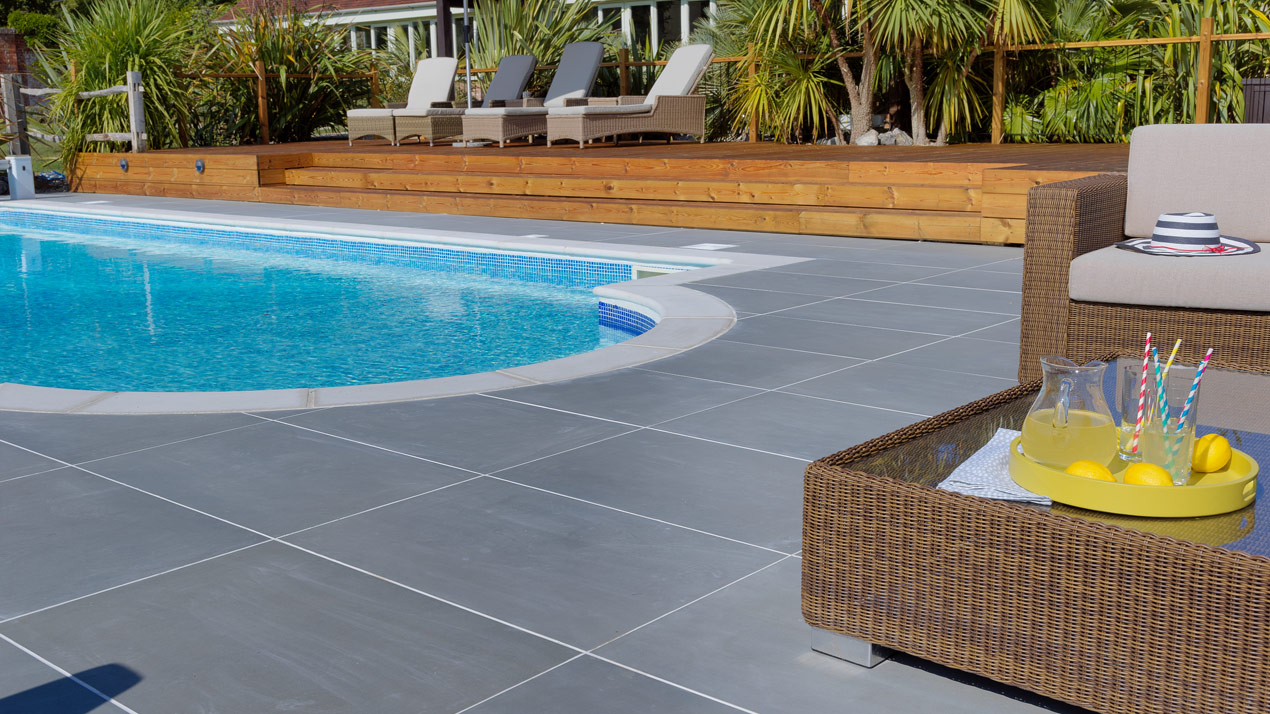
Single Size Stack Bond – Monviso Grey Porcelain Paving
Utilising a contrasting white grout, here we see 3:2 ratio slabs (Monviso Grey 900 x 600 mm Porcelain Paving) laid in a stack bond pattern around a swimming pool. The gridded layout provides a sleek and minimalist feel that exudes elegance and sophistication.
Single Size Stack Bond – Al Fresco Porcelain Paving
A stack bond patio has a utilitarian quality to it that resonates with modernist/contemporary designs. It is a no-nonsense, straight forward pattern, that provides a uniform and orderly look and feel. Here we see a small patio of Al Fresco 603 x 603 mm porcelain paving, with a breakfast dining area.
Single Size Stack Bond – Granite Carbon Porcelain Paving
Granite Carbon Porcelain Paving (900 x 600 mm) laid on this contemporary/modernist patio in a stack bond pattern. The patio has a steel pergola and uses concrete furniture to help paint the modernist aesthetic we see here.
Single Size Paving – 45° Stack Bond Pattern Examples
45-Degree Stack Bond – Paving Slab Laying Pattern
Often referred to as diamond stack or diamond pattern, this pattern uses single size square paving slabs angled at 45-degrees to the edges in a stack bond configuration. Like stack bond, this is less common in the UK. However, with the increasing popularity of 600 x 600 mm and 900 x 900 mm porcelain paving being selected by home-owners, 45-degree stack bond installations are becoming more common as they offer an alternative with more visual interest.

Patio Paving Features & Circles Laying Patterns
Paving features and circles are available as off-the-shelf kits, with varying sizes and complexity. It is also common for landscapers to create custom designs, motifs and features using their own bespoke cutting patterns.
Below are some examples for both custom design paving features and readily available and standardised paving kits (circles and squaring off).
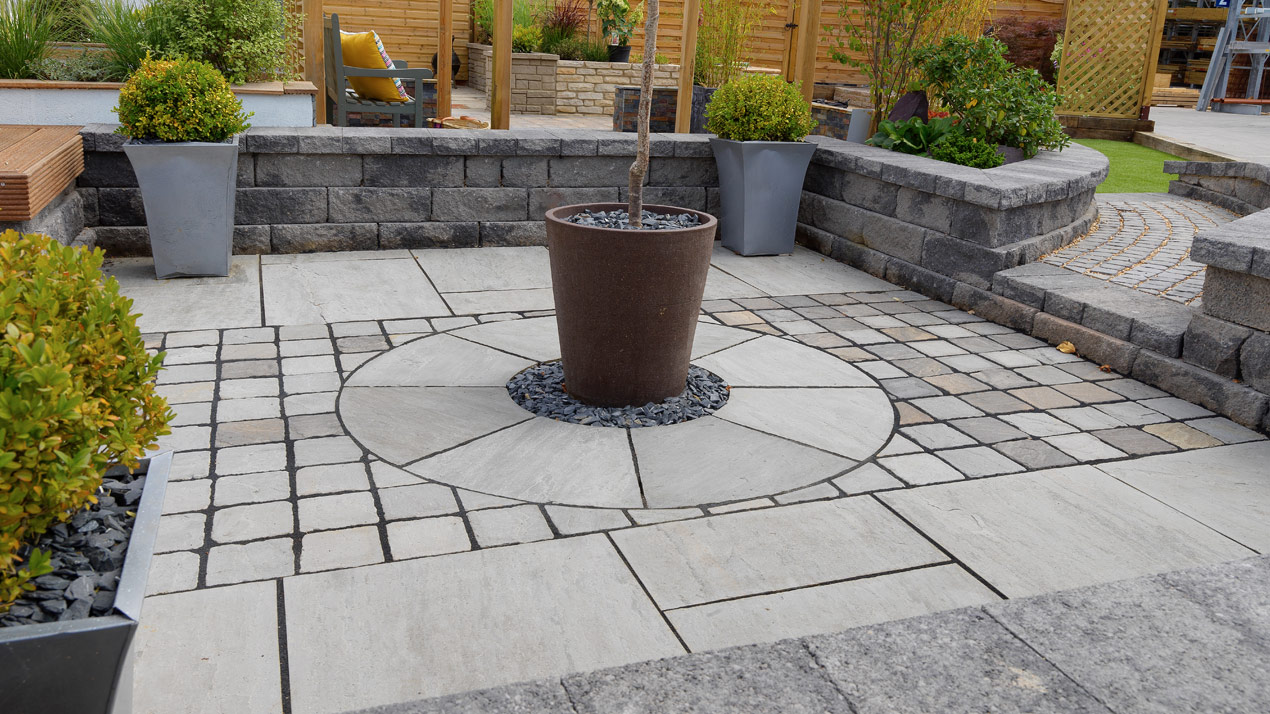
Paving Circles – 3 Ring & with Squaring Off
Available in both natural stone and concrete formats, 3-ring paving circles provide a great opportunity to create a focal point or feature within your paving design, ideal for round dining tables or gazebo bases.

Paving Circles – 2 Ring & with Squaring Off
Available in natural stone, 2-ring paving circles are perfect for designating functional spaces as well as for their aesthetic interest. They are big enough for the likes of a bistro table and chair set, making them ideal for that breakfast or mid-morning coffee area.

Paving Circles – 1 Ring & with Squaring Off
Available in natural stone, 1-ring paving circles are ideal as surrounds for garden design features such as sundials, birdbaths, and ornamental plinth with statues, sculptures or other objet d’art.

Contrasting circular and straight paving elements add visual interest and a sense of considered design and care to the aesthetics. Here we see the inner-ring of Light Grey Indian sandstone circle used as a surround for a planter, inset in a stack bond matrix of setts of the same stone.
Here we see a 2-ring circle kit of Buff Indian sandstone with a pencil course border of Fossil setts. The subtle contrast between the lighter Fossil sandstone and Buff allows the overall aesthetic to appear harmonious and cohesive. Circular paving kits such as shown here are a great way to introduce visual appear and features in your patio paving.

Custom Cut Paving Features
In this section, we will illustrate some examples where landscapers have used custom cuts to create eye-catching bespoke paving features and designs. The love, care and intricacy that these designs show really adds to their aesthetic quality.
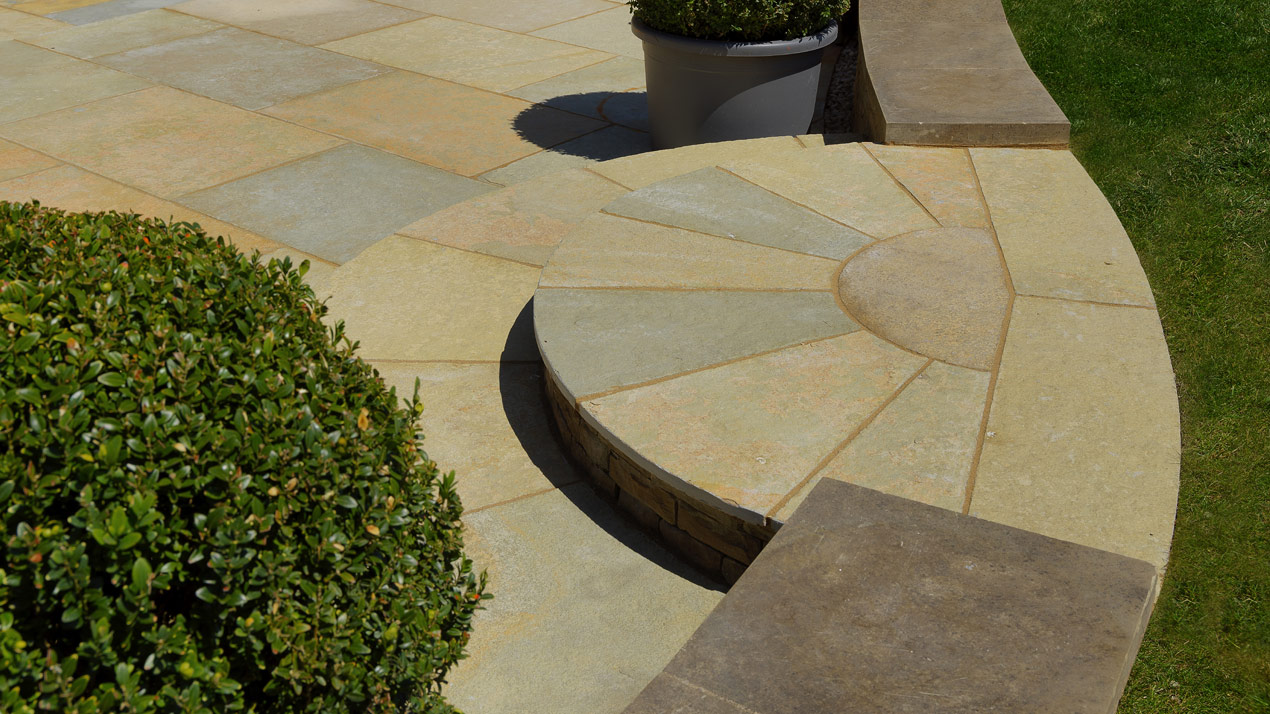
This customer paving design sees Abbey limestone paving cut using a bespoke pattern to create a circular step in the middle of a low retaining wall between the patio and lawn terrace.
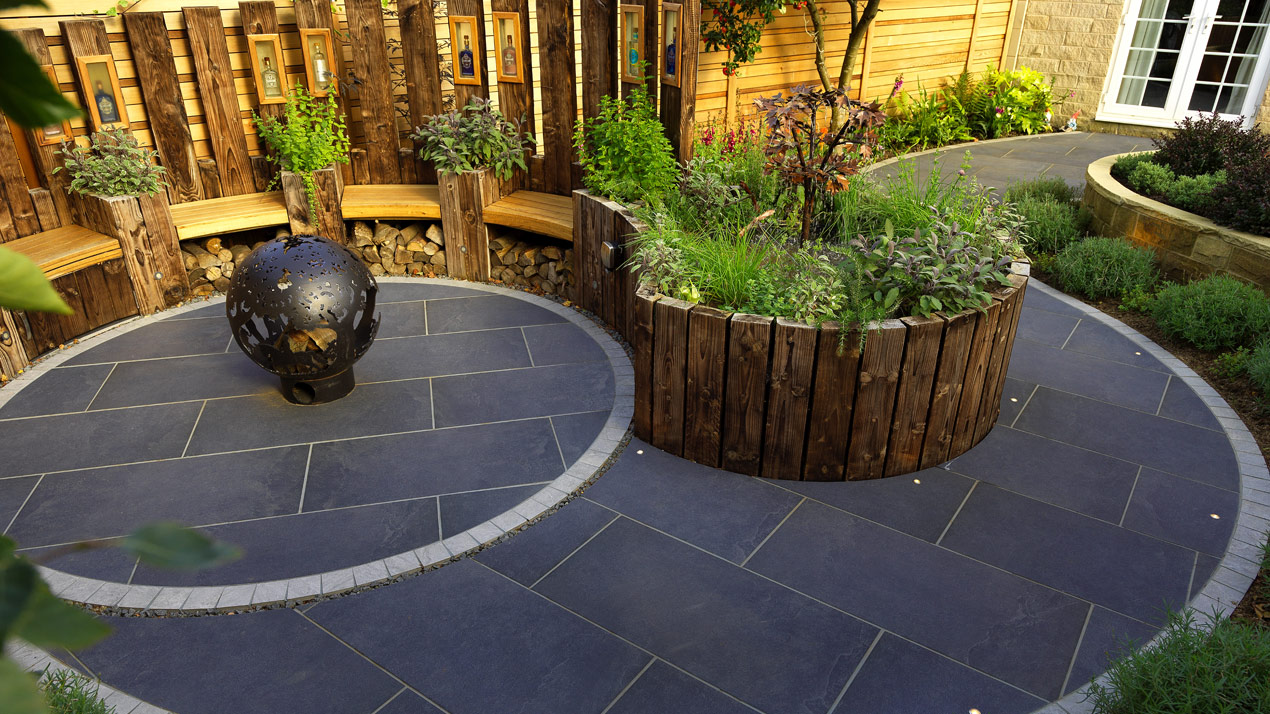
An elliptical path and a circle cut from Dolomite Slate porcelain paving with a contrast edge course in lighter grey. The serpentine path draws the eye to the feature circle as it curves around the raised bed. The circle has a stylised globe brazier and built-in seating, under seating log storage, and it is back by inset bottles to signal this is an area for drinks!
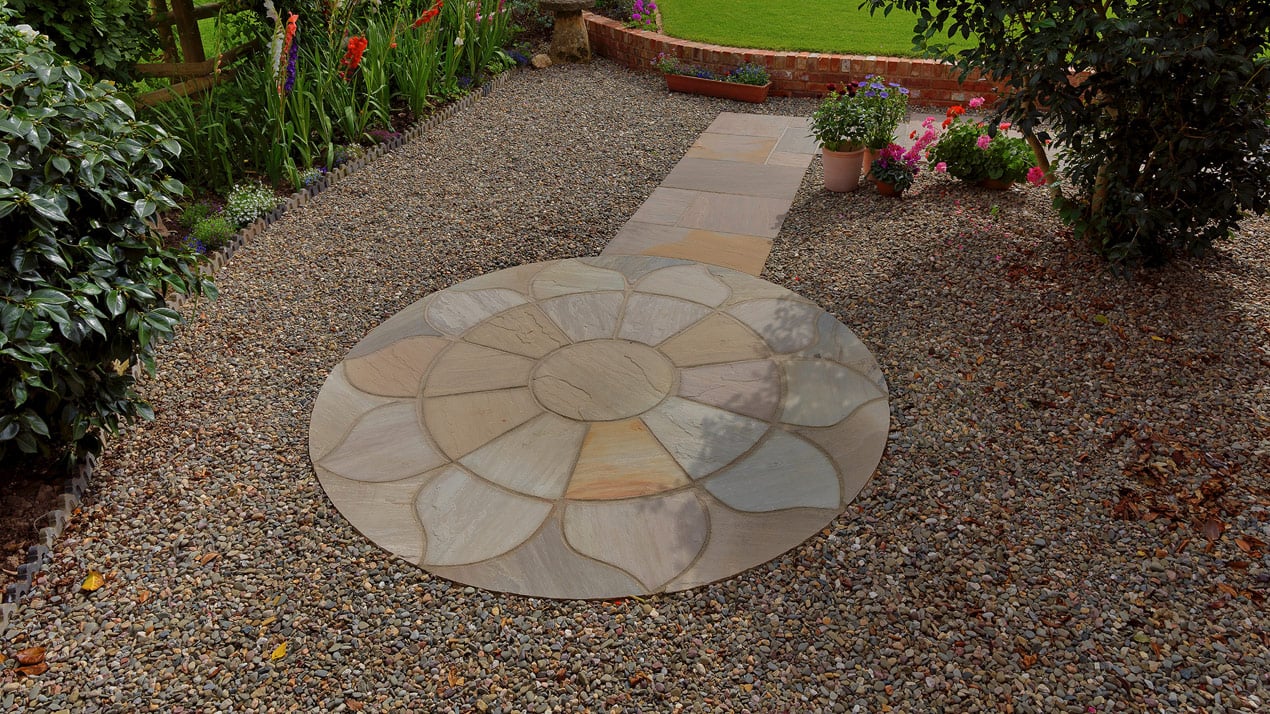
Custom cuts can make all the difference. Here we see a Raj Blend Indian Sandstone circle that has been extended using custom cuts to make petal shapes to create an eye-catching and beautiful flower patterned paving design.
On this patio, we can see the clever use of pencil inlays of darker contrasting setts to help define spaces and functions within the paved areas, such as the circular seating area. The inlays also help accentuate the elliptical, sweeping curve of the patio, and the care and detail of the paving cuts.
Block Paving Laying Patterns
In this section, we will show you common block paving laying patterns, including 3-size paving blocks, 2:1 ratio standard driveway paving blocks, Belgium blocks (square setts), cobblestones (rectangular setts), and mixed-size tumbled setts.
Stretcher Bond – Tumbled Block (3-Sizes) – Driveway Paving Laying Pattern
This tumbled block paving pattern is based on the common 3-size format, where the blocks have a common width that allows them to be laid in even rows. The stretcher bond (wherein vertical joints never meet) is achieved by off-setting three sizes against the joints in the row below, choosing a size that creates the correct offset as you lay them. Once the first two rows have been laid, you can simply repeat the two row pattern.
- 200 x 150 mm
- 150 x 150 mm
- 100 x 150 mm

Stretcher Bond – Tumbled Block (Large-Medium) – Driveway Paving Laying Pattern
This tumbled block paving pattern is simplified and based on just the large and medium sizes of a three size format. Simply lay at an offset on alternating rows and cut-in your end-pieces that compensate for the offset.
- 200 x 150 mm
- 150 x 150 mm

Stretcher Bond – Tumbled Block (Large-Small) – Driveway Paving Laying Pattern
This tumbled block paving pattern is simplified and based on just the large and small sizes of a three size format. Simply lay at an offset on alternating rows and cut-in your end-pieces that compensate for the offset.
- 200 x 150 mm
- 100 x 150 mm

Stretcher Bond – Tumbled Block (Medium-Small) – Driveway Paving Laying Pattern
This tumbled block paving pattern is simplified and based on just the medium and small sizes of a three size format. Simply lay at an offset on alternating rows and cut-in your end-pieces that compensate for the offset.
- 150 x 150 mm
- 100 x 150 mm

Here we see Pavesett Silver tumbled block paving (a three size 150 mm format series) laid in a classic stretcher bond pattern on this elegant looking driveway. Notice how getting the distribution and mix of the blend of block colours is important to the overall aesthetic.
The curbside appeal of your house can be raised significantly with a well laid driveway. Here we see Pavesett Autumn Brown (a 3-size 150 mm series format tumbled block paving system) laid on a domestic driveway in a stretcher bond pattern with an edge course of contrasting colour using Pavesett Charcoal.
The Tudor Antique Cobble range offers mixed sizes of tumbled sandstone and limestone that can be laid in a variety of patterns. Here the setts have been laid in rows of corresponding width in a stretcher bond manner.
The simplest type of stretcher bond block paving pattern uses a single size block. In this example, we can see Pavesett Silver 200 x 150 mm blocks laid in a stretcher bond laying pattern. They are inset within a larger patio (Abbey sawn limestone) to define a dining area, where the grey block paving contrasts against the golden coloured limestone surround.
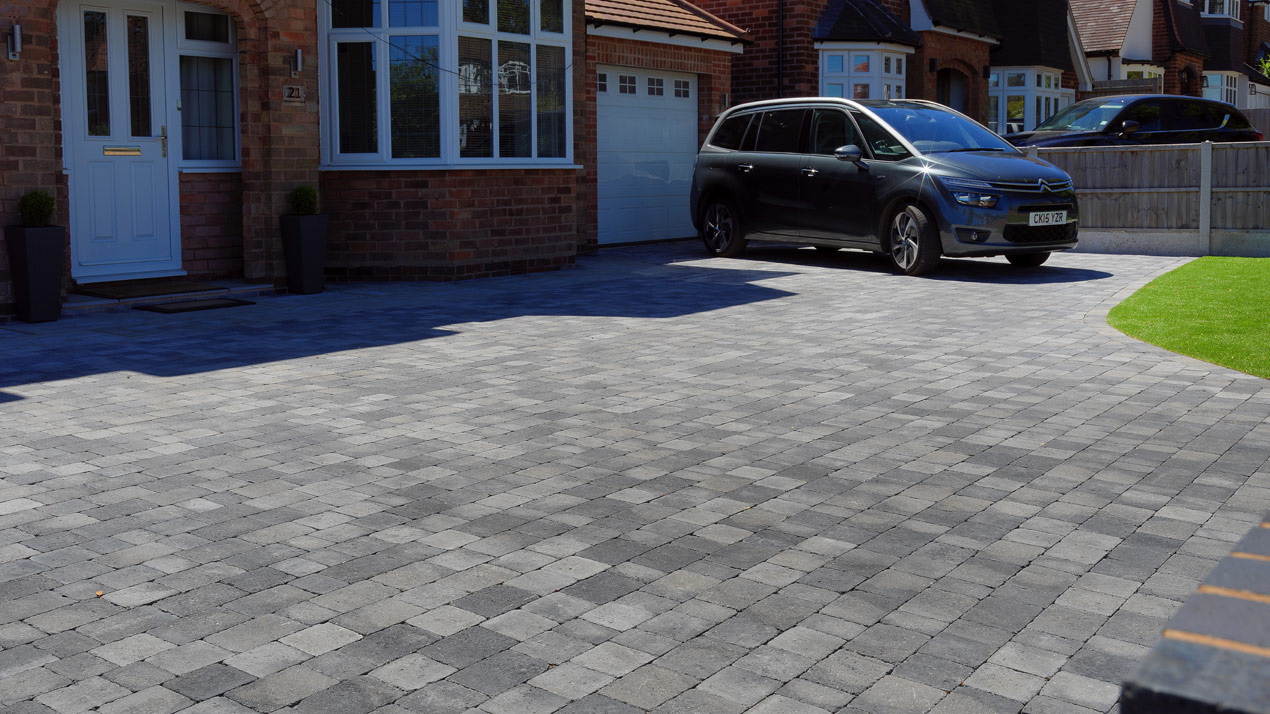
Stretcher Bond – Standard 2:1 Block – Driveway Paving Laying Pattern
Standard driveway block paving in a 2:1 ratio can be easily laid in a stretcher bond pattern. Each alternating row is offset 50% of the length of the row above and below it to create the stretcher.

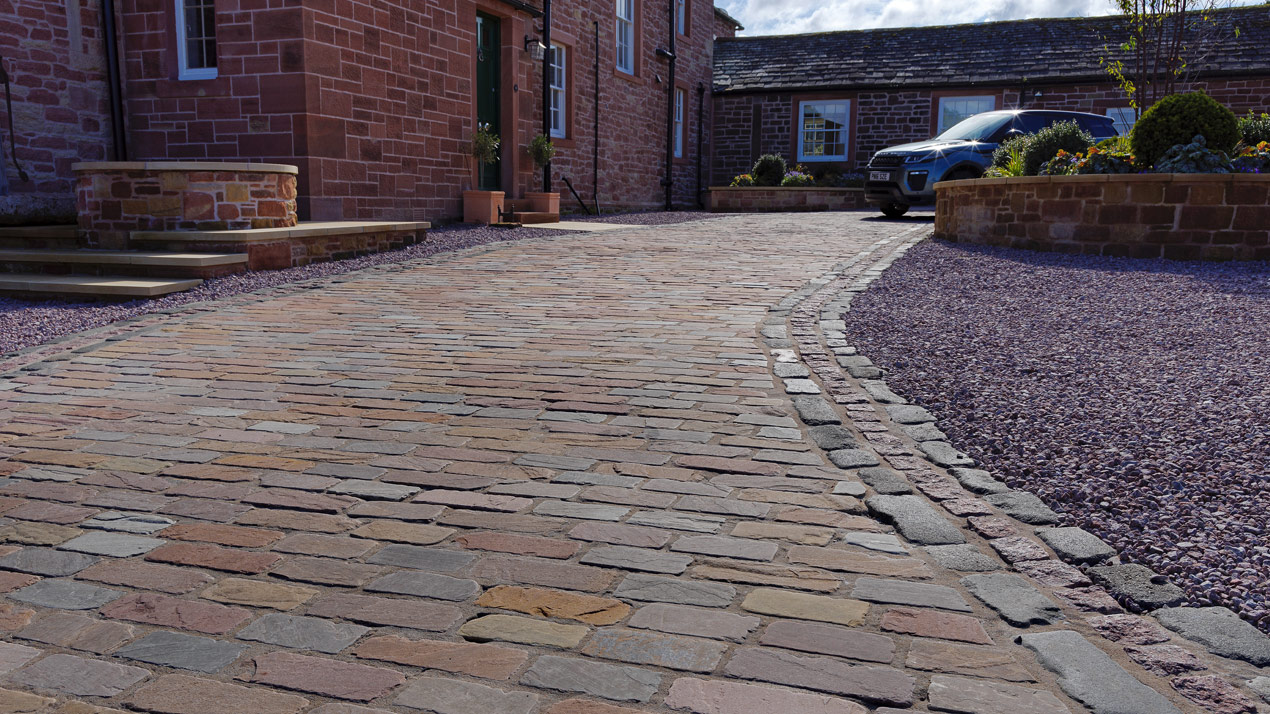
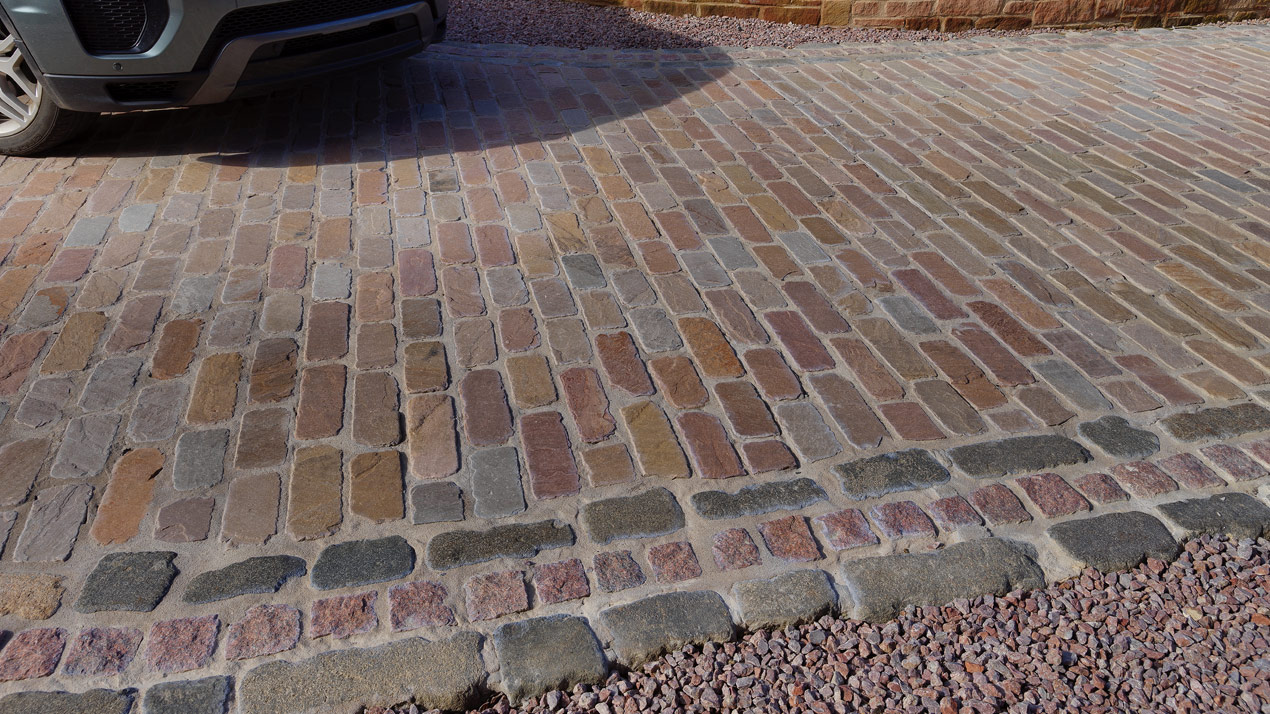
For a traditional or period look and feel for your driveway or courtyard, tumbled cobblestones, such as these Old York Sandstone Blocks, are ideal. They have a timeless charm and natural beauty. Here they are laid in a stretcher bond pattern with a triple stretcher edge course.
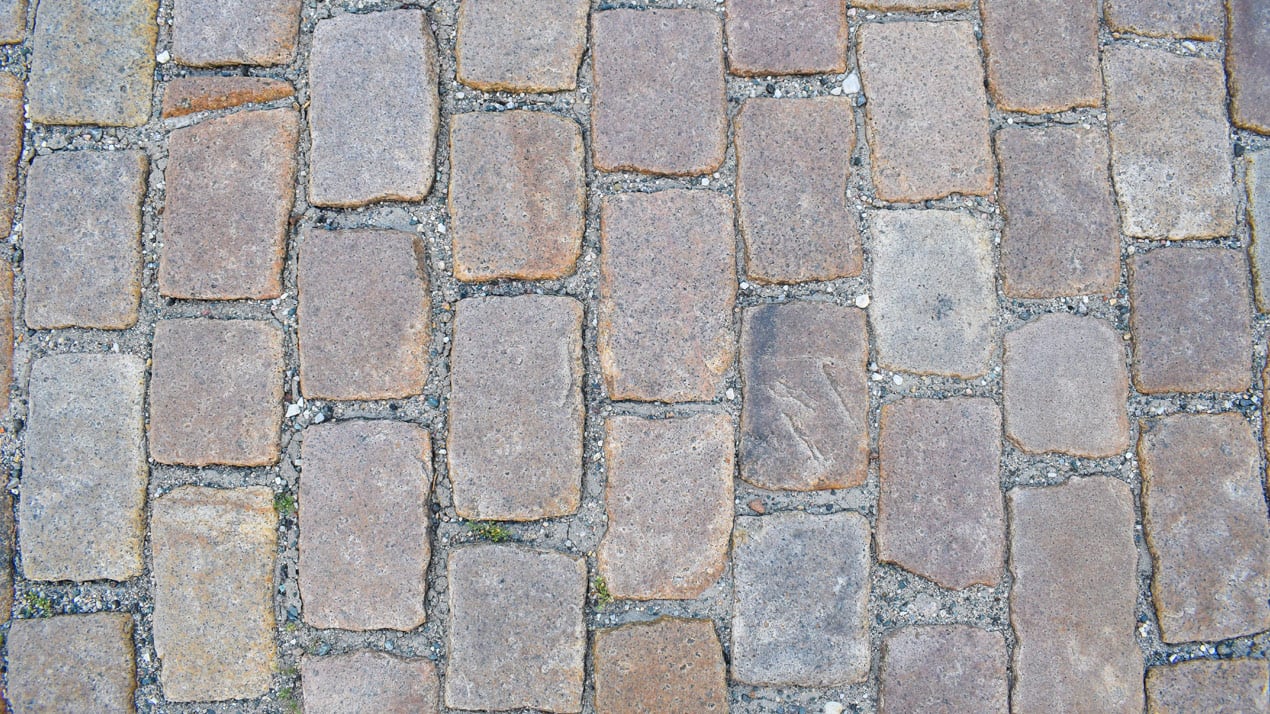
Tumbled rectangular sandstone blocks laid in a classic stretcher bond pattern, wherein each joint falls offset from joints in other rows to create the “bond”.
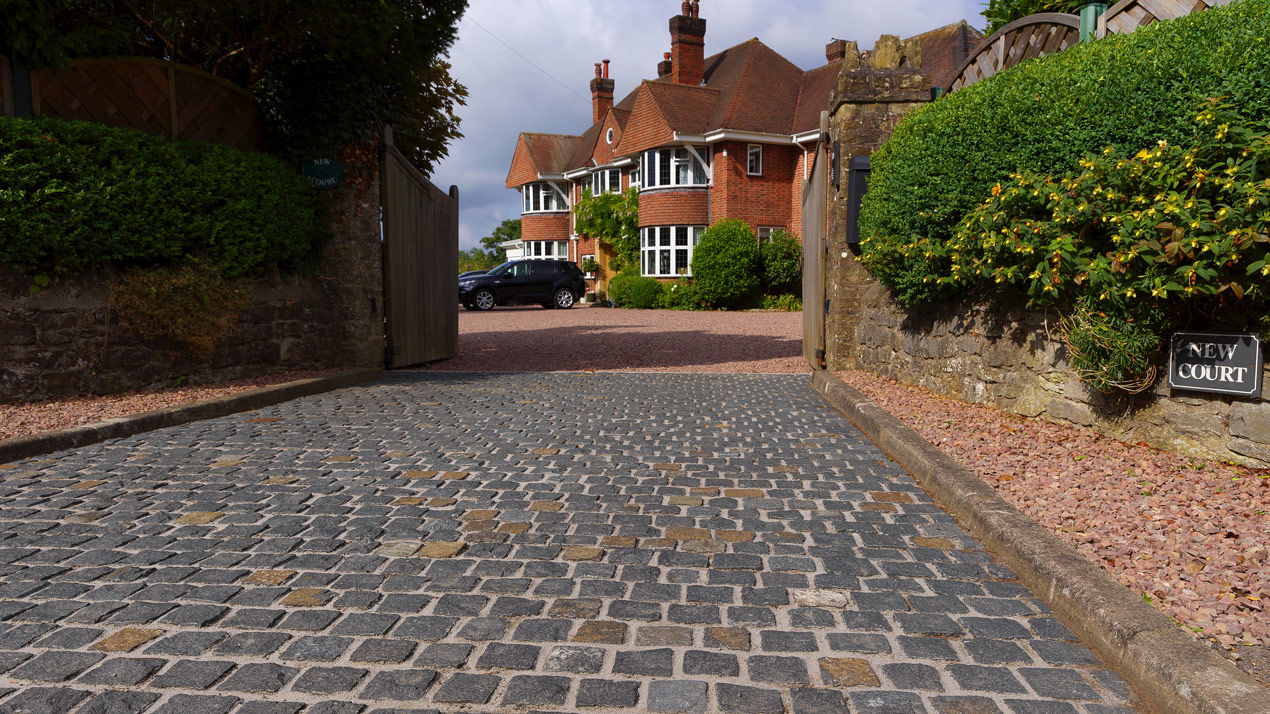
If you want a traditional, rustic or period look to your driveway or courtyard, then you may want to shortlist rectangular cobblestone blocks (tumbled setts) and lay them in a classic stretcher bond as shown here, with each row off-set about 50% from the adjacent rows.
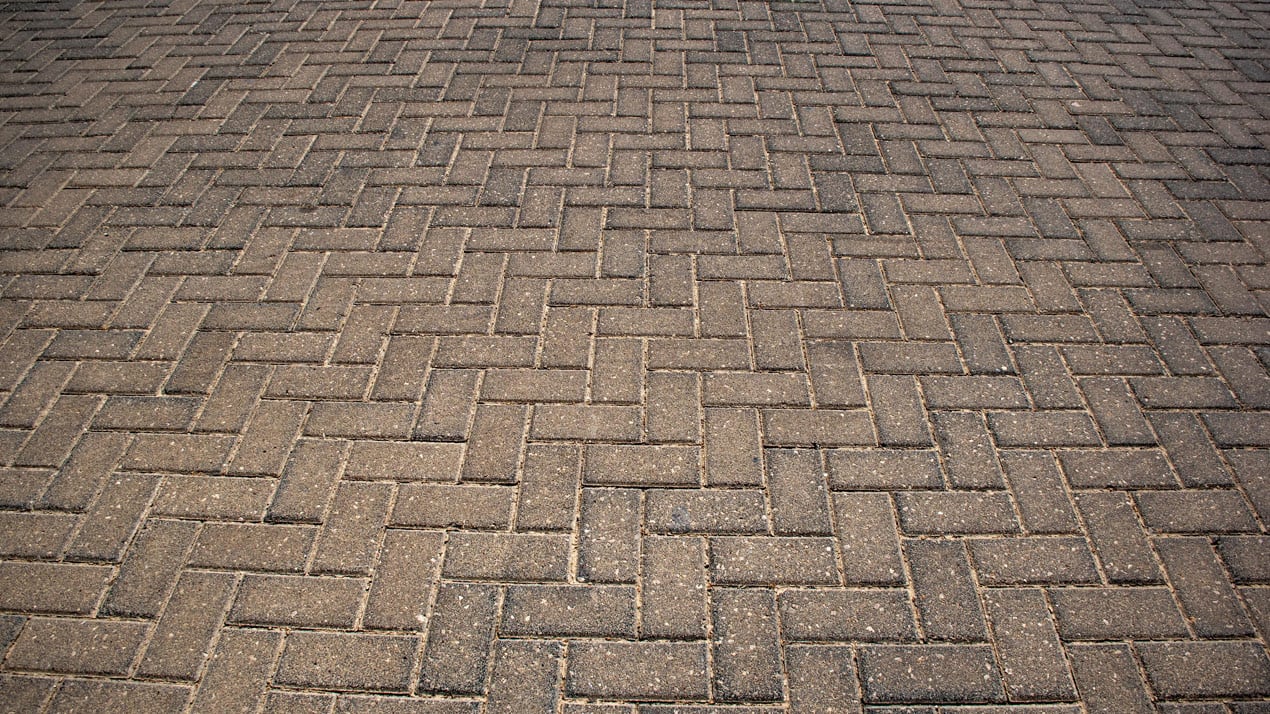
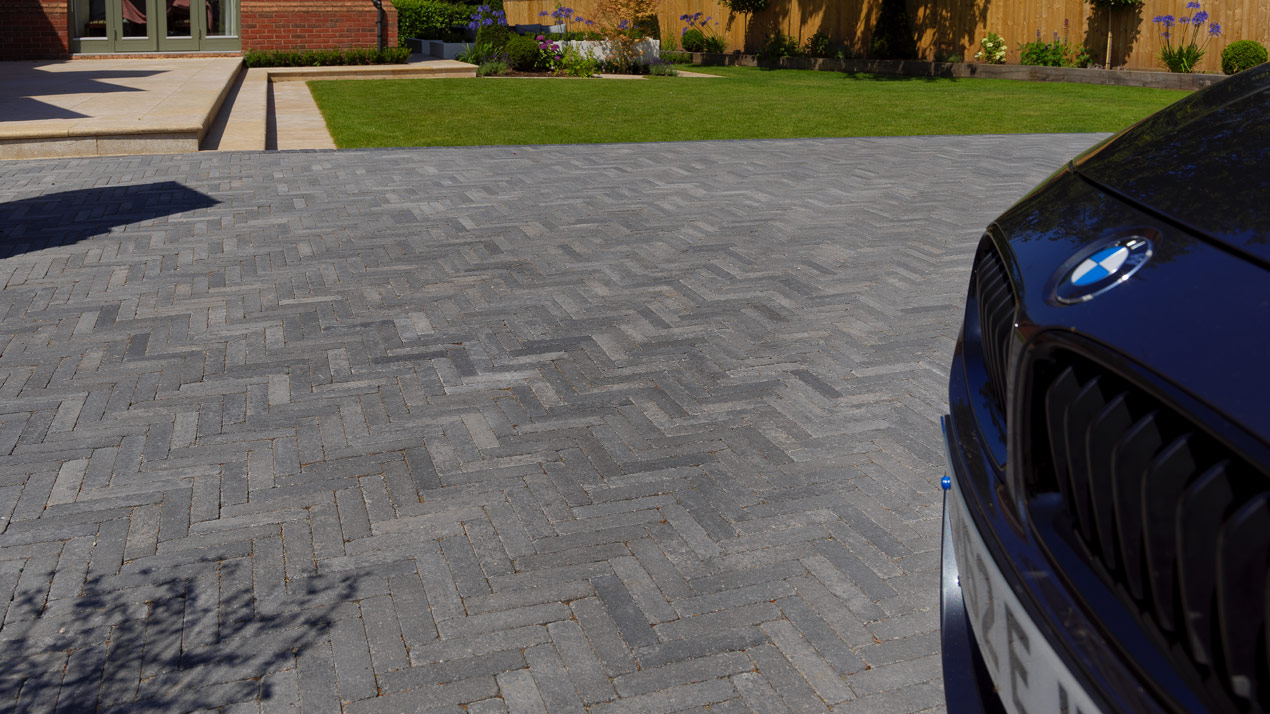
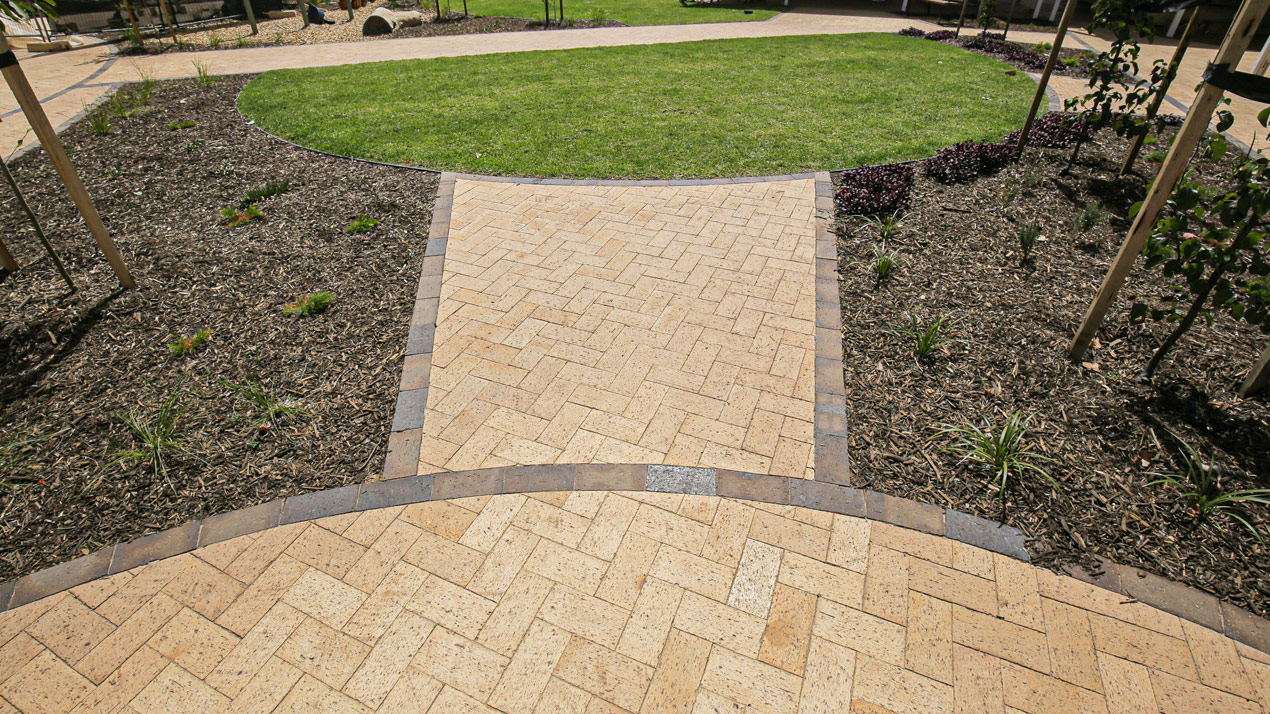
Herringbone – Standard 2:1 Block – Driveway Paving Laying Pattern
Herringbone laying patterns take their name from the resemblance to the chevron pattern of the dorsal and rib bones of the fish’s skeleton. In this pattern, 2:1 ratio blocks are laid in perpendicular pairs, with one block laid along its vertical axis, and the other laid on its horizontal axis, to create rows of interlocking chevrons.

45 Degree Herringbone – Standard 2:1 Block – Driveway Paving Laying Pattern
A 45-degree herringbone pattern is one utilising the standard herringbone technique (pairs of 2:1 ratio blocks, laid perpendicular to one another in a chevron shape). However, in this variation, the axis of the blocks set to run a 45-degrees to the edge course or datum. This allows the herringbone pattern to really stand out and emphasise the chevron motif/geometry.

Here we see standard driveway paving blocks (2:1 ratio) laid in a traditional herringbone pattern. The chevron pattern not only looks great, but with unbound driveway blocks, it does add a little more of both straight and lateral stability where the blocks interlock.
A driveway laid in a herringbone pattern using 4:1 ratio block paving (Slimsett Anthracite). These Dutch/Flemish style 4:1 ratio blocks, being more elongated than standard driveway paving units, seem to more closely represent the skeleton of a fish that lends itself to the herringbone pattern’s name.
Standard 2:1 concrete block paving laid in a herringbone pattern with a contrast colour edge course that bisects the infill where the path meets the circular centre. The infill of the path section’s herringbone pattern is not true to the edge course, and in fact follows the same line as the circle’s infill / datum point, with the consequent cutting in neatly done to create a harmonious appearance.
Here we see some old Dutch clay paving blocks laid in a herringbone pattern to create a striking visual effect.

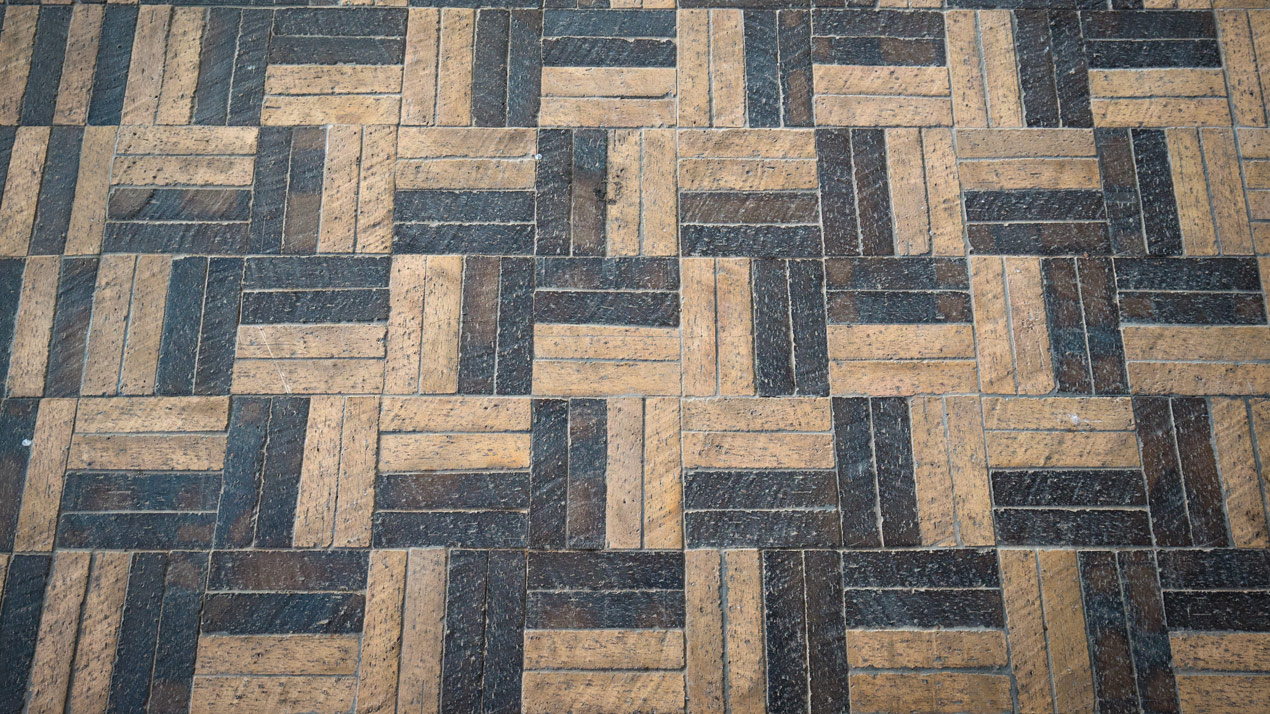
Basket Weave – Standard 2:1 Block – Driveway Paving Laying Pattern
A 2:1 ration paving block allow you to lay a basket weave pattern with pairs of blocks laid in an alternating horizontal and vertical direction. A basket weave pattern can also be laid with a 4:1 ratio block, but in that case 4-blocks are laid alternating vertically and horizntally.

A clay brick paver path with an infill using a basket weave laying pattern and pencil edge course. Notice how the basket weave lends itself to a more bucolic/rustic look and feel

Contrast colour basket weave paving, laid to create a repeating pattern of off-set crosses. Whilst visually interesting, be aware that high-contrast colours laid in strong patterns can dominate the visual hierarchy in your garden’s landscape, dramatically effecting the aesthetics.
45 Degree Stretcher Bond – Standard 2:1 Block – Driveway Paving Laying Pattern
Like the 45-degree herringbone, the purpose of the 45-degree stretcher bond laying pattern is to create visual interest and directional contrast to the edge course or datum from which the paving will be viewed.

The tumbled paving blocks (Pavesett Ochre Grey) have been laid in a 45 degree stretcher bond pattern. This provides subtle but effective visual interest for those coming from outside and from within the property. These unbound blocks are held on the perimeter by an edge course of the larger 200 x 150 mm blocks, laid along their longest axis in a soldier course pattern.

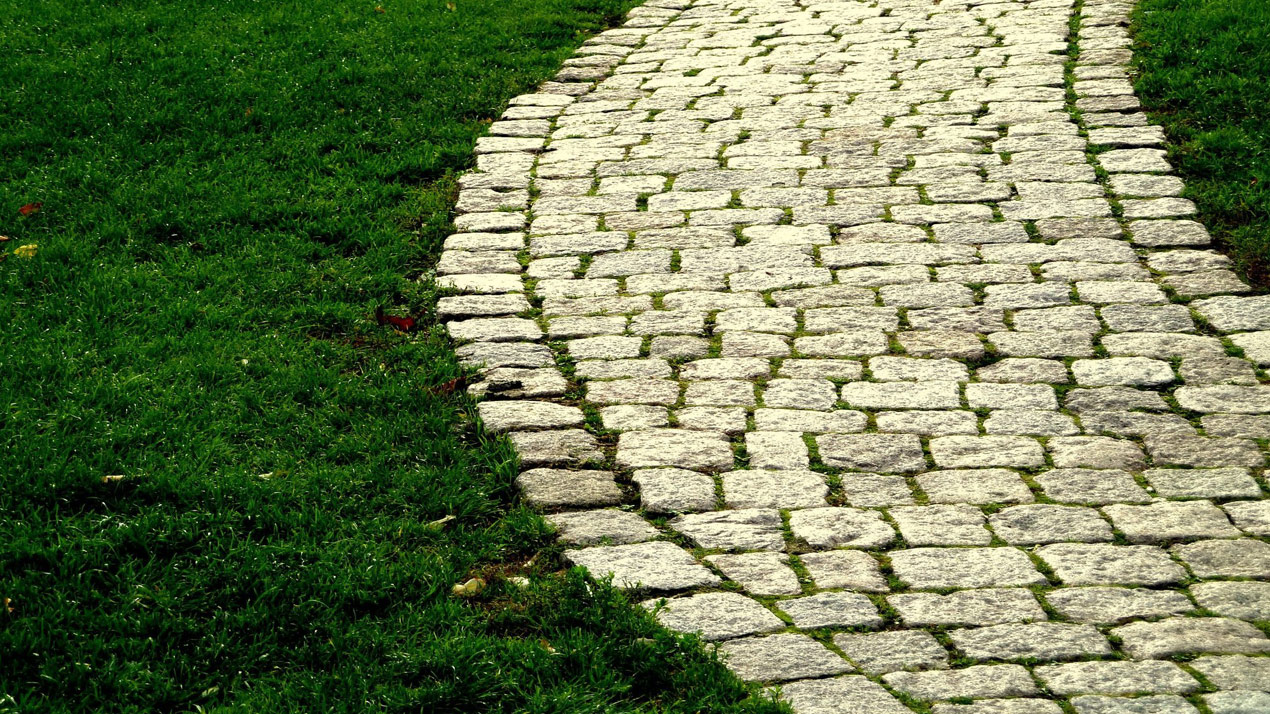
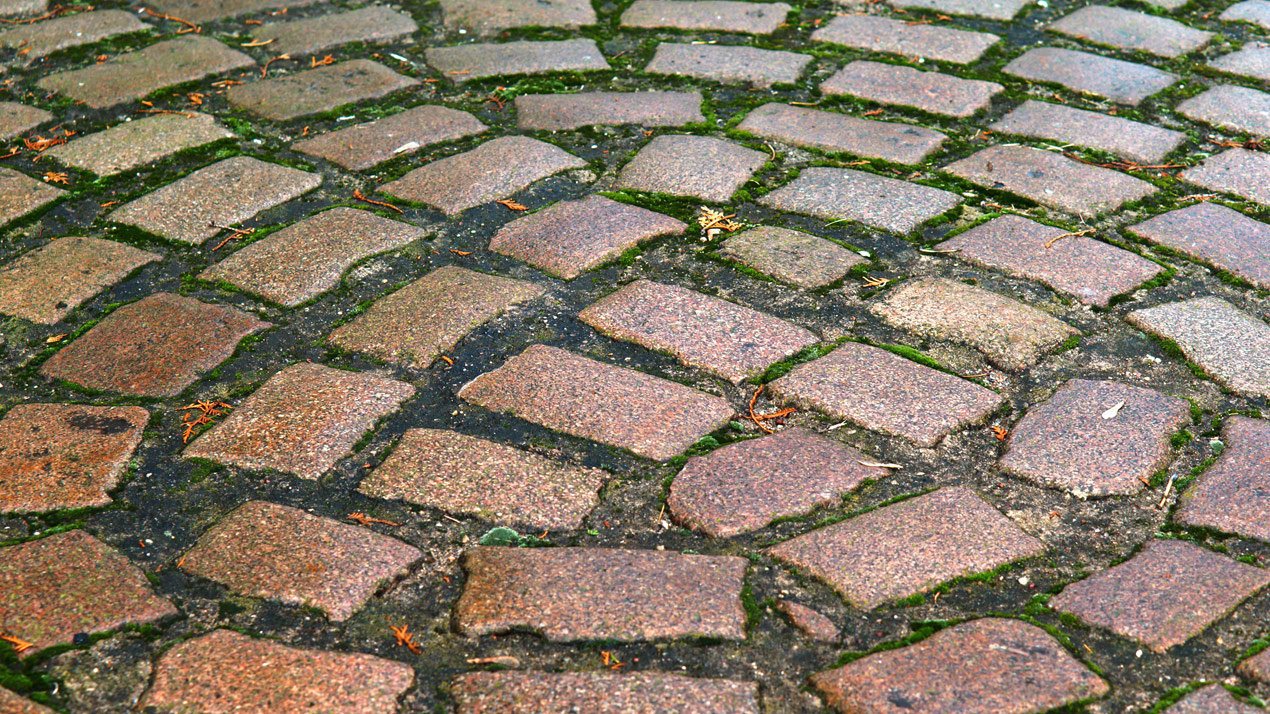
Sett & Cobblestone Laying Patterns
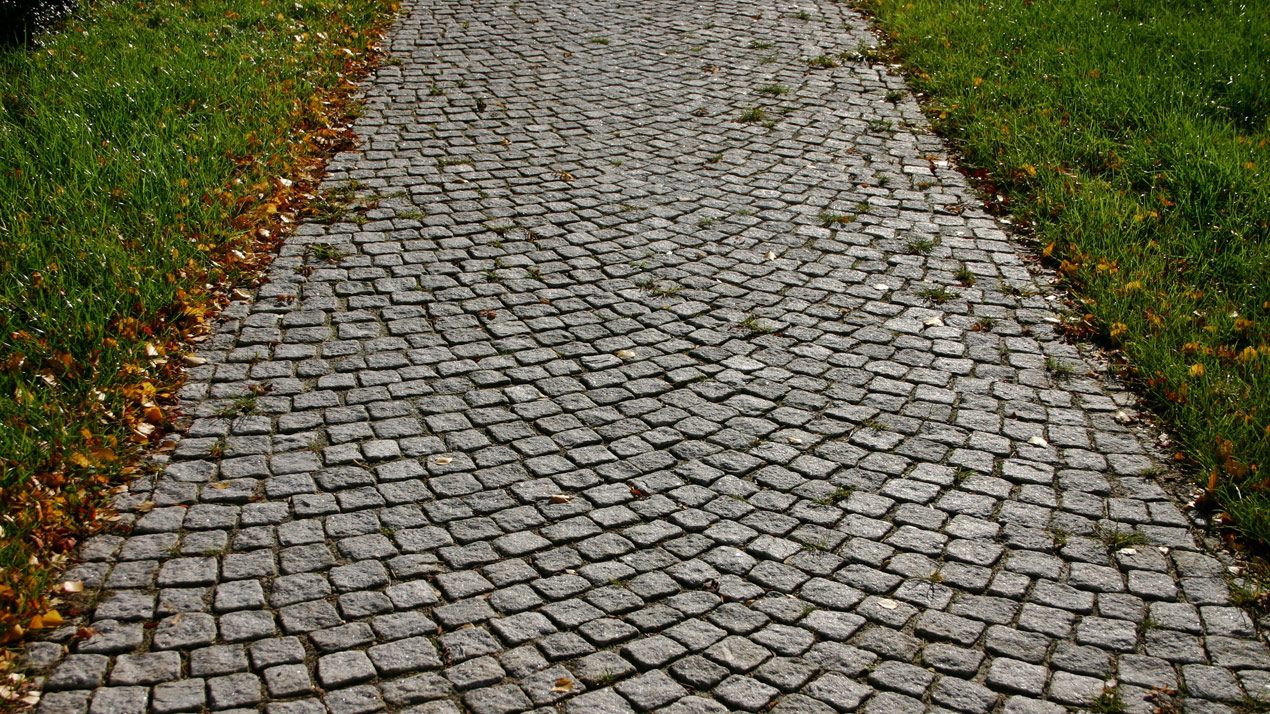
In this section, we will illustrate how smaller format setts (often referred to as Belgium blocks or pavé) which have a square aspect can be laid to create visual interest and the right aesthetic for certain settings.
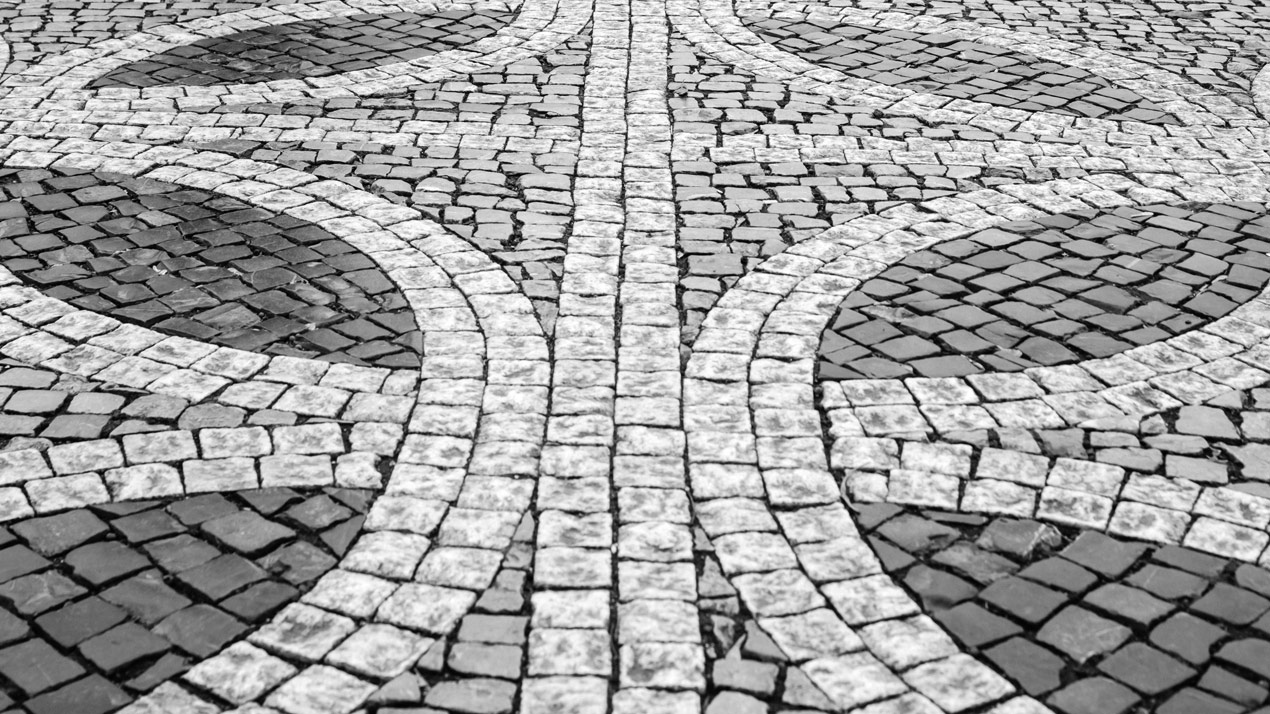
A traditional carriageway of stone setts, laid using a double fan radius pattern. Where necessary, the mason/installer has cut the setts (most likely hewn with a masonry hammer) to create wedged-shaped rather than square setts. These wedged shaped setts help the alignment of the radius courses (similar to voussoir stones in an arch), so the lines of setts in both radius arcs, curve and intersect in a pleasing way.
One of the advantages when laying hand-cut bonded setts is that their small format and joint widths allow them to be manipulated and orientated more easily into interesting shapes and patterns. Depending on the radius of the course, often these square stone blocks can be laid intact, without alteration. As course radii become smaller near the centre of the circle/curve, the axis lines will narrow and setts might need to be cut and trimmed to make wedges to match the axis line. This can be done simply and easily with a masonry hammer’s chisel.
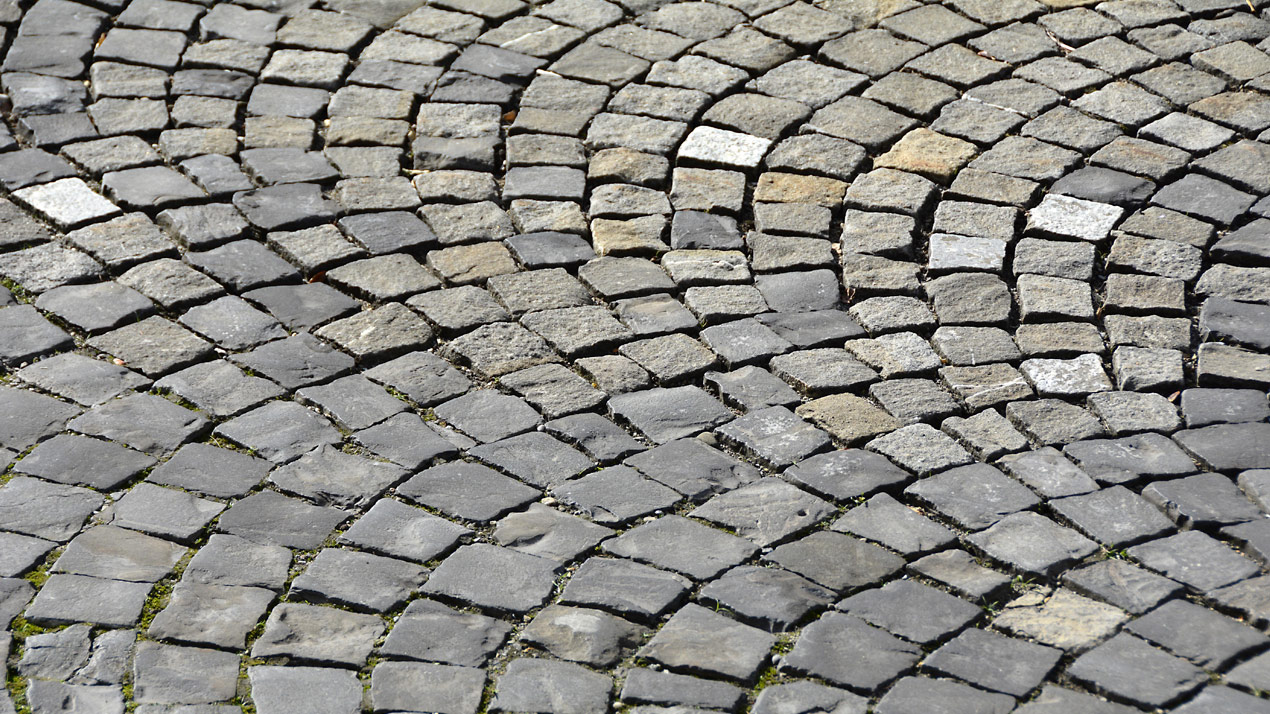
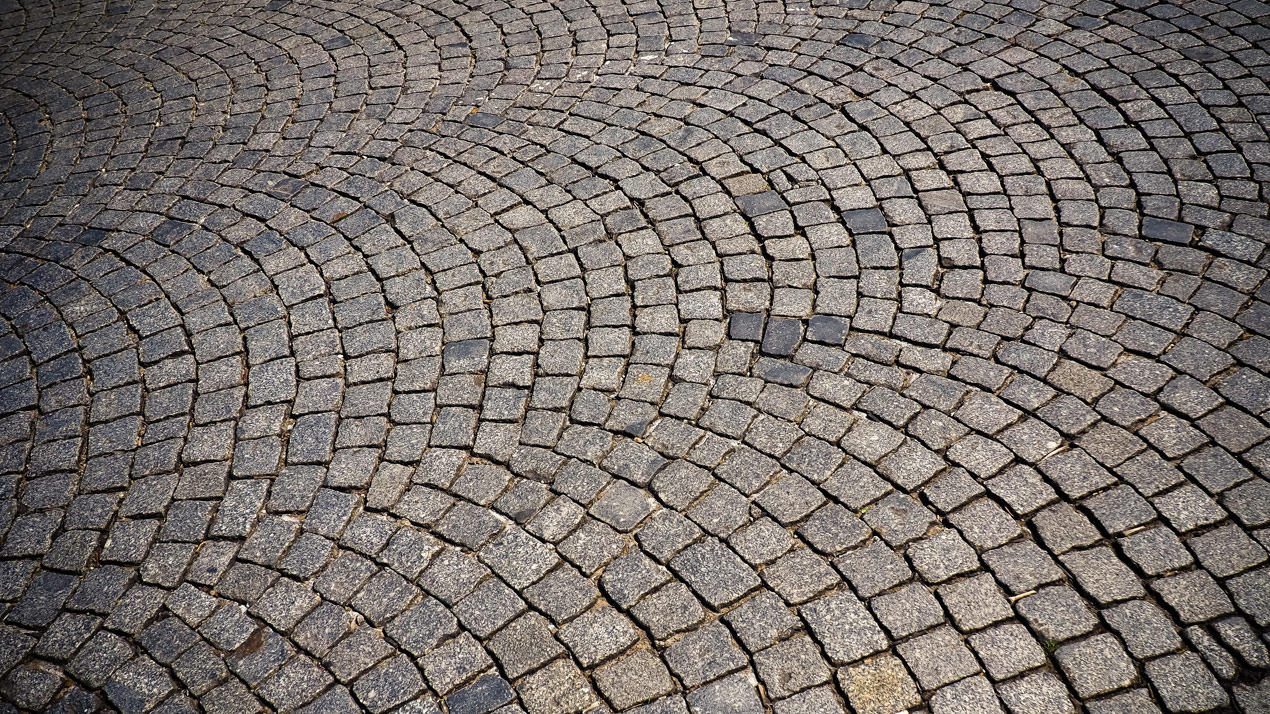
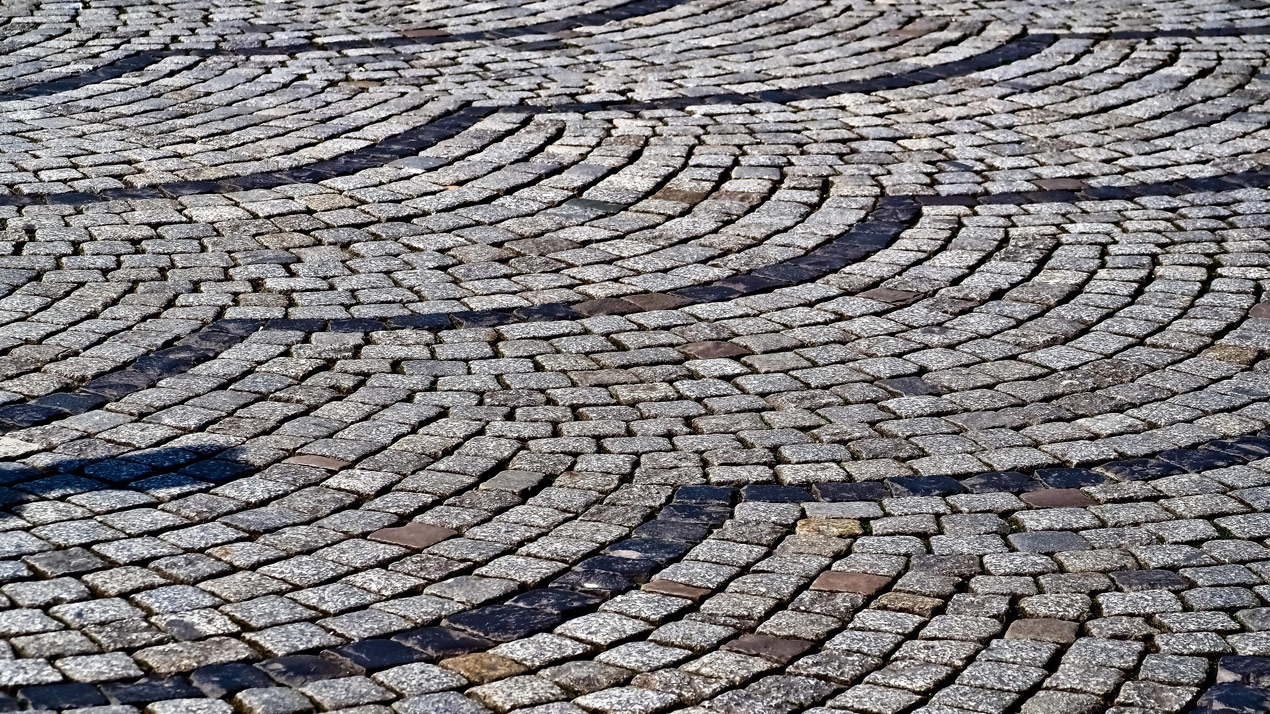
A nice example of traditional stone setts laid in wave/fan patterns. Notice how the radii of the arcs have achieved by exploiting the size variance of the setts and their traditional wider joint sizes. Each block is manipulated/directed within the tolerance afforded, with smaller setts being selected where adjustments to the angle/direction of the course’s arc are required.
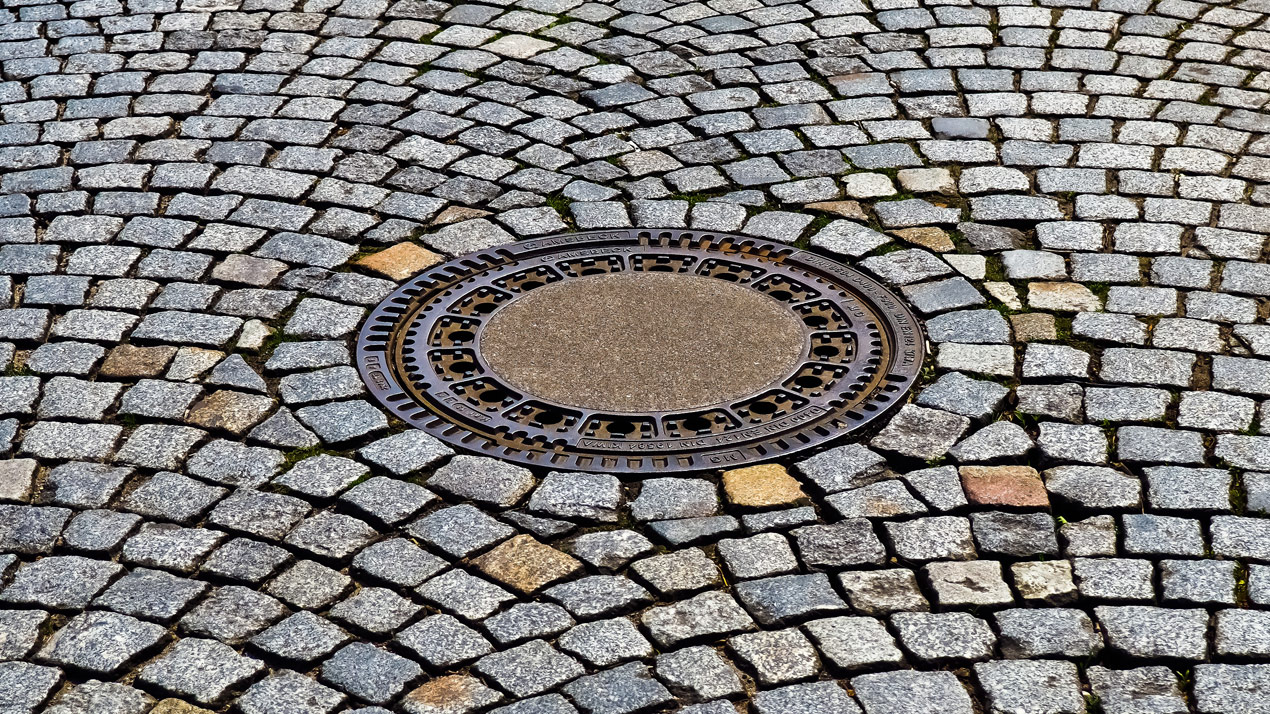
Setts laid in a wave/fan arrangement in conjunction with a circular pencil course edge around a manhole cover. Notice how the mason has cut in custom wedges where the fans meet the circle edge course. These custom wedged stone setts were likely hewn in short order using a masonry hammer, with the mason scoring the cutting line with the chisel before splitting the stone at the appropriate point with more forceful strikes from the hammer.
Contrasting colour is one of the simplest ways to achieve interesting and eye-catching designs when laying paving. In this example, we can see black granite setts laid in a pencil line course to create a series of distinct waves within this “cobbled paving” of grey granite setts.
A single-stretcher edge course used on this pathway paving. The edge course stretcher has been off-set against the infill pattern (also a stretcher bond pattern) so that it appears to run perpendicular to the infill paving (although both edge course and infill are the same format square stone setts). This cleverly gives the observer visual distinction between the edge course and infill, when using the same format of stone.
Granite setts laid in a gentle off-set stretcher bond. This gives the pattern of these setts a slight diagonal appearance. Each row moves to the right about 25% of the width of a sett, to create an orderly slant to the paving blocks.

Black granite setts laid in a stretcher bond pattern on this driveway entrance. The dark grey / black granite provides a strong, visually impactful contrast to the brindle blocks of the interior property’s driveway. Likewise, the lighter colour mortar used in the pointing of the granite setts really helps the laying pattern visual “pop”.
When laying mixed or random sized setts, the pattern will lend itself to more random, haphazard and pragmatic layouts. The result is a more “organic” and natural looking, as the stone setts are placed where they will fit, rather than following a prescriptive pattern. This creates paving that feels more rustic and informal.

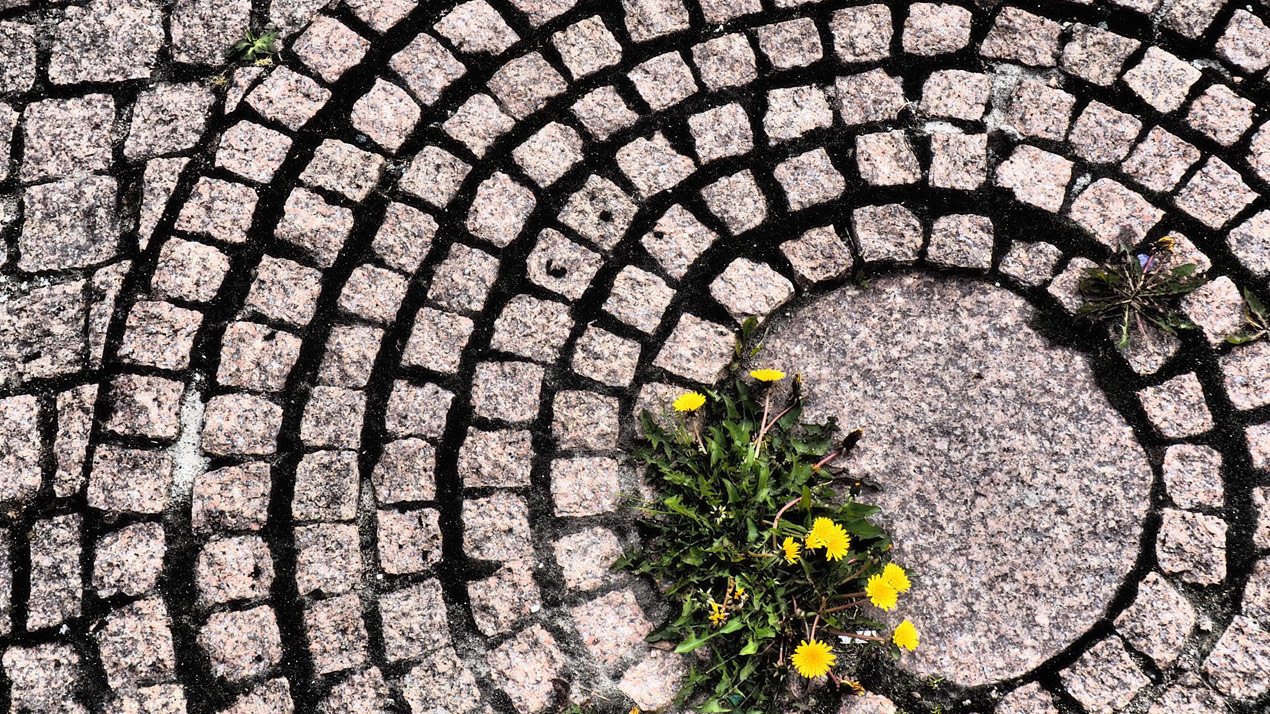
A rustic paving circle of granite setts surrounding a circular centre stone. Notice these setts are smaller than those in the top left. Their smaller format makes them easier to orientate and layout in a circular pattern, without having to cut the stones. The rustic style provides more tolerance in the joint width, allowing the setts to use the varying wedge-shaped angle of the joint to accomplish the circle.
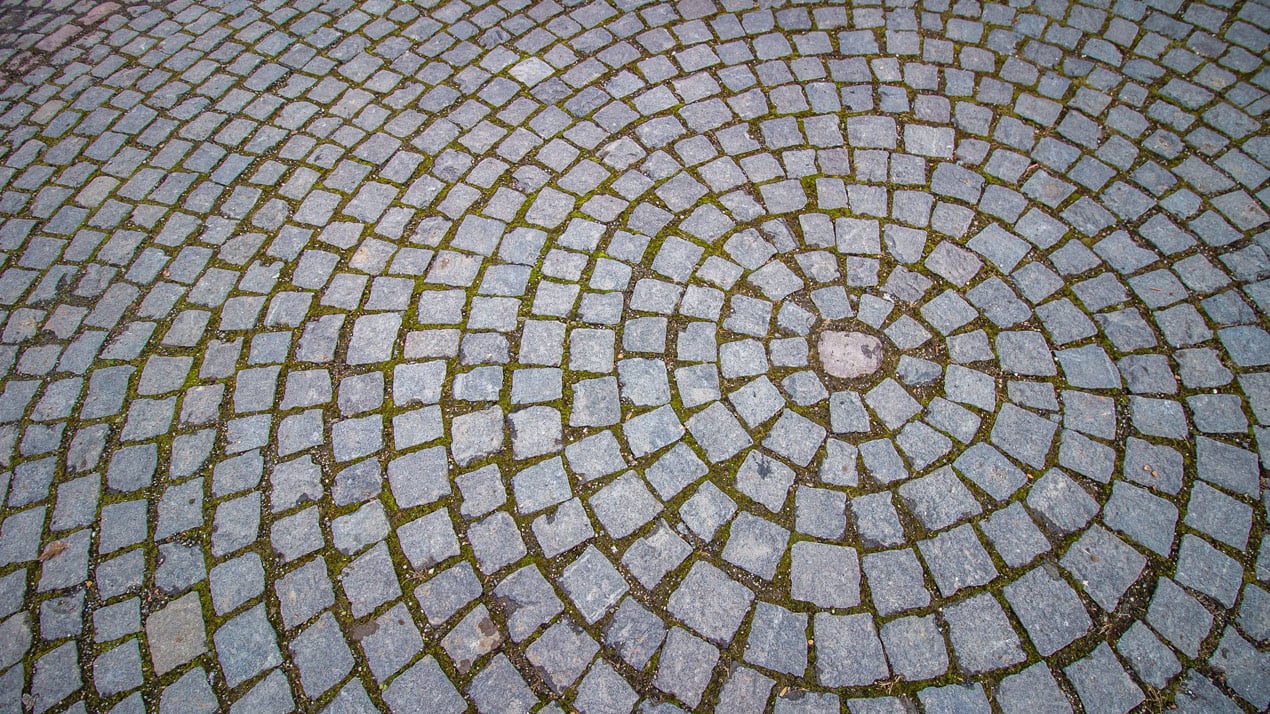
This circle of hewn stone setts radiates from a single sett in the centre. The joint style is rustic, which lends itself to wider joints and looser tolerances, which enable the paver to create the circle without having to make lots of precise cuts.
These tumbled 2:1 format red/brown granite setts have been laid in a circle around a single sett. Notice how the 2:1 format means the laid paving pattern is circular in spirit only, and it is not until going out about 3-4 rings of setts from the axis, that one starts to see what could genuinely be called a circle.
These mixed size Oxford Tudor Cobbles with their tumbled, rounded edges provide the perfect surface for period home driveways and courtyards where a traditional/historic look and feel is needed. Their pattern is designed to follow traditional precepts and avoid creating cross-joints, where four line meet as a cross.
Irregular & Highly Decorative Laying Patterns
In this section, discuss irregular paving patterns and paving designs that use high-contrast elements and ornation to create visual interest.
The “irregular” appearance of crazy paving lends itself to a mid-ground between truly natural occurring shapes, and ordered and regimented processed/dressed stone. It has a faux natural quality that provides visual appear and interest. Popularised in the UK in the 1960-1970’s, crazy paving is seen less commonly now, but it is still popular in North America and in Europe.

This concourse demonstrates the use of contrasting coloured paving blocks to create a visually interesting pattern. The paving utilising a 4:1 Dutch/Flemish style block paver laid in a series of basket weave pattern variations (single colour, alternating colours, colour pairs etc).
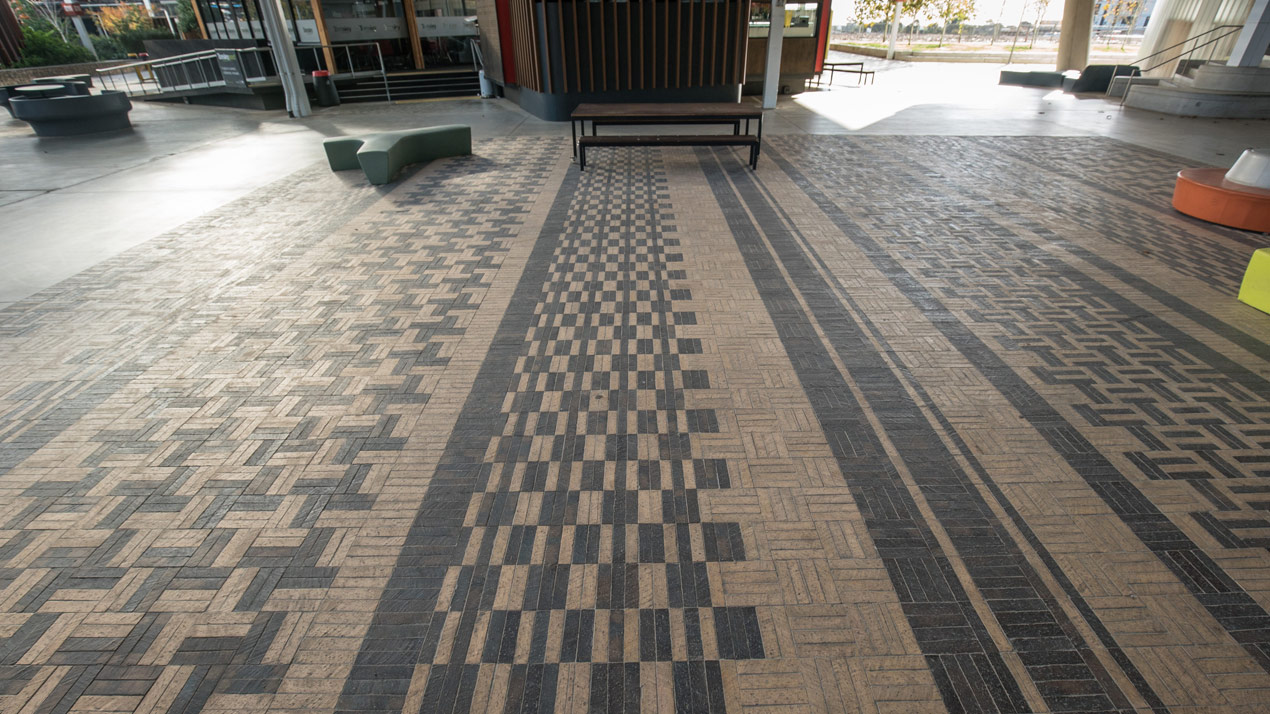
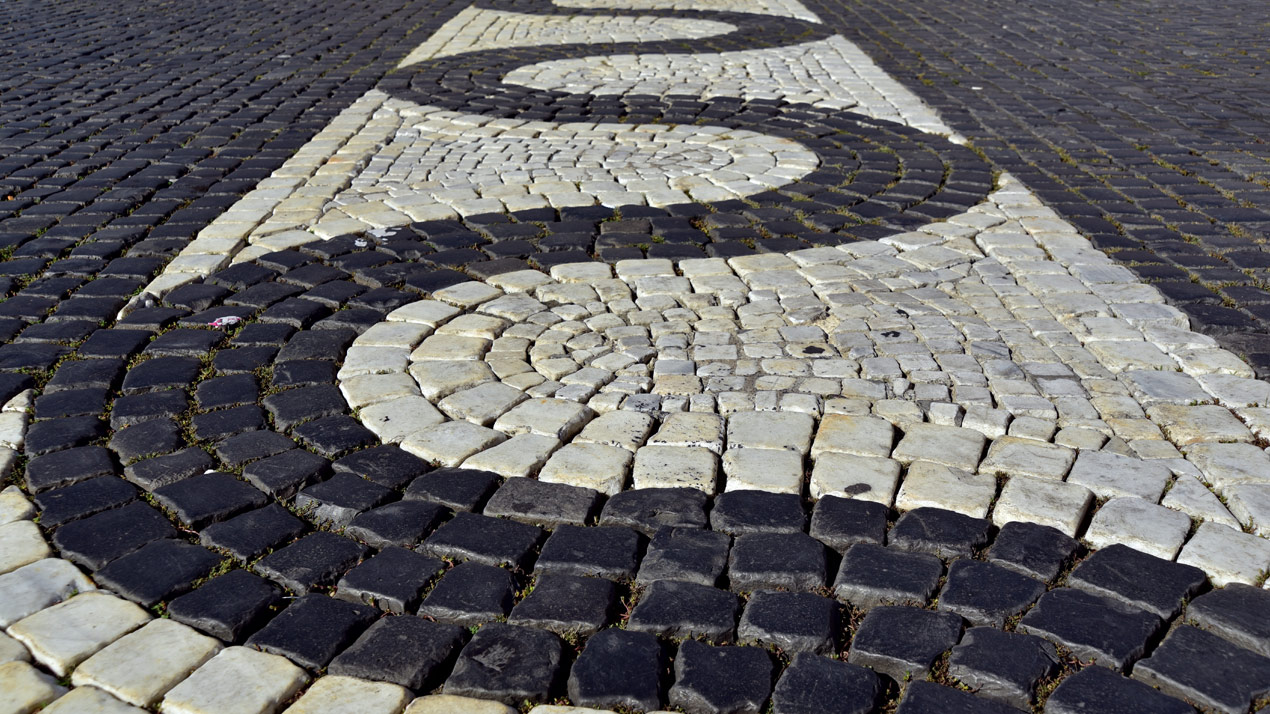
This paving in Prague, Czech Republic uses contrasting colour setts to create a vivid design motif. Both the double-stretcher inlays and the darker infill sections use stretch-bonds, with the infill sections orientated to the centre of the piece.
Contrast colour setts used here to form a series of curved, serpentine shapes utilising a chessboard infill that are orientated in a different direction to the surrounding lighter stone blocks.
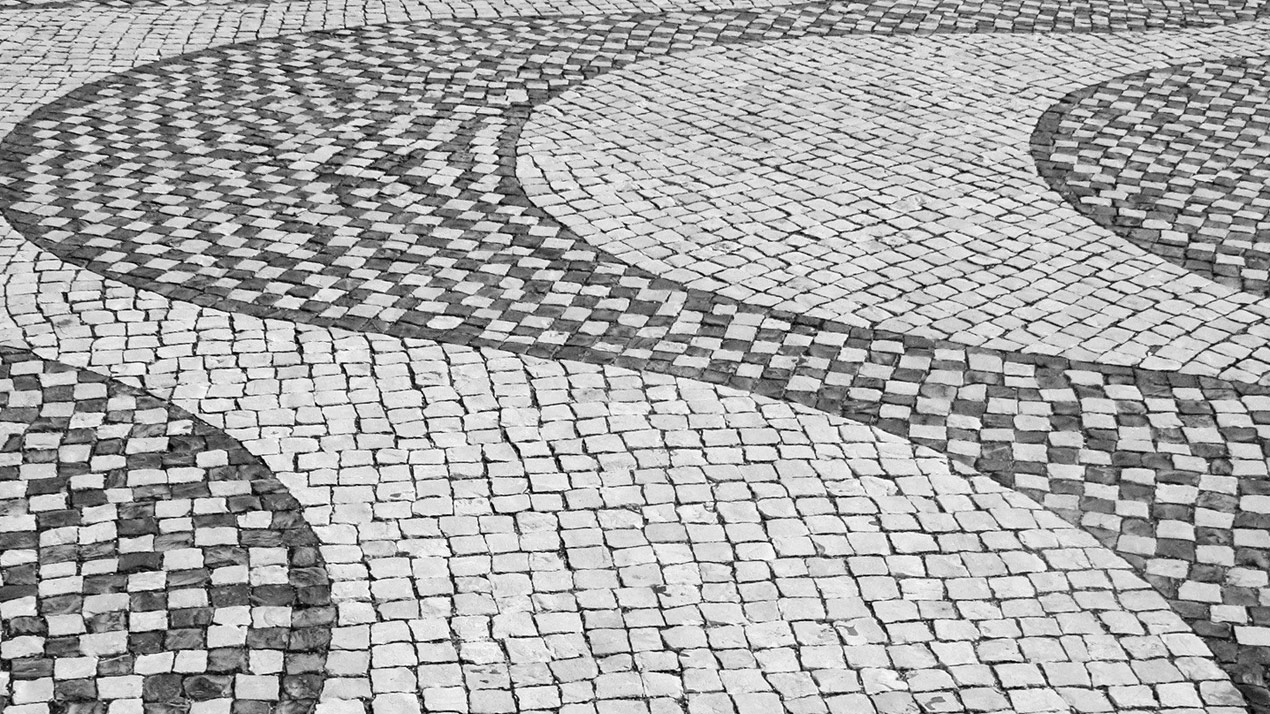
Contrast colour setts have been laid here to create a custom serpentine design. Notice how the infill of the lighter section has smaller format setts as well as the matching sized ones.
Edge Course & Inlay Laying Patterns
Driveways and pathways will often have an edge course that is part of the paving (distinct from kerbs or edging stones) that helps provide visual interest and define the border of the paved area.
In this section, we will illustrate and discuss some of the edge course that can help elevate the appeal and sense of craft that these types of ornation provide. Often it is this attention to detail that make the paving appear artful and loved, rather than merely functional.
Soldier Course – Driveway Paving Laying Pattern
A soldier course is one where blocks are lined up with their longest dimension running perpendicular to the line of the course (so the blocks run with the longest length at right angles). The name is derived from a visual imagery of a line of soldiers on parade standing shoulder-to-shoulder.

Here we see a contrasting colour soldier course in Brindle adjacent to an infill of Charcoal block paving. Notice that the infill utilises a pencil inlay course between the soldier course and stretcher bond main infill.
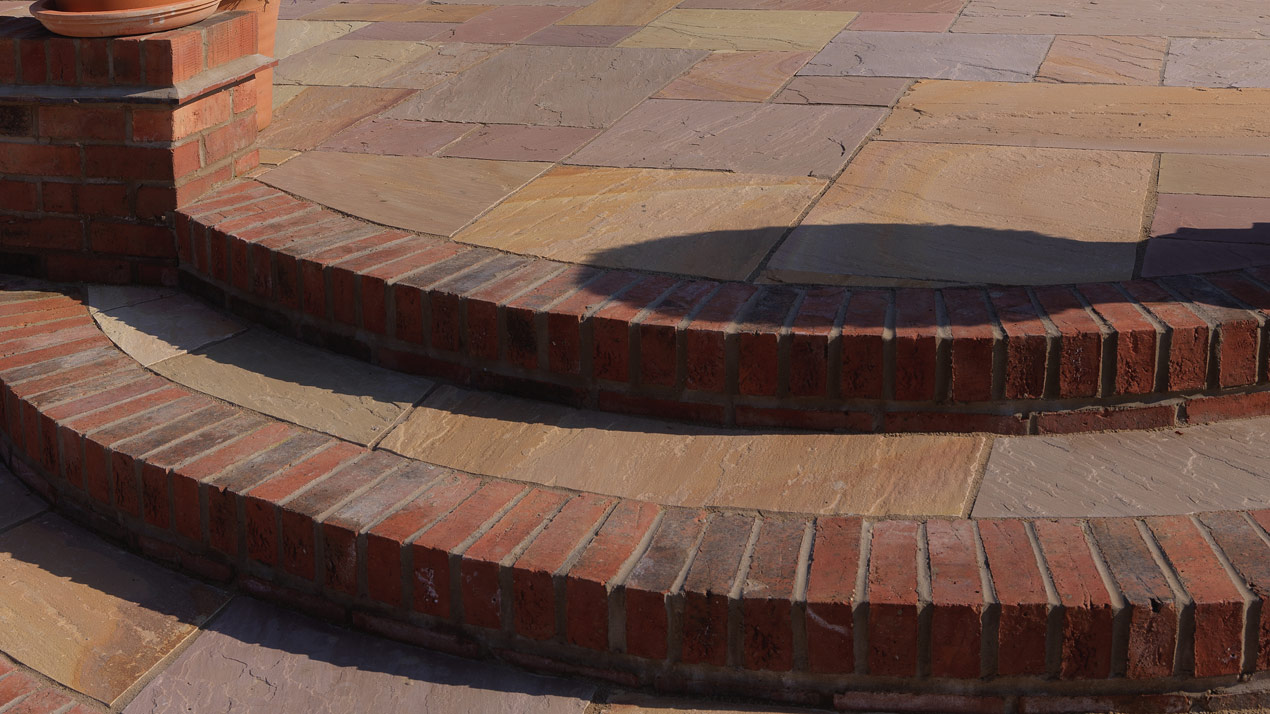
In this example, we can see bricks laid in a soldier course to create steps on this patio terrace. The red bricks work well as a low contrast visual break against the rosy brown, tan and purple hues of the Heather Blend India sandstone paving slabs.
Pencil Line Inlay – Driveway Paving Laying Pattern
An inlay course is one where the blocks are inset/inlaid from the edge course. Often, inlays will use a contrasting colour or block format from the main body of paving and edge course, to create a visually distinct course. A pencil line inlay course is typically a line of single blocks (usually laid along their length) and more often not offset in a stretcher bond, but rather level or flush to the edge course or main paving body.

Here is a nice example of a pencil inlay course of setts being used to separate two different colours of paving slabs (Dolomite Dark and Dolomite Moon). The colour contrasting paving has been used to define a path or thoroughfare from the house to the outdoor kitchen. Note that the slabs have been laid at a 45-degree angle to the house and pencil course. This design decision demonstrates a sense of love/care and attention to detail/beauty, thereby improving the overall aesthetics of this patio.
Edge courses are great for helping to define paving areas, where they can be used to “picture frame” the patio space to say “this is one bit, and distinct from those bits!” Here we can see setts used to define the cooking area of this outdoor kitchen space (Dolomite Moon porcelain paving) distinct from the rest of the patio (Dolomite Dark porcelain paving).
Stretcher Bond inlay – Driveway Paving Laying Pattern
A stretcher bond inlay course function is to add visual interest and contrast to the main body of paving. Often it will be laid using different colour blocks or might also include blocks of a different dimension/format. The stretcher bond inlay differs from the pencil line inlay in that the blocks are laid to sit offset to the joints of the paving or edge course to create the “stretcher” effect.

Double Stretcher Bond – Standard 2:1 Block – Driveway Paving Laying Pattern
The double stretcher bond inlay serves the same visual interest and contrast purpose of all inlays, but adds a bit more weight. The double stretcher sees both courses offset to themselves and the edge course and main body of paving. Usually this is achieved by having the edge course and main paving body running perpendicular to the inlay course, so the middle-line offset ensures that no joints meet.

Triple Stretcher Bond – Standard 2:1 Block – Driveway Paving Laying Pattern
A triple stretcher bond inlay can be used to create some dramatic visual distinction as part of the edge course design. Three rows of stretch bond inlays are laid along the length of the edge, offset against the edge course and main body of paving block.

A “cobbled” driveway of tumbled stone blocks showing a triple stretcher bond edge course. The triple stretcher bond edge course is a traditional design that is commonly seen and used in the UK when “cobble” setts are laid on driveways and roads.
A traditional “cobbled street” made up of a main infill of sandstone setts laid in a stretch bond, bordered with a triple stretcher edge course of the same sandstone, meeting the fanned arcs of grey granite setts on the right.

Conclusion
As demonstrated above, paving can be laid in a variety of ways, with many combinations and possibilities. If you are imaginative and willing to take the time to create custom cuts, then there really are no limits to the patterns and design motifs you can create.
We hope this guide has triggered your thoughts and inspired you to do something creative with your garden landscaping and paving designs.
Remember, you can paper prototype ideas, either with rough sketches, detailed drawing or even with scaled cut-out paper/cardboard pieces to represent your paving.
As you’ll be looking at and living with your patio for many years, we firmly believe you should take the time to ensure that every time you see your patio, you think it is beautiful, and it brings you a little happiness.
Good luck with your paving projects. Should you need any advice, please don’t hesitate to contact our team, who will provide free help and answer your questions. Contact us.