


Summary
This guide is suitable for all three types of patio paving slab installation:
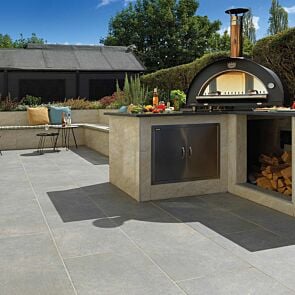
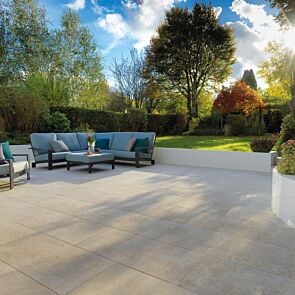
- Porcelain Paving Slabs
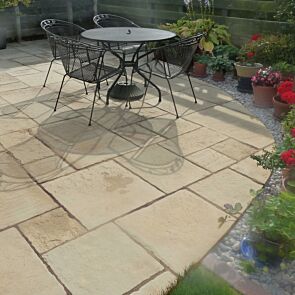
- Natural Stone Paving Slabs (Sandstone, Limestone, Slate & Granite)
- Concrete Paving Slabs.
There are seven primary steps when laying patio paving. They are:
- Measure up and mark out your patio
- Dig out the patio area (200mm depth)
- Lay the sub-base (compacted & 150mm depth)
- Lay a concrete mix mortar bed (50mm depth)
- Lay the paving slabs on to the mortar bed and tamp down. Ensure you leave the desired joint spacing between the slabs and the slabs are “level” to the fall
- Leave the set for 24 hours so the concrete mix (mortar bed) can cure
- Fill the joints between the paving with pointing.
There are some additional steps that may or may not be appropriate for your installation, depending on what paving slab material you have selected:
- Seal the slabs (natural stone and concrete slabs)
- Stain/seal the slabs (black stone sealer).
Each of the 7 primary steps has subtasks and further considerations which we cover in more detail below.

What tools do I need to lay a patio?
- Tape measure
- String line and pegs
- Spirit level
- Rubber mallet
- Shovel
- Trowel
- Rake
- Wheelbarrow
- Flexi-tub/bucket
- Cement mixer (optional)
- Wacker plate or roller
- Broom (for pointing stone/concrete with jointing compound)
- Pointing tool (for pointing stone/concrete with jointing compound)
- Grout float (for pointing porcelain paving with grout)
- Tile wash float/sponge (for pointing porcelain paving with grout)
- Washboy (for pointing porcelain paving with grout)
- Paint brush (for applying priming slurry to the slabs)
What materials do I need to lay a patio?
- Paving slabs
- Sub-base aggregate
- Cement (general purpose OPC)
- Sharp sand
- Priming slurry
- Jointing compound or grout
Recommended optional materials:
- Grout & Cement Residue Remover
- Resin Residue Remover
- Paving Sealer
- SBR Bond.
1) Measure up & mark out
The first step of your patio project is to decide where it will be located and to mark out the area. Once you have decided where it will go you’ll need to measure up the dimensions so you can calculate the coverage in square meters (m²).
Q: How do I calculate the square metres m² of the paving area?
A: Multiply the width by the height of the area in metres (e.g. w4m x h5m = 20m²)
Area Calculator Tool
Once you know the coverage it will allow you to calculate how much paving you will need, and determine the cost of materials for your patio project. Always calculate at least 10% more paving than the coverage – this will give you enough contingency for breakages, cuts and corners etc.
Q: How much paving do I need to buy for my patio?
A: Calculate the area in square meters (m²) and add another 10% for for breakages, cuts and corners (20m² + 10% = 22m²)
Remember to also calculate your material quantities for your mortar bed and sub-base. We recommend that the sub-base of DTp1 Hardcore (MOT Type 1) be at least 150mm in depth once compacted down.
You should calculate a laying course with a full concrete mix mortar bed that has a depth of 50mm.
Q: How much sand, cement and other aggregates do I need?
A: 150mm compacted sub-base of DTp1 Hardcore (MOT Type 1), 50mm full bed laying course of 5:1 mortar (sharp sand and cement)
Q: What is dry laying?
A: Dry laying is a practice layout where you’ll test the laying pattern, coverage and colour blend/mix of your slabs. Simply place the slabs over the area where they will eventually be laid, and checking everything looks good before you lay they for real.
Q: Why should I dry lay my patio?
A: The old adage measure twice, cut once is why you dry lay. You want to ensure your measurements are right and you understand the selected laying pattern. This is also an opportunity to mix your slabs so they blend nicely (this is especially important with natural stone where different packs will have tonal and colour variation that you should mix and blend before you “wet” lay them). Consider numbering the underside of your slabs for easy laying so you can exactly replicate your dry lay.
You will also need to calculate the fall (the gentle slope or gradient which will be applied to the patio to allow surface water to run-off for drainage. This is usually calculated at 80:1 drop per metre in the direction you want the paving to drain (e.g. 12.5mm drop per meter), but a ratio of 60:1 can be used when necessary if the paving surface requires more assistance.
Q: What should the fall (gradient) of my paving or patio be?
A: An 80:1 gradient is recommended for the fall. To calculate this, divide the length of the paved area (the run) in millimetres by 80 to give you the correct fall in millimetres. So a patio with a 5.76m run (5760mm) would calculate the fall as 5760/80 = 72mm drop.
2) Dig out the patio area
Use staves/pegs and string line to mark out the area you will need to dig out to create your substrate. Start with a datum line running between two pegs – this will represent the edge and the highest surface level of the patio.
If you are placing your patio next to your house remember that the datum line must be lower than the damp proof course (at least 100mm lower) to ensure the patio does not disrupt the property’s damp protection.
You want to use the datum line of the patio’s highest edge to project the left and right edges where necessary. You can ensure these run at 90° by using the 345 Pythagorean right-angle triangle method using your guide lines and a tape measure, or alternatively you can use builder’s folding square.
As far as possible the substrate which you have dug out, should be free of bumps, lumps, hallows and dips.
Q: How deep do I need to dig out my patio?
A: Approximately 160-210mm+ depending on the 1) firmness of underlying soil 2) thickness of your slabs and 3) how much fall you are applying to the lower end of the run. That figure comes from the following:
- 100mm – 150mm sub-base (depending on underlying ground)
- 40-50mm mortar bed
- 15-30mm paving slabs (minus 5mm to 15mm tamped down into mortar bed)
- plus the fall at the lower end of the run
3) Prepare & lay the patio sub-base
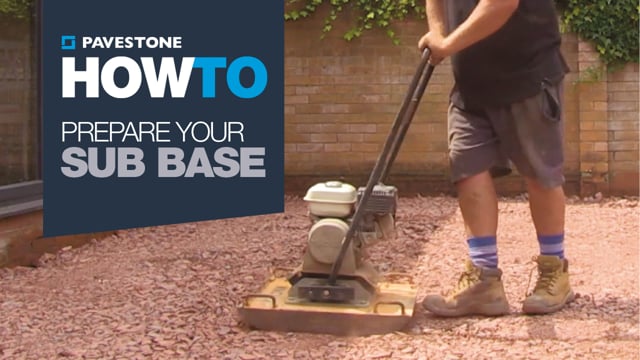
To provide a stable and secure platform for your patio installation, you will need to add a sub-base of compacted DTp1 hardcore (an aggregate with particulates ranging from 40mm down to dust).
We advise that you lay your sub-base to conform with the required fall. You can gauge this with string and pegs or depth staves.
In both cases, you’ll start with a projected level line from the top of your patio (the datum line) and then measure down to either tie a line at the required gradient of the fall, or knock in staves at 1m or 2m intervals with the top of each stave representing the required depth of hardcore sub-base.
Sub-base of DTp1 aggregate (MoT type 1 hardcore)
Lay the DTp1 hardcore sub-base, ensuring it is compacted and even. It should be 150mm in depth once laid. We recommend laying the hardcore in two or three layers, compacting down each as you go. This approach will add strength and stability to the hardcore sub-base.
“Wacker” plate compactor
We recommend using a wacker plate (compactor plate) as this tool is the easiest way to ensure your hardcore is properly compacted, and that the aggregate particulates are settled and stabilised. If you don’t have one, you can usually hire one inexpensively (approx £25 a day).
Q: What is the best way to compact a patio sub-base?
A: Use a mechanical compactor AKA “wacker plate”. These can be hired for a little as £25 a day.
Traditionally, a blinding coat (builders’ sand) was sprinkled on top of the hardcore to finish the sub-base, but if you’re using DTp1 (MOT Type 1) hardcore and a wacker plate this is not generally required (as the fine particulates and compacting forces generate the required finish).
4) Mix your mortar and prime your paving slabs

We recommend a cement mix of 5:1 sharp sand to general purpose/ordinary Portland cement (OPC) as this will provide good strength and bonding. You may consider also adding an SBR bond to the mix to increase bonding, elasticity and reduce osmosis.
Some landscapers like to swap a little builders’ sand for sharp sand to the mix – this will give the mortar a more pliable texture allowing you to make fine adjustments to the slabs more easily when laying them, but it will slightly weaken the mix.
Use sharp sand for your bedding mortar cement mix
Sharp sand is used for the laying coarse concrete mix because firstly, it has improved strength and cohesion. Secondly, it also offers better adhesion and grip to the slabs. Lastly, it also helps prevent insect and burrowing animal intrusions too!
Q: What mix ratio should I use for a patio mortar bed?
A: Use a 5:1 mix of sharp sand to general purpose cement.
Some landscapers may use weaker sand-cement concrete mixes where the slab is slightly porous and the underside is courser and has more natural grip (e.g. sandstone), but this will inevitably make for a weaker bedding layer with weaker bonds to the slabs.
For porcelain paving in addition to a strong 5:1 ratio cement mix for your bedding mortar you must use a priming slurry to aid adhesion between the bedding mortar and slabs. Porcelain slabs are vitrified (non-porous), so have less grip and natural bonding than found with more porous stone or concrete slabs – so a priming slurry is essential.
Laying coarse bedding mortar should a pliable but firm cement mix
The bedding mortar should not be too wet, nor not too dry. It should be reasonably firm and hold its shape when you trowel down the laying coarse. It should be creamy and pliable. Ideally you want to be able form small peaks above the line of the laying coarse so when you tamp down the slab into the mortar it creates a full bed and the peaks spread out under the slab.
Q: How wet should the bedding mortar cement mix be?
A: It should be just wet enough to hold the mix together and be pliable. If it is too wet, when you trowel it down, it will not provide the support or hold the peaks/ridges needed to ensure a full bed from the laying coarse.
Consider hiring or buying a cement mixer (mixing the mortar in a bucket or a flexi-tub by hand is very time consuming and labour intensive).
Use priming slurry to ensure your patio slabs bond properly with the bedding coarse

We strongly recommend that you apply a priming slurry to the back (underside) of the slabs prior to laying them. This will improve adhesion/bonding and provide additional protection against damp/osmosis related issues such as efflorescence and rust blooming, which can blemish and mark the stone.
Q: Why do you add priming slurry to the back of paving slabs prior to laying them?
A: Priming slurry provides excellent bonding/adhesion and helps prevent damp/osmosis related blooming issues with paving too. Priming slurry is a must for porcelain slabs, which need the adhesive properties to help the cement mix bed and slabs bond properly.
You can also add an SBR Bond additive to the cement mix too which will further improve adhesion/bonding of the mortar bed.
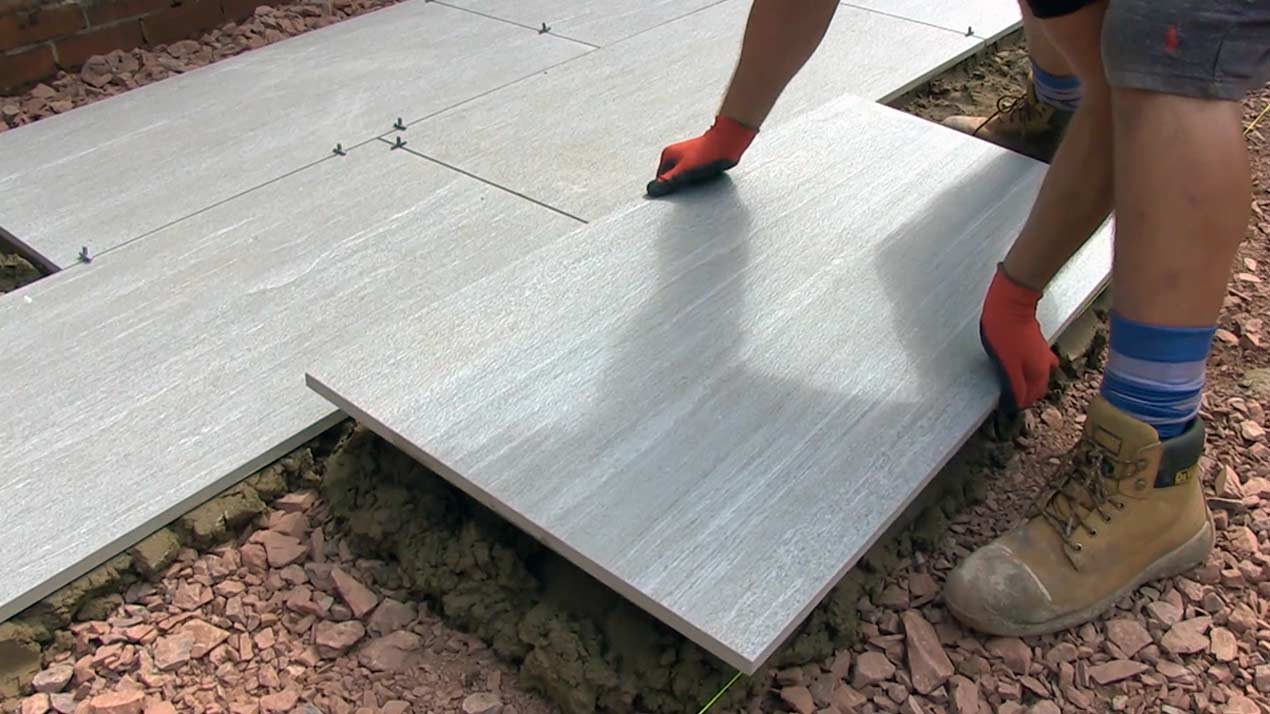
5) Lay the patio slabs
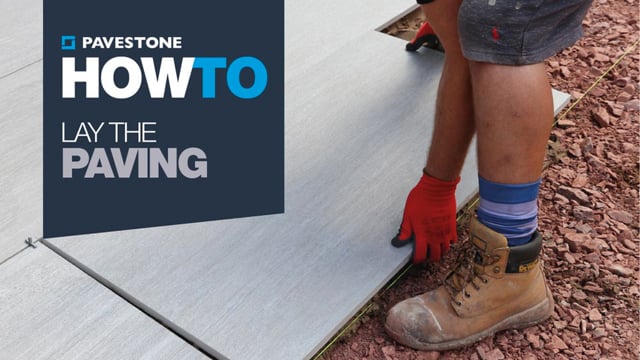
As mentioned above, your patio slabs should be laid on a full bed of mortar. A full mortar bed will ensure stability, adhesion and prevent voids that can collect water, causing damp patches, staining and related issues (efflorescence and rust blooming).
Q: Why use a full mortar bed when laying a patio?
A: Any method of bedding using voids is not recommended by professional landscapers and can cause significant problems once the job has been completed.
- Voids fill with water and create subsidence or instability in the finished patio. The resident water pools under the paving will cause discolouration on the face of porous paving.
- Water filled voids will increase damage to your slabs by freeze-thaw erosive action.
- Voids can cause paving to crack/fracture due to lack underlying support.
- Voids may become infested by insects or burrowing animals.
- “Dot and dab” mortar spots many cause the paving to be unstable and are more likely to rock when traversed (a trip hazard that must be avoided).
Trowel the laying coarse cement mix where you want lay the slab
As you lay each slab, trowel the cement mix laying coarse where the slab will be placed. The cement mix mortar should be approximately 50mm in depth. Trowel it with small peaks that come above the height of you laying coarse guide string line. This will ensure that when you tamp the slab down to the correct level it receives a full bed from the cement mix as the peaks spread and flatten.
6) Wait 24 hours for the mortar to set

Leave the freshly laid paving slabs and bedding mortar to set for 24 hours so the concrete mix can cure.
Do not allow the slabs to be walked on whilst they set.
7) Point the paving slabs
The gaps between the slabs will now need filling with appropriate pointing material. For natural stone and concrete slabs a two-part epoxy jointing compound such as Pointfix is recommended. For porcelain paving slabs an exterior paving grout such as Pavestone Tile Grout should be used.
7a) Jointing Compound for Concrete & Stone Slabs
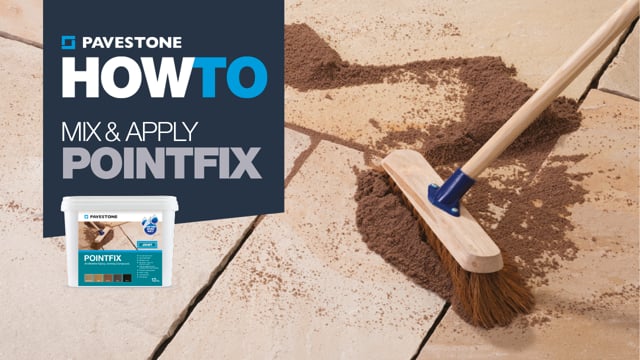
Pointfix is a two-part epoxy jointing compound designed to replace traditional mortar pointing. The main advantages it provides are:
- Can joint in wet or dry weather conditions (does not matter if it is raining).
- Very easy to install/apply – no specialist tools
- Brush in and brush off
- Suitable for natural stone and concrete paving, blocks, cobbles, setts and bricks
- Pet friendly
- Quick – fast application and finishing with quick curing
- No Waste – only mix what you need
- Non-staining – does not leave stains or colouration on paving
- Prevent weeds – inhibits weed growth in your paving joints
Jointing your paving with Pointfix
- Mix the two part mix in equal quantities
- Thoroughly mix in a tub/bucket until the colour is uniform and consistent
- Trowel and brush (us a yard broom) the mix into the joints so they are fully filled
- Use a pointing tool or brush to achieve the right depth and finish to your jointing.
- As the mix starts to cure and harden brush off excess material.
- Once the Jointing compound has set you give the paving a final sweep to brush off any last particles.
7 b) Paving Grout for Porcelain Paving Slabs
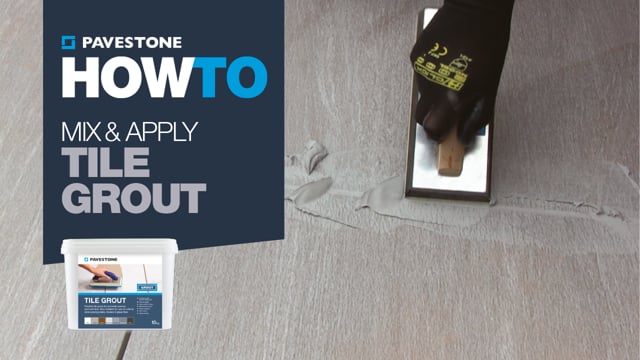
For exterior porcelain paving you will need a suitable paving grout. Most tubs of paving grout come with multiple bags powdered mix. These allow you to make up smaller batches of grout when pointing your patio. You don’t want unused grout curing and going hard before you’ve been able to apply it to the paving joints, so mix the bags as and when you need them.
Mix the grout
- Each bag of grout mix will have a precise amount of water to which you’ll add the powder.
- Always consult the packing/instructions for the precise amount of water per bag.
- Use fresh clean water (and a clean bucket).
- Carefully measure your water.
- Pour the correct amount into a mixing bucket or tub and slowly pour in a bag of powder.
- Mix with an electric drill with a mixing paddle or use a dedicated electric mixing paddle.
- Ensure that the mix is smooth and free of lumps
Apply the grout, and then clean off the excess residue
- Ensure the joint is dry so the applied grout adheres to the porcelain slabs on either side of the joint correctly.
- Dampen the surface of the porcelain slabs (without wetting the inside of the joint) – this will help the grout float move more smoothly as you apply the grout and assist cleaning up residual grout on either side of the joint.
- Using a grout float, press the grout into the joint ensuring it fully fills the joint and smooth with the float.
- Spread and removed excess grout, pushing further down the line of the joint to leave as little residual grout on either side of the joint as possible. Work like this along the line of the joint.
- Clean the slabs – use a tiling sponge or tile wash float to wipe away the residual grout (grout haze) on either side of the joint. You will likely need the grout to harden/cure slightly so you are not wiping it away from the joint, but you’ll need to start cleaning whilst the grout haze is still easily wipeable (i.e. not cured).
- Wipe away the grout haze with your sponge/wash float at a 45 degree angle to the joint to ensure you don’t catch, smear or excavate the grout from the joint.
- Ensure this cleaning/sponging process is done as soon as the grout has started to harden. You don’t want the residual grout haze setting, so clean and wiped it away as early as possible. Don’t leave cleaning away the grout residue for “later” as it will harden/set and be difficult remove.
- Consider using Pavestone porcelain tile protector which is a pre-grout treatment that makes cleaning off the grout haze/residue much easier.
Sealing your patio paving
Porcelain paving is essentially non-porous and waterproof (its a vitrified almost impermeable material) so it is much less prone all the issues related to porosity and water absorption faced by concrete and natural stone paving.
Water absorption & porosity
All unsealed natural stone and concrete paving is porous (permeable) so water is absorbed into the paving to various degrees depending on the type of stone or concrete used.
Because water is absorbed in paving
- Freeze-thaw erosion where water in the slabs expands and contracts as ice is formed and then thaws. This can weaken the slab and cause delamination over time.
- Chemical erosion often occurs when local natural water or environmental conditions lower the pH to less than 7 and the water is therefore, acidic (which is damaging to most natural stone and concrete).
- Spills and blemishes (oil, fat, wine, lawn fertilisers etc are all part of the wear-and-tear of outdoor living that a patio will likely be subjected too.
- Efflorescence where crystalline, salty deposit form on the paving as salts are surfaced through capillary action and/or osmosis
- Iron staining where rust from ferrous/iron deposits in the stone or from particles in the underlying aggregates or mortar are brought to the surface from moisture and/or osmosis
- Organic matter & staining – leaves, fruit trees and other flora (especially as they decompose in damp winters) can more easily blemish porous stone and concrete, often leaving stubborn and difficult stains that require special cleaning products to remove.
Protect you paving with a sealer
An affective way to avoid many of the issues facing concrete and natural stone paving in the list of issues related to porosity is to seal the paving slabs.
There are two types of water based impregnating sealers for all types of natural, reconstituted stone and concrete paving that should meet most people’s needs:
- Natural Finish – as the name suggests, this type of sealer leaves the stone or concrete slabs looking almost identical to their previous state prior to sealing (although there will be a very subtle change).
- Colour Enhancing Finish – this type of sealer will darken stones or concrete and enhance the vibrancy and colouration of the paving. Blues with be bluer, reds with be redder, but the paving will also have the appearance akin to when it is wet
Before applying any sealer to you patio we suggest testing it on a sample of off-cut to ensure it gives you the aesthetic you desire.
Free & friendly advice
Don’t hesitate to contact our team if you want any advice or have any questions relating to your paving installation project.
Email: [email protected]
Telephone: Mon-Fri (8:00am to 5:00pm) 01993 608 824
If you’re looking to buy, we stock a high-quality range of porcelain, natural stone and concrete paving slabs.