Summary
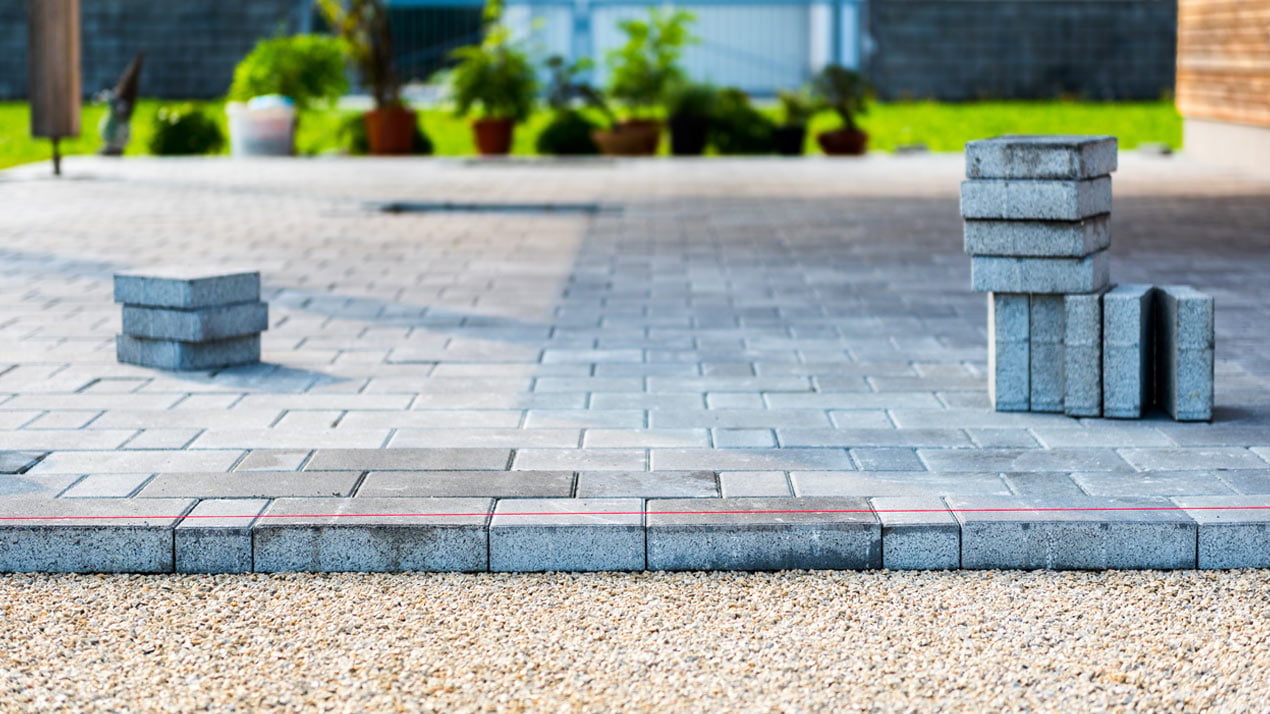
This guide is suitable for “unbound” driveway block paving installations with either of the two most popular types of driveway concrete block paving (standard/split and tumbled/rumbled pavers). If you want to use the following types of paving blocks, this is the right driveway installation guide for you:
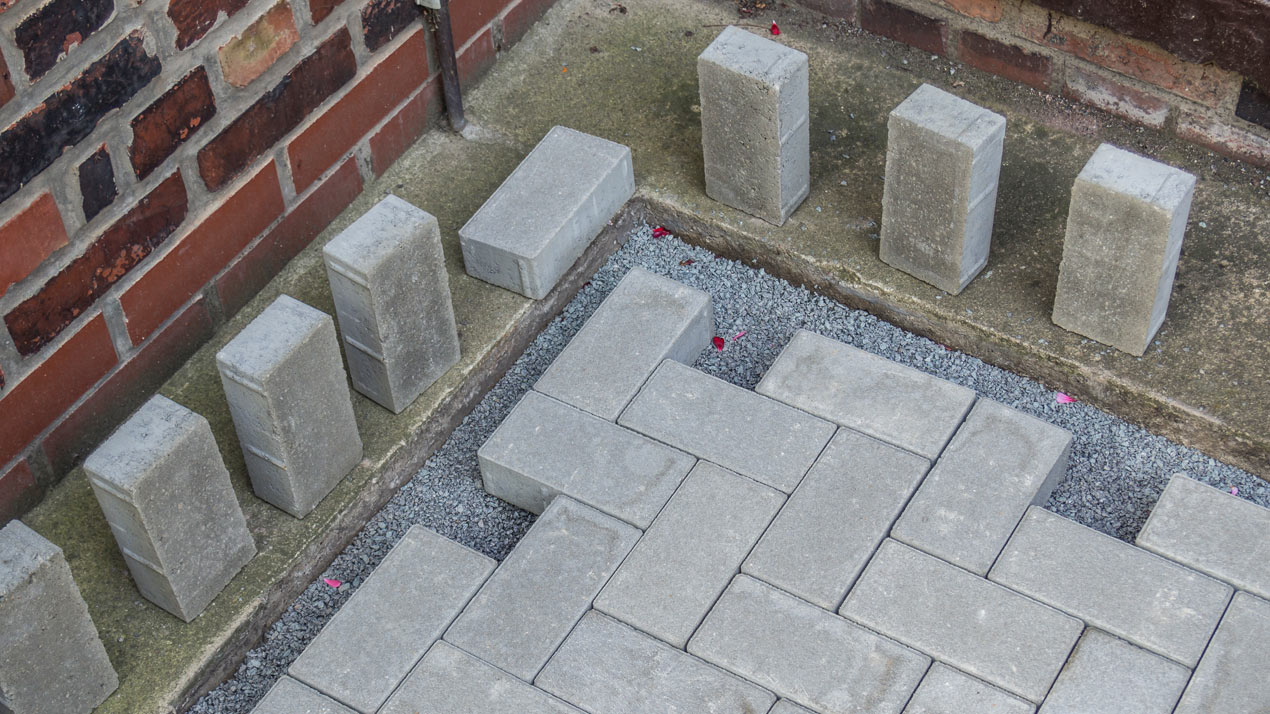
- Standard Block Paving – Straight Edge
- Rumbled Block Paving – Tumbled/Soft Edge
These types of driveway paving blocks are impermeable. So, if the paved area is greater than 5m², the installation will need in-boundary rainwater capture or drainage (UK SUDs regulations designed to prevent water entering the public drains and stop flooding). This will ensure it is compliant with environmental and planning regulations. The two most common methods used for water capture and dissipation within your property boundary are:
- Soak-away crate rainwater capture – using drainage channel in the driveway connected via pipes to an underground soak-away crate.
- Garden capture – using a gradient (fall) on the driveway to drain surface rainwater toward the garden (lawn, flowerbeds or borders) as a rainwater capture/soak-away area.
For unbound paving block driveway installations, there are twelve primary steps within the project:
- Measure up and mark out your driveway, mark up services/utilities (so you don’t cut or dig-up any pipes, cables or conduit), and devise your drainage plan
- Excavate – dig out the driveway area (240-370 mm depth) and drainage channels and soak-away areas as required
- Mortar & Concrete Mix – you’ll need a 5:1 mortar mix on which to lay your edge restraints. You’ll need a second batch when you lay any drainage channels. Lastly, you’ll need a batch of concrete mix to backfill/haunch the edge restraints.
- Edge restraints – lay, set levels and haunch the edge restraints
- Wait 24hrs – allow the edge restraints to cure/set for 24hrs
- Sub-base – lay the sub-base (compacted & 150-250 mm depth)
- Drainage channels – lay any required drainage channels ensuring, position, level and fall are correct
- Sand Screed – lay and screed the laying course (slightly damp sharp sand)
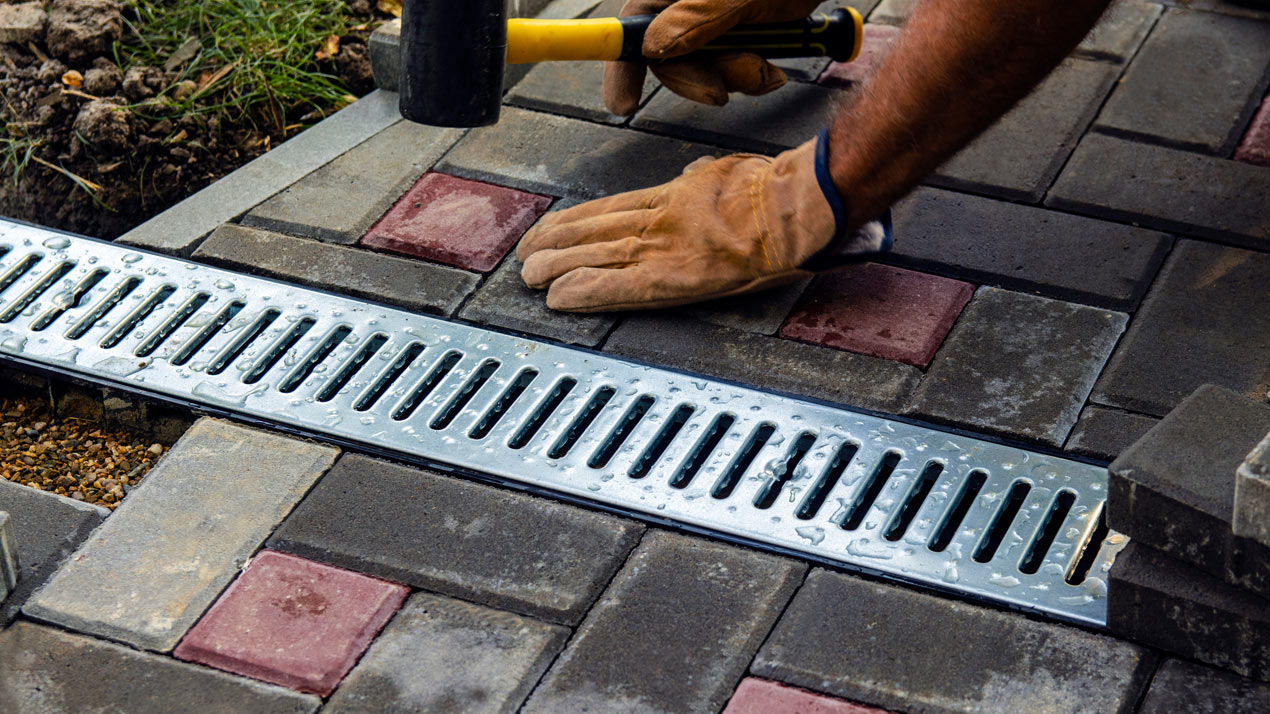
- Lay the blocks – lay the paving blocks in the desired pattern
- Cutting – cut and fit blocks to complete the gaps in the paving
- Jointing – use kiln dried sand to joint the paving
- Compaction – ensure the paving is compact and stabilised.
Each of the 12 primary steps has subtasks and further considerations, which we cover in more detail below.
Cross-Section/Diagram of Unbound Driveway Block Paving Installation

What tools do I need to lay driveway block paving?
- Tape measure
- String line and pegs
- Spirit level
- Rubber mallet
- Shovel
- Trowel
- Rake
- Wheelbarrow
- Flexi-tub/bucket
- Cement mixer (optional)
- Wacker plate or roller
- Broom
- Angle grinder or block splitter for cutting concrete paving blocks
What materials do I need to lay driveway block paving?
- Driveway paving blocks (50mm, 60mm and 80mm depth are common formats with 50mm being used most commonly for domestic driveways where there is less need to handled heavier vehicle weights and more traffic movements)
- Sub-base aggregate (MOT Type-1)
- Cement (general purpose OPC) for the mortar mix used to lay edge restraints and drainage channels, and for the cement mix used to haunch edge restraints
- Sharp sand (laying course, edge restraints & drainage channels mortar & haunching cement mix)
- Coarse aggregate for the haunching concrete mix (20mm washed ballast or 20mm shingle combined with sharp sand)
- Kiln dried sand (pointing)
- Underground drainage (optional)
- Soak-away crates (optional) @ 1m³ for every 50m² of driveway
- Geotextile Membrane
- Joining tape
- Shingle (to backfill soak-away and drains) or washed aggregate with no fines
1) Measure up & mark out
The first step of your driveway project is to decide exactly where it will be located and to mark out the area. Once you have decided where it will go you’ll need to measure up the dimensions so you can calculate the coverage in square meters (m²).
Q: How do I calculate the square metres m² of the driveway?
A: Multiply the length by the width of the area in metres to give you the total metres squared coverage (e.g. 15m x 4.5m = 67.5m²)
Once you know the coverage, it will allow you to calculate how much block paving you will need, and determine the cost of materials for your driveway project. Always calculate at least 10% more paving than the coverage – this will give you enough contingency for breakages, cuts and corners etc.
Q: How much block paving do I need to buy for my driveway?
A: Calculate the area in square meters (m²) and add another 10% for breakages, cuts and corners (20m² + 10% = 22m²)
You will also need to calculate the material quantities for the other required project elements too:
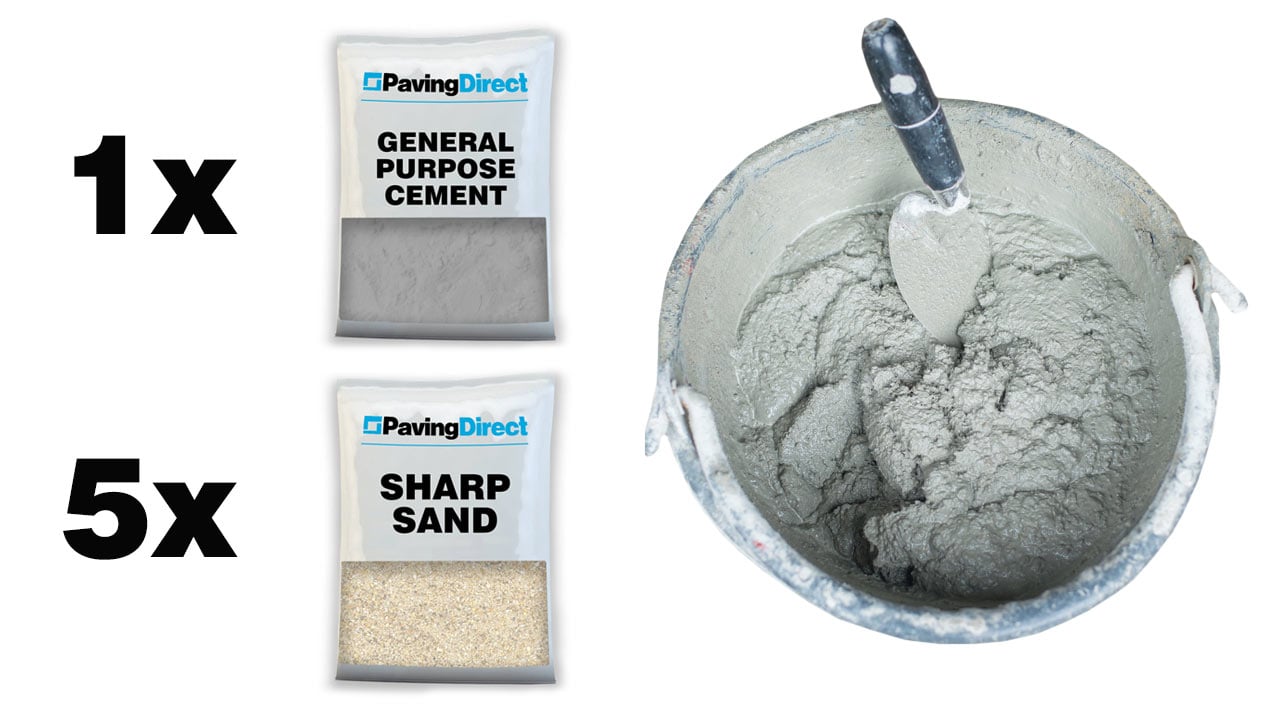
- 5:1 Mortar Mix (Sharp Sand & Cement) – enough for the bedding of the driveways edge restraints (kerb stones or similar) and drainage channels.
- 5:1 Concrete Mix (Ballast/Coarse Aggregate & Cement) – enough for the backfilling/haunching of the edge restraints
- MOT Type 1 Hardcore (Type 1 SHW clause 803) – for the sub-base (compacted and a minimum depth of 150mm)
- Sharp Sand – for the bedding course on which the blocks are laid (compacted and screed with a 40mm depth)
- Drainage channels / slot drainage – sufficient length, so surface water can be captured as it runs off your driveway. Usually supplied in 1-metre lengths.
- Underground drainage – enough pipework and couplings to connect your drain channel to the underground soak-away crate. Remember you’ll also need a P gully trap or similar to capture silt/debris from the surface, and to prevent gas and smells escaping back to the surface from underground.
- Soak-away Crate – You’ll need 1m³ of crates for every 50m² of driveway, plus you’ll need to consider where your roof/downpipes drain and whether these will contribute to the driveway’s run-off water capture?
- Shingle / washed aggregate with no fines – used to encase and support your underground drainage pipes and the soak-away crate
- Geo-textile material and tape – used to wrap and encase the soak-away crate. Geo-textile membranes prevent the ingress silt/fines and soil into the soak-away crate, but are permeable, allowing water to drain through them.
Q: How much sand, cement and other aggregates do I need?
A: 150mm compacted sub-base of MOT Type 1 Hardcore (Type 1 SHW clause 803), 40mm laying course of sharp sand, and enough 5:1 mortar and concrete mix to secure your edge restraints and drainage channels. Additionally, you’ll need shingle or similar aggregate for encasing your underground pipework and soak-away crate as part of your drainage solution if underground capture is being used.
Driveway drainage
If your planned driveway is bigger than 5m², UK driveway drainage regulations require that rainwater that falls on your driveway is “captured” within the boundary of your property (unless you want to apply for planning permission to allow the run-off to enter public drains).
There are four options to tackle this rainwater capture requirement:
- Permeable Paving – using paving that allows the rainwater to pass directly through it and soak into the ground under the driveway. This will require the use of permeable jointing aggregate (3-5mm) and MOT Type 3 (Type 3 SHW clause 805) as the sub-base material, which has reduced fines and will also allow water to drain through it.
- Soak-Away – using an underground soak-away crate connected to drainage channels to capture rainwater within the boundary of your property. The soak-away crate must be located at least 5-metres from your home, and at least 2-metres from the property boundary.
- Garden Capture – using the gradient/fall of the driveway to direct surface water into flower beds, lawns or garden borders where the rainwater can drain away naturally within your property.
- Rainwater Harvesting – using an underground reservoir (connected to drainage channels), that has a pump connected to above-ground water-stowage (such as a water butt) so the captured water can be reused to water the garden.
Driveway Drainage – Gradient/Fall for Garden Capture of Rainwater
If you want to use your lawn, flowerbeds or borders to capture rainwater run-off from your driveway, you will need to ensure the driveway paving has the right gradient angle (fall) so the water drains properly.
To calculate the fall (the gentle slope or gradient which will be applied to the driveway paving) you will need a gradient 80:1 drop per metre in the direction you want the paving to drain. This equates to 12.5mm drop per meter. So if your driveway is draining to a lawn on the side and is 4-metres wide, then the fall would need to be 50mm (4 x 12.5mm) from one side to the other of the driveway.
If the paving blocks have a rougher surface that is less likely to easily drain, a fall of 60:1 (16.66mm per metre) should be used.
Q: What should the fall (gradient) of my driveway be to ensure it drains properly?
A: An 80:1 gradient is recommended for the fall. To calculate this, divide the length of the paved area (the run) in millimetres by 80 to give you the correct fall in millimetres. So a driveway with a 5.76m run (5760mm) would calculate the fall as 5760/80 = 72mm drop.
Flush Edge Restraints & Drainage
Depending on the direction of your fall, if you are using garden rainwater capture method, you may need your edge restraints to be at the same level as the driveway (flush). This will allow the surface run-off rainwater to pass over the edges into the soak-away into the border area of your garden. In this case, you’ll need to select edge restraints that will sit at the same height as the deck of the driveway.
Services/Utilities
Services and utilities (mains electricity, water, gas, telecomms cables, etc) will typically run from the front of the house towards the public road. As this is also the same area where you will usually want to have your driveway, you’ll want to be sure you know exactly where the services and utilities are before you start digging up the ground.
So you will need to identify which utilities you have, and then mark these carefully. This will ensure you don’t cut or dig-up any pipes, cables or conduit when you come to excavate.
2) Excavate the Driveway & Drainage
Use staves/pegs and string line to mark out the area you will need to dig out to create your substrate.
Some key considerations for your excavation are:
- Damp course & block height – be aware that where the driveway is adjacent to your house, the height of the blocks must be at least 100mm lower than the damp course layer (DCL) to ensure the paving doses not disrupt the property’s damp protection.
- Services/Utilities – Pipes, cables and conduit for your household utilities and services should be marked before excavation begins. When you begin digging up the ground, be certain you know exactly where these are, and be especially careful to make sure you don’t cut or damage any of them.
- Fall – You’ll need to excavate the ground to allow for the fall/gradient needed for your drainage plan (e.g. the substrate will typically be 12.5mm lower per meter of paving run on the side where you want water to drain toward).
- Drainage Channels & Soak-Away Crate – If you are using an aquacell method as part of your drainage plan, you’ll need to a hole for the soak-away crate and trenches from there to your drainage channels (for the underground pipes and a P gully trap). The hole for soak-away crate should have approximately 200mm space between the sides and the crate, which you will fill with shingle (or a suitable aggregate). The hole should be deep enough for the height of the crate, plus 200mm top and bottom for shingle infill, plus the 200-300mm of topsoil, on top of the infill aggregate.
As far as possible the substrate which you have dug out, should be free of bumps, lumps, hallows and dips.
Q: How deep do I need to dig out my driveway?
A: Approximately 240mm+ depending on the 1) firmness of underlying soil 2) thickness of your blocks and 3) how much fall you are applying to the lower end of the run. That figure comes from the following:
- 150mm – 250mm sub-base (depending on underlying ground)
- 40mm screed sharp sand bedding course
- 50-80mm block depth
- plus the fall at the lower end of the driveway run
Driveway Slopes and Gradients
Driveways are rarely entirely flat, with slopes and gradients often being necessary near the entrance to achieve street level.
When excavating the substrate, you want to ensure that rises all falls necessary to navigate the topography are as smooth and gradual as possible. Any severe changes in gradient will mean the block paving does not sit flat. As you want a flat continuous driveway deck, you’ll need to ensure the substrate is as flat and smooth as possible, with gradual changes in gradient.
So if you have a significant change in elevation, use as much of the run as possible to achieve the change in height. This will ensure that the change in height produces the shallowest angle/gradient changes possible.
Where your driveway needs to slope up or down, use shorter runs with your string-lines and staves/pegs to mark where your driveways deck will sit. These shorter runs will allow you to more accurately plot where the surface of the block paving will be, and therefore allow you to excavate the desired gradient more accurately.
3) Mortar Mix & Cement Mix
How to Make Mortar Mix (Edge Restraint & Drainage Channel Bedding)
Both the edge restraints and any drainage channels you install will need to be laid on a bedding layer of mortar. This should be a strong mix using a 5:1 ratio of sharp sand and general purpose cement (OPC).
- 5 Parts Sharp Sand
- 1 Part Cement (OPC)
- Water as required (should be a dryer mix with limited water)
Whether you decide to hand-mix the mortar or use a cement mixer, be aware that the mix should be a pretty dry. As this is not a wet mix, and its consistency is more like a moist crumble, you’ll not need mortar plasticiser in your mix as it will not need to be worked and manipulated as you would when brick laying. Remember that mortar will start to cure when mixed, so only mix up batches of as much as you need at a time.
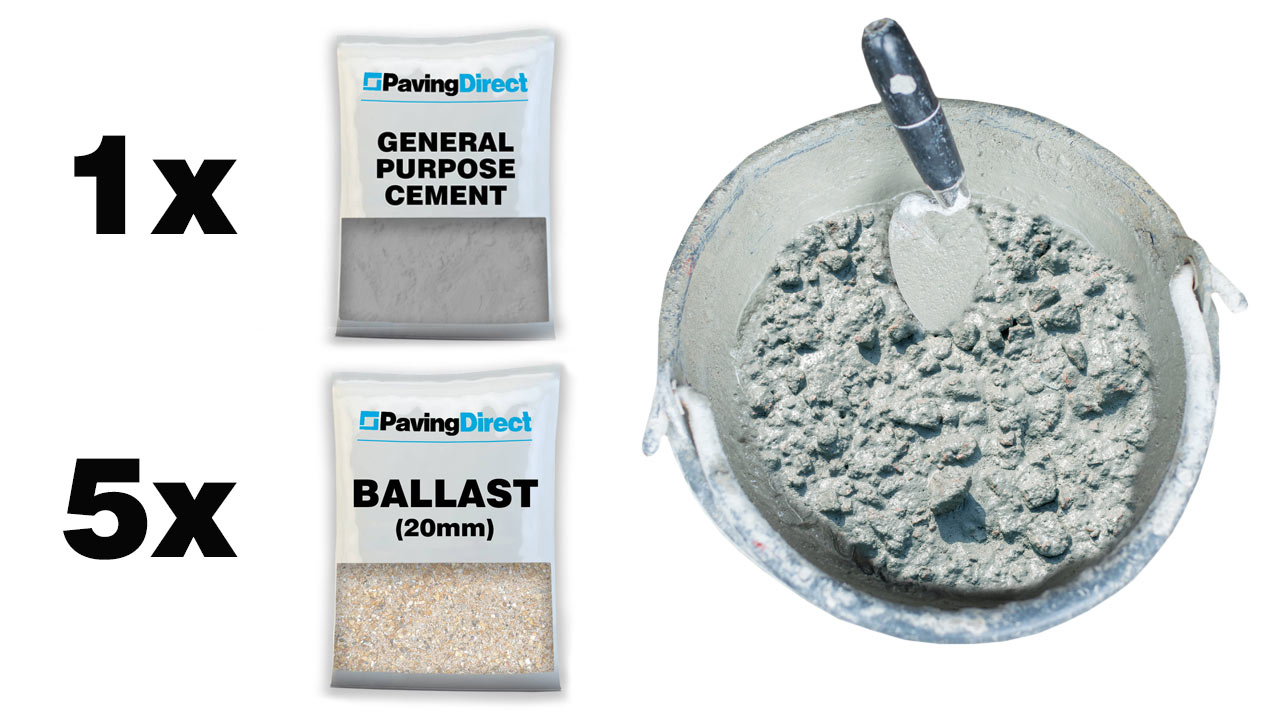
How to Make Concrete Mix (Edge Restraint Backfilling aka Haunching)
To hold the unbound block paving place and fully secure the edge restrains, they should be backfilled with concrete (also known as haunching). The backfilled concrete will ensure the edge restraints are not going to move and provide the driveway lateral stability.
Concrete is a thicker and stronger cement mix than mortar, and contains coarser aggregate with larger particles that give concrete its additional strength.
The concrete mix should be a strong, using a 5:1 ratio of 20mm ballast (or coarse aggregate) and general purpose cement (OPC).
- 5 Parts Coarse Aggregate (20mm Ballast recommended)
- 1 Part Cement (OPC)
- Water as required (should be a moist mix)
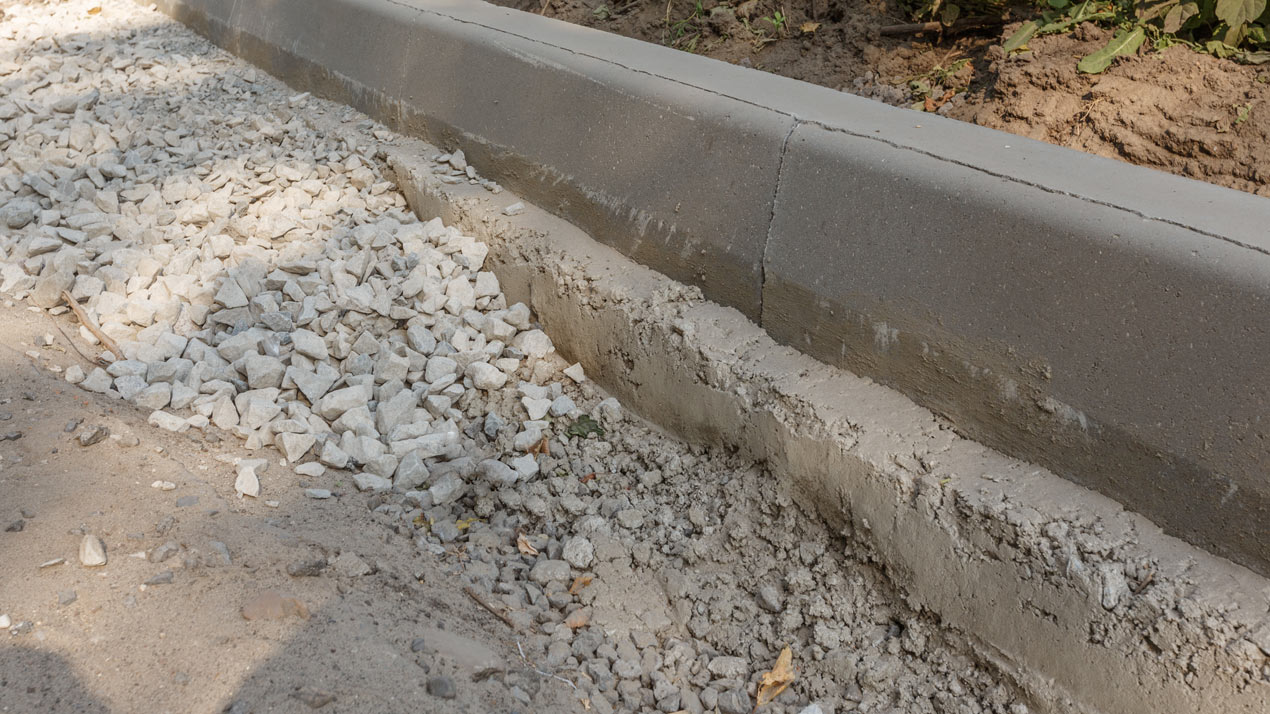
4) Lay & Haunch the Edge Restraints
Unbound block paving driveways need to be held in place by edge restraints. These are often kerb stones, but other masonry blocks are often used too.
Edge Restraints =>100mm in Height
The edge restraint needs to be tall enough to match at least the height of the blocks (50-80mm), the sharp sand laying course (40mm) and enough to form a purchase/bond with its own mortar mix bedding. So typically, an edge restraint needs to have a depth of at least 100mm if it is intended to sit flush (level) with the driveway blocks. Obviously, if you want your edge restraints to protrude above the level of the driveway blocks, you’ll need ones with a greater height than the blocks + the bedding course.
Lay the Edge Restraints
The edge restraints will need to be positioned and levelled exactly. Once positioned, the edge restraints are effectively a datum from which you can determine the level of your laying course sharp sand screed and block height.
Lay the edge restraints on mortar, using a spirit level to check the position and alignment as required. If necessary, the edging can be laid onto a built-up concrete base to achieve the designed height (see example above)

Once you are happy with the position of the edge restraints, you will need to backfill them with concrete to ensure they are fixed securely in place.
The backfilled concrete mix for haunching the edge restraints will typical be 150-250mm wide and come up about 50% of the edge restraints’ height. This will leave enough depth so turf, topsoil or decorative aggregate can be added later to sit adjacent to the edge/border, hiding the concrete haunching.
5) Wait 24 hours for concrete & mortar to set

6) Prepare & Lay the Driveway’s Sub-base
To provide a stable and secure platform for your unbound block paving driveway installation, you will need to add a sub-base of compacted DTp1 hardcore (an aggregate with particulates ranging from 40mm down to dust).
Like the substrate, the sub-base should be set to match the fall, being lower on the side where you wish rainwater to drain. Remember, that the sub-base should be the same depth of compacted MOT Type-1 regardless of the fall (e.g. the sunstrate needs to be excavated to follow the fall to allow for a uniform depth of sub-base). You can gauge the fall angle using string and pegs or depth staves to make sure your sub-base is as needed.
Sub-base of MOT Type 1 Hardcore (Type 1 SHW clause 803)
Lay the MOT Type 1 hardcore sub-base, ensuring it is compacted and even.
It should be at least 150mm in depth once laid. This may
We recommend laying the hardcore in two or three layers, compacting down each as you go. This approach will add strength and stability to the hardcore sub-base.
Ensure there are no soft pockets and that the sub-base is fully consolidated.
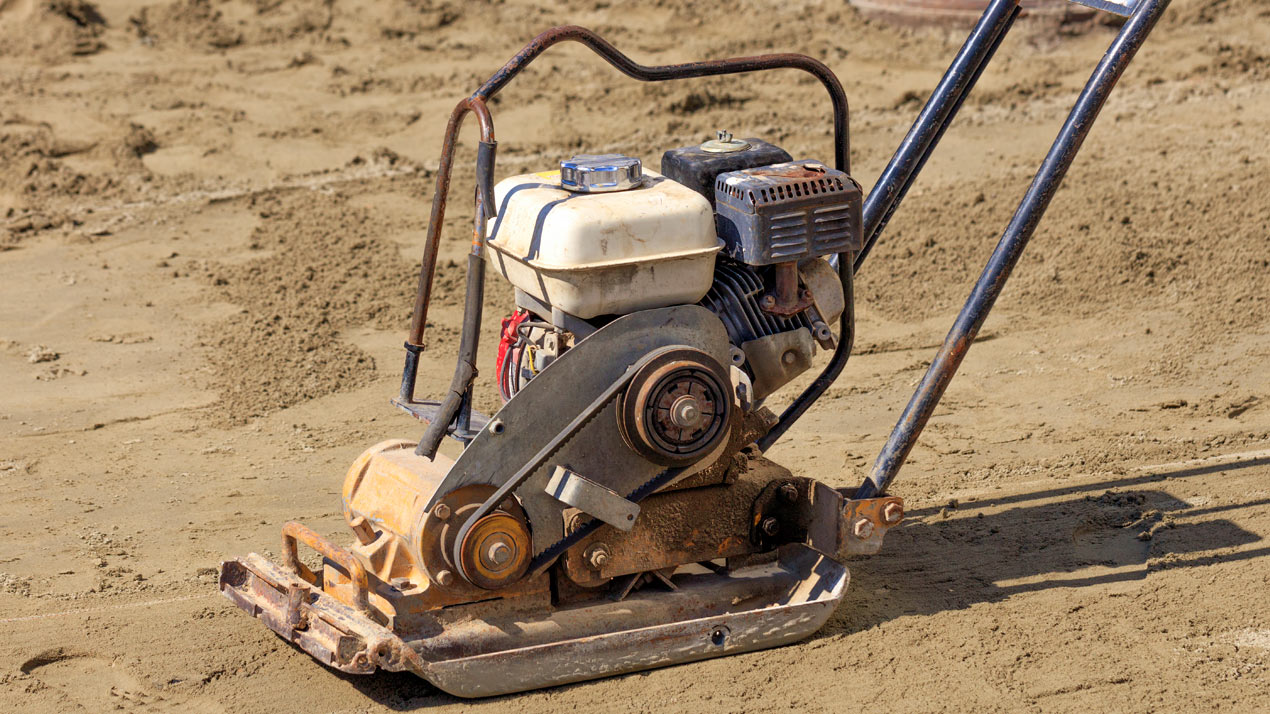
“Wacker” plate compactor
We recommend using a wacker plate (compactor plate) as this tool is the easiest way to ensure your hardcore is properly compacted, and that the aggregate particulates are settled and stabilised. If you don’t have one, you can usually hire one inexpensively (approx £25 a day).
Q: What is the best way to compact a driveway sub-base?
A: Use a mechanical compactor AKA “wacker plate”. These can be hired for a little as £25 a day.
Traditionally, a blinding coat (builders’ sand) was sprinkled on top of the hardcore to finish the sub-base, but if you’re using DTp1 (MOT Type 1) hardcore and a wacker plate this is not generally required (as the fine particulates and compacting forces generate the required finish).
Sub-Base Gradient
As discussed above, your substrate should be excavated to ensure that you have the shallowest changes in angle/gradient to achieve changes in the driveway’s elevation.
When laying and compacting your sub-base, you need to follow this principle through here too. The string-line used to excavate the substrate should now allow you to accurately lay the sub-base material to the correct height.
The sub-base surface should be as flat and even as possible, and changes in slope angle should follow the substrate and be as gentle as possible.
This will ensure that when you lay the bedding (sharp sand) it can be done so easily whilst maintaining its 40mm depth. It will also make sure that the seating and positioning of the driveway blocks will appear and perform as a continuous deck.
6) Lay Drainage Channels
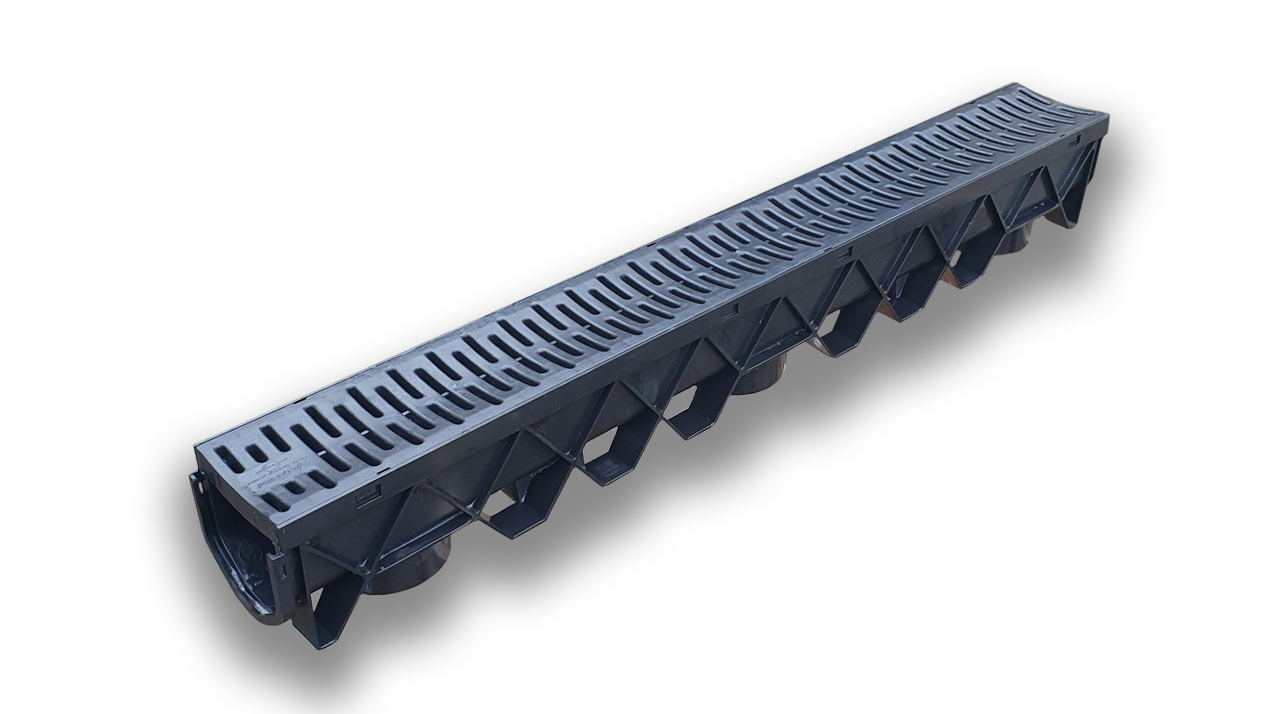
Drainage channels are usually sold in 1-metre lengths and are available in concrete/metal and plastic version. They are weight rated, with most domestic drainage channels being rated circa 5 tonnes (5000 kg).
They will often have pre-defined cut-outs and edge couplings for end-joints from which you can connect a down-pipe or P gully trap.
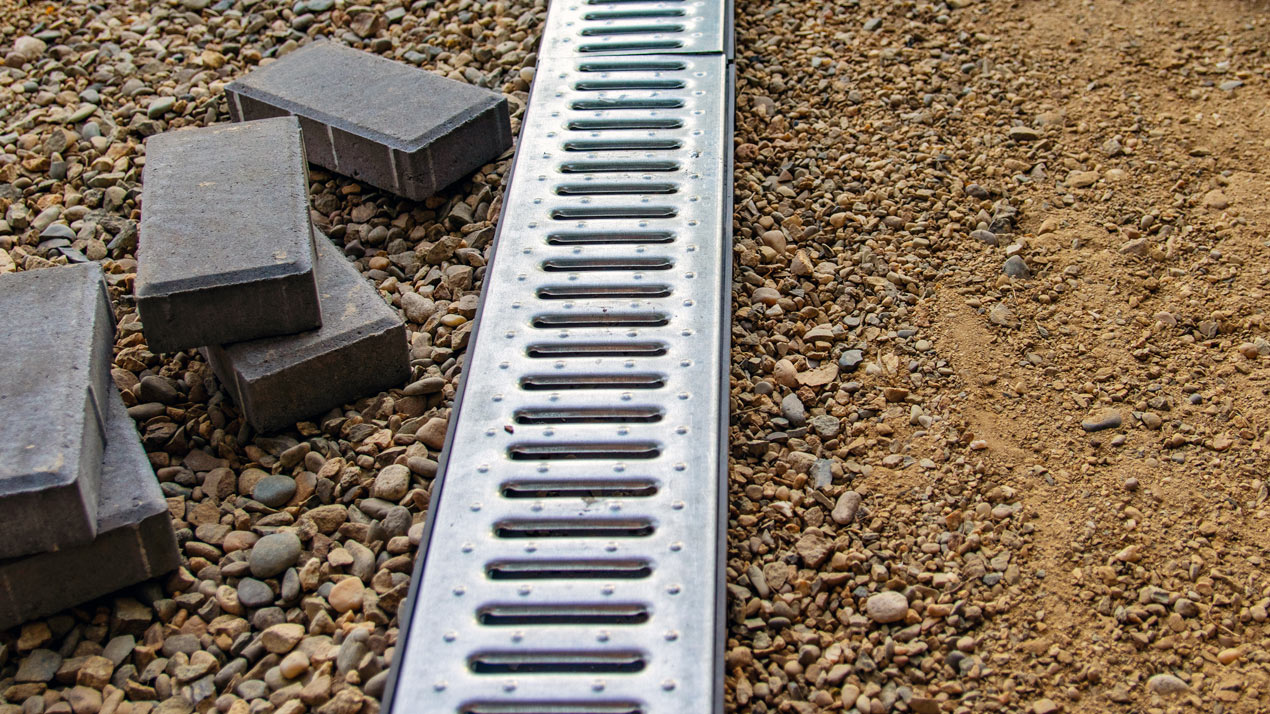
If your driveway rainwater management plan uses drainage channels, these will need to be positioned and fixed in place.
This is usually done by laying the channels on bedding mortar (on top of your sub-base) and then making the small level and alignment adjustment necessary.
When you come to lay and compact your bedding course, you’ll need to make fine adjustments to ensure the right depth so that the blocks and drainage channels are level.
Your drainage channels will usually need to be connected to underground drainage to convey captured water to the soak-away.
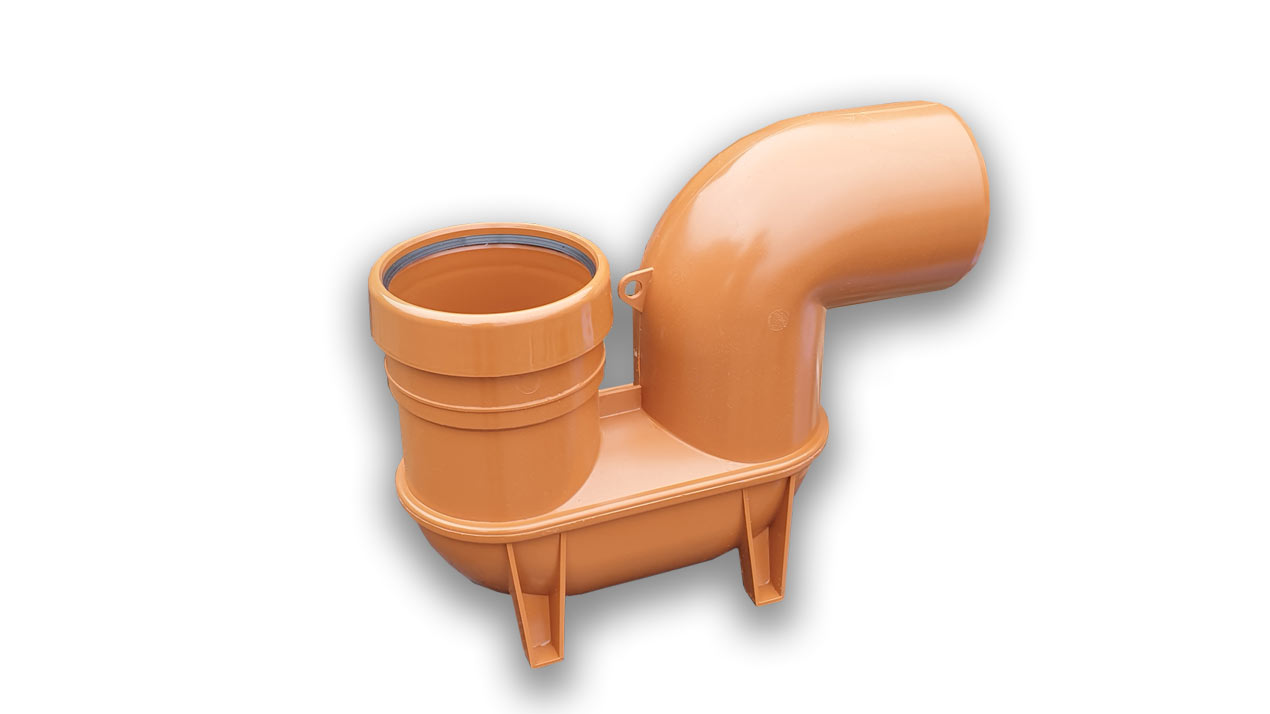
Ideally, the P gully trap should be located at the point between the drainage channel and underground pipes. This will allow it to capture silt and detritus washed from the driveway surface, and prevent this being washed into your soak-away crate. The P gully trap will also prevent odours and gases coming back up the pipes from the soak-away and escaping.
8) Lay the Sand Screed
The laying course for unbound block paving is a 40mm compacted screed bed of sharp sand (or 6mm limestone to dust aggregate). DO NOT USE BUILDING SAND as it will not drain properly.
Try and make sure it is no deeper than 40mm (as this will reduce the stability and effectiveness of the compacted sharp sand as a laying course. If you do find that the depth is going above 50mm, adjust your sub-base to bring it up to the right depth. This is why getting the sub-base laid as accurately as possible is paramount.
The sharp sand should be compacted with a wacker-plate or roller. The sand should be damp when you compact and screed it; this helps hold it together more easily. Compaction will ensure the laying course is flat, that air pockets and voids have been removed, and that it is as stable and firm as it can be.
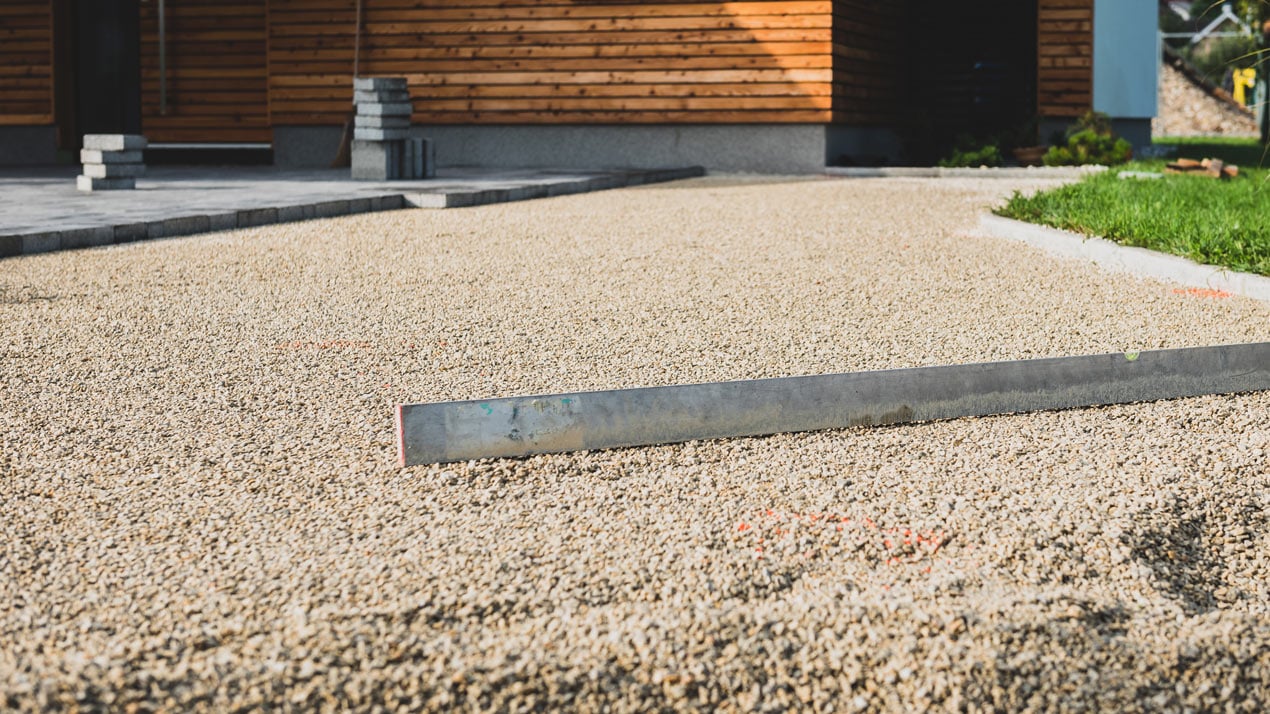
Screed Rails & Gauging the Height of the Laying Course
To physically guide your screed bar (the batten used to run/scrape over the sand and ensure the right level) you can use either the edge restraints or a temporary screed rail. Something like steel box tube is ideal as a screed rail.
The idea is you will rest the screed bar on either end using the edge restraints and/or the screed rails as physical guides. The screed bar should sit flat at the right level for the sand laying course. When using edge restraints as a screed rail, you’ll usually need to cut a rebate in the screed bar to drop it to the right level, with the edge restraint’s top sitting in the rebate.
We recommend using a timber batten as your screed bar as it allows you to cut appropriate rebates when using edge restraints. However, you can also use other similarly long straight edge implements such as a level or steel.
By moving the screed bar along these physical guides, you will ensure the sand screed is exactly at the height and level it needs to be.
Once the laying course is compacted to its near finished height, set screed-rails as required on the edge of the laying course. You’ll need a string line to accurately set the screed rail’s height. Measure, and adjusts the rail’s height as required. You’re now ready to screed the laying course.
Screed the Laying Course
Using your screen bar, work it along the screen rails and/or edge restraints to create a flat surface on the laying course.
You can gently rake out or rake in areas where the sand is too high or too shallow, and then run the screed bar back over until the right level is achieved.
Work systemically from one end of the driveway to the other, moving and adjusting your screed rail guides as necessary as you move along.
Sand Screed on Slopes & Gradients
As stated, the idea is to create as gentle changes in gradient angle as possible when installing your driveway. If your substrate excavation and sub-base installation have not accounted for this, then the laying course is not going to be able to compensate for this – and you’ll need to go back and address this to create less severe changes in slope angles.
If you don’t have edge restraints in place on both sides, to screed the slope, you’ll need to use shorter runs for your screed rails.
Just like the distances between your string-line staves/peg in the sloping area (needed to accurately plot the surface of the driveway’s deck) your screed rail runs will need to be shorter. In some areas where a rail is impracticable, you may have to eyeball it and manually adjust the screed bars movement to create the laying course.
9) Lay the Block Paving
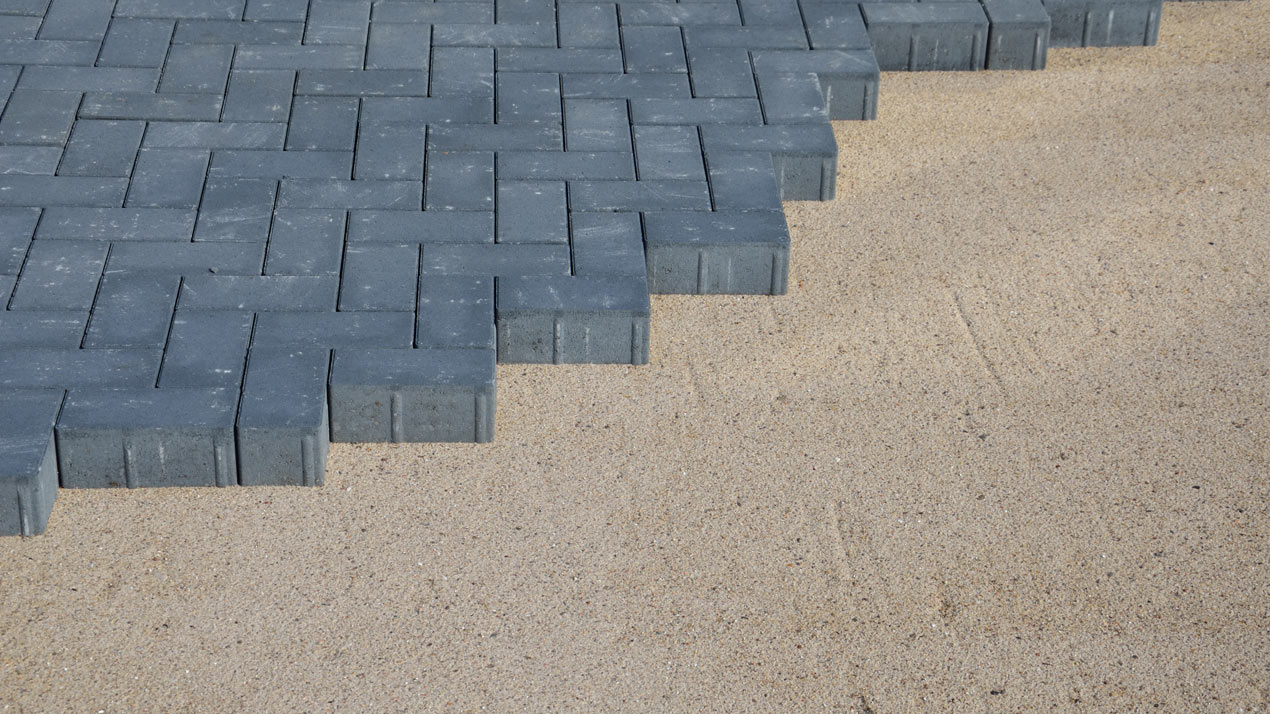
Once you’re happy with the screed and your laying course is done, you’re ready to install the blocks.
Mix & Blend Your Packs
Whether you are laying sawn natural stone or concrete block paving, remember that in each pack, the colours of the blocks will likely be similar (quarried from the same area or made in the same batch). Therefore, we recommend mixing the blocks from different packs when laying them to ensure a proper blend. This will ensure you don’t get banding or patches of a single colour, and ensure a good mix of the various hues and tones. This is important with multi-coloured block paving, where one pigment shade can be dominant in a single pack, so mixing the packs is key to achieving the overall colour blend.
- Ensure you mix your paving packs for proper colour blending
How to Lay Block Paving
Start from one edge and work out from there laying the block. This will ensure that you have a datum and can maintain the pattern that you are laying.
There are two crucial elements you must do when laying unbound driveway paving blocks:
By following these two laying techniques, you’ll ensure that the blocks are positioned correctly.
Block Paving Laying Patterns
There are a range of laying patterns available for unbound block paving that vary based on the format of the blocks. We’ll briefly outline and show you the most common patterns for common formats of standard and tumbled block paving.
Standard Block Paving Laying Patterns
Most standard block paving has a 2:1 size ratio (e.g. twice as long as it is wide) with 200 x 100 x 50 mm being the most popular size format.
There are four common laying patterns that can be achieved with these paving blocks:
- 45° Herringbone
- 90° Herringbone
- Stretcher Bond
- Basket Weave
Stretcher Bond Laying Pattern
The blocks are laid in alternating staggered rows. The joint of the adjacent row sits in the middle of the block, so there are no linear joints. It is recommended that this pattern be laid with the rows going across the width of the drive (rather than along the length).

Basket Weave Laying Pattern
The blocks are in alternating pairs horizontally and vertically in each row, with alternating rows aligning the horizontal pair with the vertical pair.

90° Herringbone Laying Pattern
The blocks are laid alternately vertically and horizontally to create an “L” shape. The back corner of the L shape is then seated in the front corner of the row above, creating a geometric, symmetrical pattern reminiscent of V-shaped skeletal structure of herring bones!

45° Herringbone Laying Pattern
The blocks are laid at a 45°, using the same alternating directional patterns “L” shape. The back corner of the L shape is then seated in the front corner of the row above, creating a geometric, symmetrical 45° pattern.

Tumbled Block Paving Laying Patterns
Most tumbled block paving comes in three widths with matching heights, so they can be aligned in rows together. The following size ratios are most common:
- Small – 2:3 format (e.g. 100×150 mm)
- Medium – 1:1 format (e.g. 150×150 mm)
- Large – 4:3 format (e.g. 200x150mm)
In terms of laying patterns, most will be variations on a stretcher bond theme (staggered rows, offset, so joints are lined up with the middle of the blocks of the rows above and below).
Often no prescribed pattern is used at all, and the rule of thumb is merely to ensure vertical joints do not line up (avoiding linear joints). This approach will provide a randomised and more rustic feel, in keeping with the design of tumbled block.
3-Size Tumbled Stretcher Bond Laying Pattern
This pattern uses all three block sizes and alternates medium and small blocks between the larger blocks on each row. Alternating rows are staggered with an offset to ensure the vertical joints between each row do not align.

Large & Medium Tumbled Stretcher Bond Laying Pattern
This pattern uses the large and medium block sizes alternatively along each row. Alternating rows are staggered with an offset to ensure the vertical joints between each row do not align.

Large & Small Tumbled Stretcher Bond Laying Pattern
This pattern uses the large and small block sizes alternatively along each row. Alternating rows are staggered with an offset to ensure the vertical joints between each row do not align.

Medium & Small Tumbled Stretcher Bond Laying Pattern
This pattern uses the medium and small block sizes alternatively along each row. Alternating rows are staggered with an offset to ensure the vertical joints between each row do not align.

10) Cut-in Blocks
Whichever pattern you go with, if you start at one end of the drive and lay the blocks out, you will eventually reach the edges and the other end.
At this point, there will be gaps that cannot be filled with a full sized block. So you must measure, mark, cut and fit blocks to fill the remaining gaps.
Measure & Mark the Blocks for Cutting
To measure the profile of the gap between the blocks and the edge, hold a block over the gap. You will be able to see the unwanted overhang in line with the edge.
Mark the line of the overhang (use chalk or a graphite masonry pencil) where the edge intersects the blocks. You can do this either by:
- Carefully marking either side of the block where it intersects, and then drawing a line between the two marks as your cutting line.
- Hold the block over the gap and “eyeball” the cutting line, marking it freehand, scoring along the line of the overhang.
Realistically, there is not much difference in accuracy of these two methods – but if something goes wrong, you’ll be more regretful if you eyeballed it!
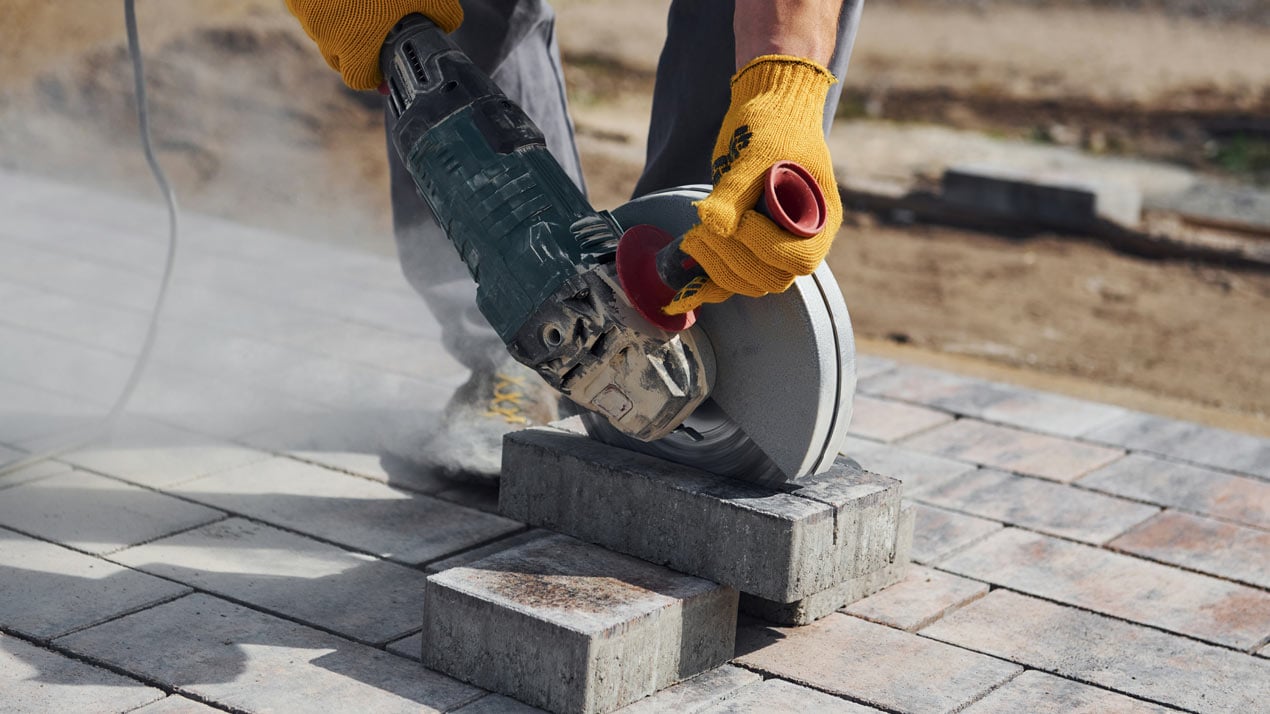
Cut the Blocks
You can use an angle grinder, stone saw or block splitter to cut or split your blocks to the right shape. You can also use a masonry chisel, but this method is prone to rougher edges, more random fault lines/splits and more wastage/breakages.
If you are cutting blocks, make sure you wear appropriate personal protective equipment (boots, gloves, goggles and mask). Likewise, be aware of dust, and where it is blowing to ensure you’re not covering your neighbours’ property in masonry dust!
Fit the Cut-in Blocks
If you’ve cut accurately, then the blocks should slot into their gaps without too much fuss. If things are a bit tight, you can use the rubber mallet to encourage them to get in!
If you feel the cut is not right, then try again with a new block. However, don’t get too fussy about super accuracy as these are paving blocks, so being 1-millimetre off is not the end of the world (and you won’t notice once it has been jointed). The key factors are that the 1) blocks are seated correctly at the same height as the other blocks and 2) they are secure (and do not move around).
11) Joint the Block Paving
Jointing (adding kiln dried sand into the joints between the blocks) is critical for unbound block paving. It server two-key structural functions:
- Fill the gaps – the kiln dried sand fills the voids between the blocks, meaning that the blocks cannot move if the space is occupied. This helps lock them in place.
- Bind the blocks – the sand generates friction between the blocks (creating a binding effect), helping to prevent block movement (both vertical and horizontal).
Without jointing sand, unbound block paving is more unstable and subject to movement when driven or walked on.
How to Joint Unbound Block Paving
You’ll need dry conditions. Kiln dried sand has been specifically dried to ensure it can pour/fall into the joints. If the sand is moist or damp, this will not happen, and you may only achieve a partial fill.
Pour the sand onto the driveway deck and using a yard broom, work the sand into the joints of the paving.
Once you’ve fill all the joints with sand – that’s it, you’ve jointed the driveway.
12) Compact the Driveway Blocks
The last step of your unbound block paving driveway installation is to compact the entire driveway (blocks and all).
Using your trusty wacker-plate run it over the surface of the driveway.
This will settle your jointing sand and make sure all the blocks are seated correctly and stabilised.
Now you can go and have a well-earned cuppa or something stronger!
Conclusion
The secret to a smooth driveway installation is in the preparation of the substrate, sub-base and screed laying course. If you focus on getting those three elements right, you’ll find it is largely plain sailing.
If you have any questions about driveway paving installations, don’t hesitate to contact us, and we’ll see if we can help with friendly free advice.